All Docs
Guide
Introduction
What is Quark ?
Quark is a general purpose software tool specifically designed to help you create projects written in HTML, CSS and JavaScript with native desktop app like capabilities. Quark apps run on Mac, Windows, and Linux from a single codebase.
How does it work? 🤯
Simply Said: Quark comes with an integrated development environment(IDE) and a JavaScript runtime. You write your code in the IDE and press a button to build your project. That's all!
The IDE automatically takes care of building your project and emits a single output file which you can "double-click" on to open and run your project. We call these output files, "sketches".
For detailed explaination, read our announcement post on Medium.com
See the process in action -
####### In the example above, we create a Quark project, built the project and run the project. All done under 15 seconds!.
Quark Apps (or Sketches) 🎨
We call apps built with Quark, Sketches. Quark itself is built on top of the Electron framework. Your sketches provide you with all the capabilities of full fledged electron apps. The difference here is that they just weigh a few kilobytes instead of hundreds of megabytes.
We achieve this functionality by using a shared JavaScript runtime for all your sketches. This runtime, in most cases, accounts for almost 99% of the weight of an electron app. This leaves us with the actual application logic, which usually only weighs a few kilobytes.
The only caveat here is that because of this shared runtime, your sketches have a direct dependency on the Quark software itself to provide for the runtime. Hence we call these projects built with Quark "sketches" and not applications.
What this means for you is that you can potentially have hundreds of sketches on your machine providing the functionality as that of full fledged electron apps, while consuming the resources equivalent to only one app!
Web Technologies
Quark apps are built using web technologies like HTML, CSS and Javascript. If you can build a website, you already know how to build a Quark app.
Cross Platform 🧬
Another advantage of using web technologies is that your sketches are Compatible with Mac, Windows, and Linux and run on all three platforms. Write once, run everywhere!
Power of Electron 💪
Behind the scenes, we use electron's renderer process as the runtime for your Quark apps. This means, that you have access to all of the Node.js and Electron's renderer process API's in your app.
Unopinionated 🏅
Anything you like, any way you like, in any style. We have out-of-the-box support for modern JavaScript, React.js, Vue.js and Typescript. Take your pick!
Powerful build system
Thanks to the powerful Quark IDE which makes transpiling, bundling and running a project as easy as pressing a button.
Releases
Quark releases frequently. We release when there are significant bug fixes, new APIs or are updating versions of Electron or Node.js.
Versioning
Once Quark releases in beta phase, it will follow semver. Before that no gurantees are made that the API will be changed in a backwards compatible way.
First Steps
To get the most out of Quark, start by reviewing a few introductory topics:
- Setting up the environment : Learn how to install Quark and get up and running within minutes.
- Quark development environment: Get to know how to navigate through the Quark IDE.
- Showcase: View example projects made with Quark.
Setting up Quark
Getting up and running with Quark is quick and easy. It is a small download so you can install in a matter of minutes and give Quark a try.
Cross platform
Quark is a free software which runs on the macOS*, Linux and Windows operating systems and has been tested on the following platforms:
- Windows 7 and 10 (64-bit)
- Linux (Debian): Ubuntu Desktop 18.xx
Quark is a small download (~100 MB) and has a disk footprint of ~300 MB. Quark is lightweight and should easily run on today's hardware.
We recommend:
- 1.6 GHz or faster processor
- 1 GB of RAM
Windows
Installation
- Download the Quark installer for Windows from the download page.
- Once it is downloaded, run the installer (
Quark-win-x64-${version}.exe). This will only take a minute. - By default, Quark is installed under
C:\users\{username}\AppData\Local\Programs\Quark.
Alternatively, you can also download a Zip archive, extract it and run Quark from there. On the downside, you will need to manually update Quark for each release.
NOTE
It is recommended that you download the setup file(Quark-win-x64-${version}.exe) instead of the zip archive, since auto-updates are only supported via the .exe file.
If you're prompted by Quark, accept the newest update and it will be installed (you won't need to do anything else to get the latest bits).
Linux
Installation
- Download Quark for Linux from the download page.
- Once it is downloaded, add the execute permissions to the downloaded file (
Quark-linux-x86_64-${version}.AppImage). - Run the appImage to start Quark.
Alternatively, you can also download the .tar.gz archive, extract it and run Quark from there. On the downside, you will need to manually update Quark for each release.
NOTE
It is recommended that you download the setup file(Quark-linux-x86_64-${version}.AppImage) instead of the .tar.gz archive, since auto-updates are only supported via the .AppImage file.
Recommended tools
It is recommended that you install the following third party softwares on your PC which can be used with Quark.
Node.js is a platform for building fast and scalable server applications using JavaScript. Node.js is the runtime and npm is the Package Manager for Node.js modules.
Network
A handful of features within Quark require network communication to work, such as the auto-update mechanism, querying and installing node packages. For these features to work properly in a proxy environment, you must have the product correctly configured.
If you are behind a firewall which needs to whitelist domains used by Quark, here's the list of hostnames you should allow communication to go through:
quarkjs.iorelease.quarkjs.iosocial.quarkjs.ionpmjs.org
Updates
As long as Quark is in the alpha stage of development, we will release a new version every week, and monthly thereafter.
Versioning
Once Quark releases in beta phase, it will follow semver. Before that no gurantees are made that the API will be changed in a backwards compatible way.
Next Steps
Once you have installed Quark, these topics will help you learn more about Quark:
- Quark IDE: A quick orientation to Quark IDE.
- Getting Started: A "Hello World" example to get you started with Quark.
- References: Learn how to use the Quark API.
- FAQs: Frequently Asked Questions.
Getting Started
All docs on one page.####### Estimated completion time : Less than 5 minutes.
Prerequisites
The official guide assumes intermediate level knowledge of HTML, CSS, and JavaScript.
Steps
Step 1: Installing the Quark IDE
You need to download and install the Quark IDE for your PC from here.
Step 2: Starting a new Project
- After installing Quark, open the IDE.
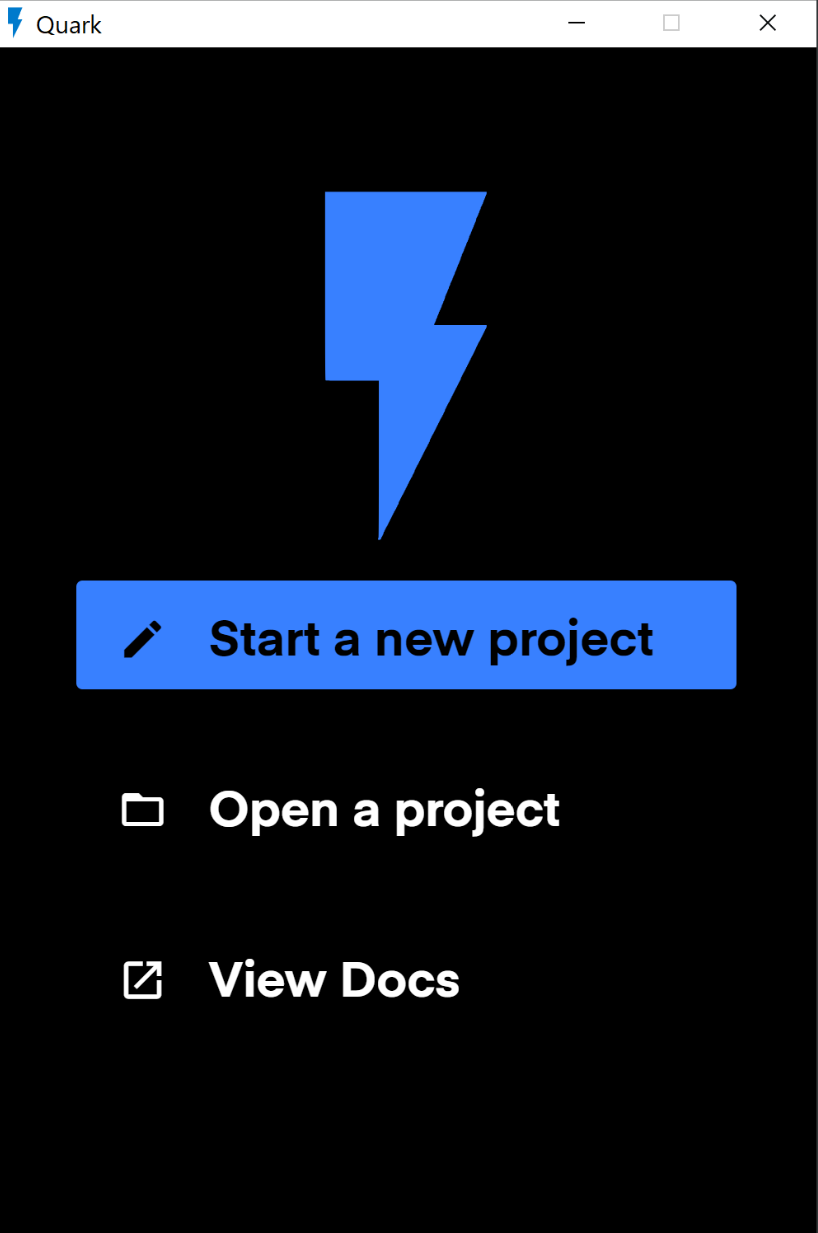
- You will be shown a welcome screen. Click on "Start a new Project"
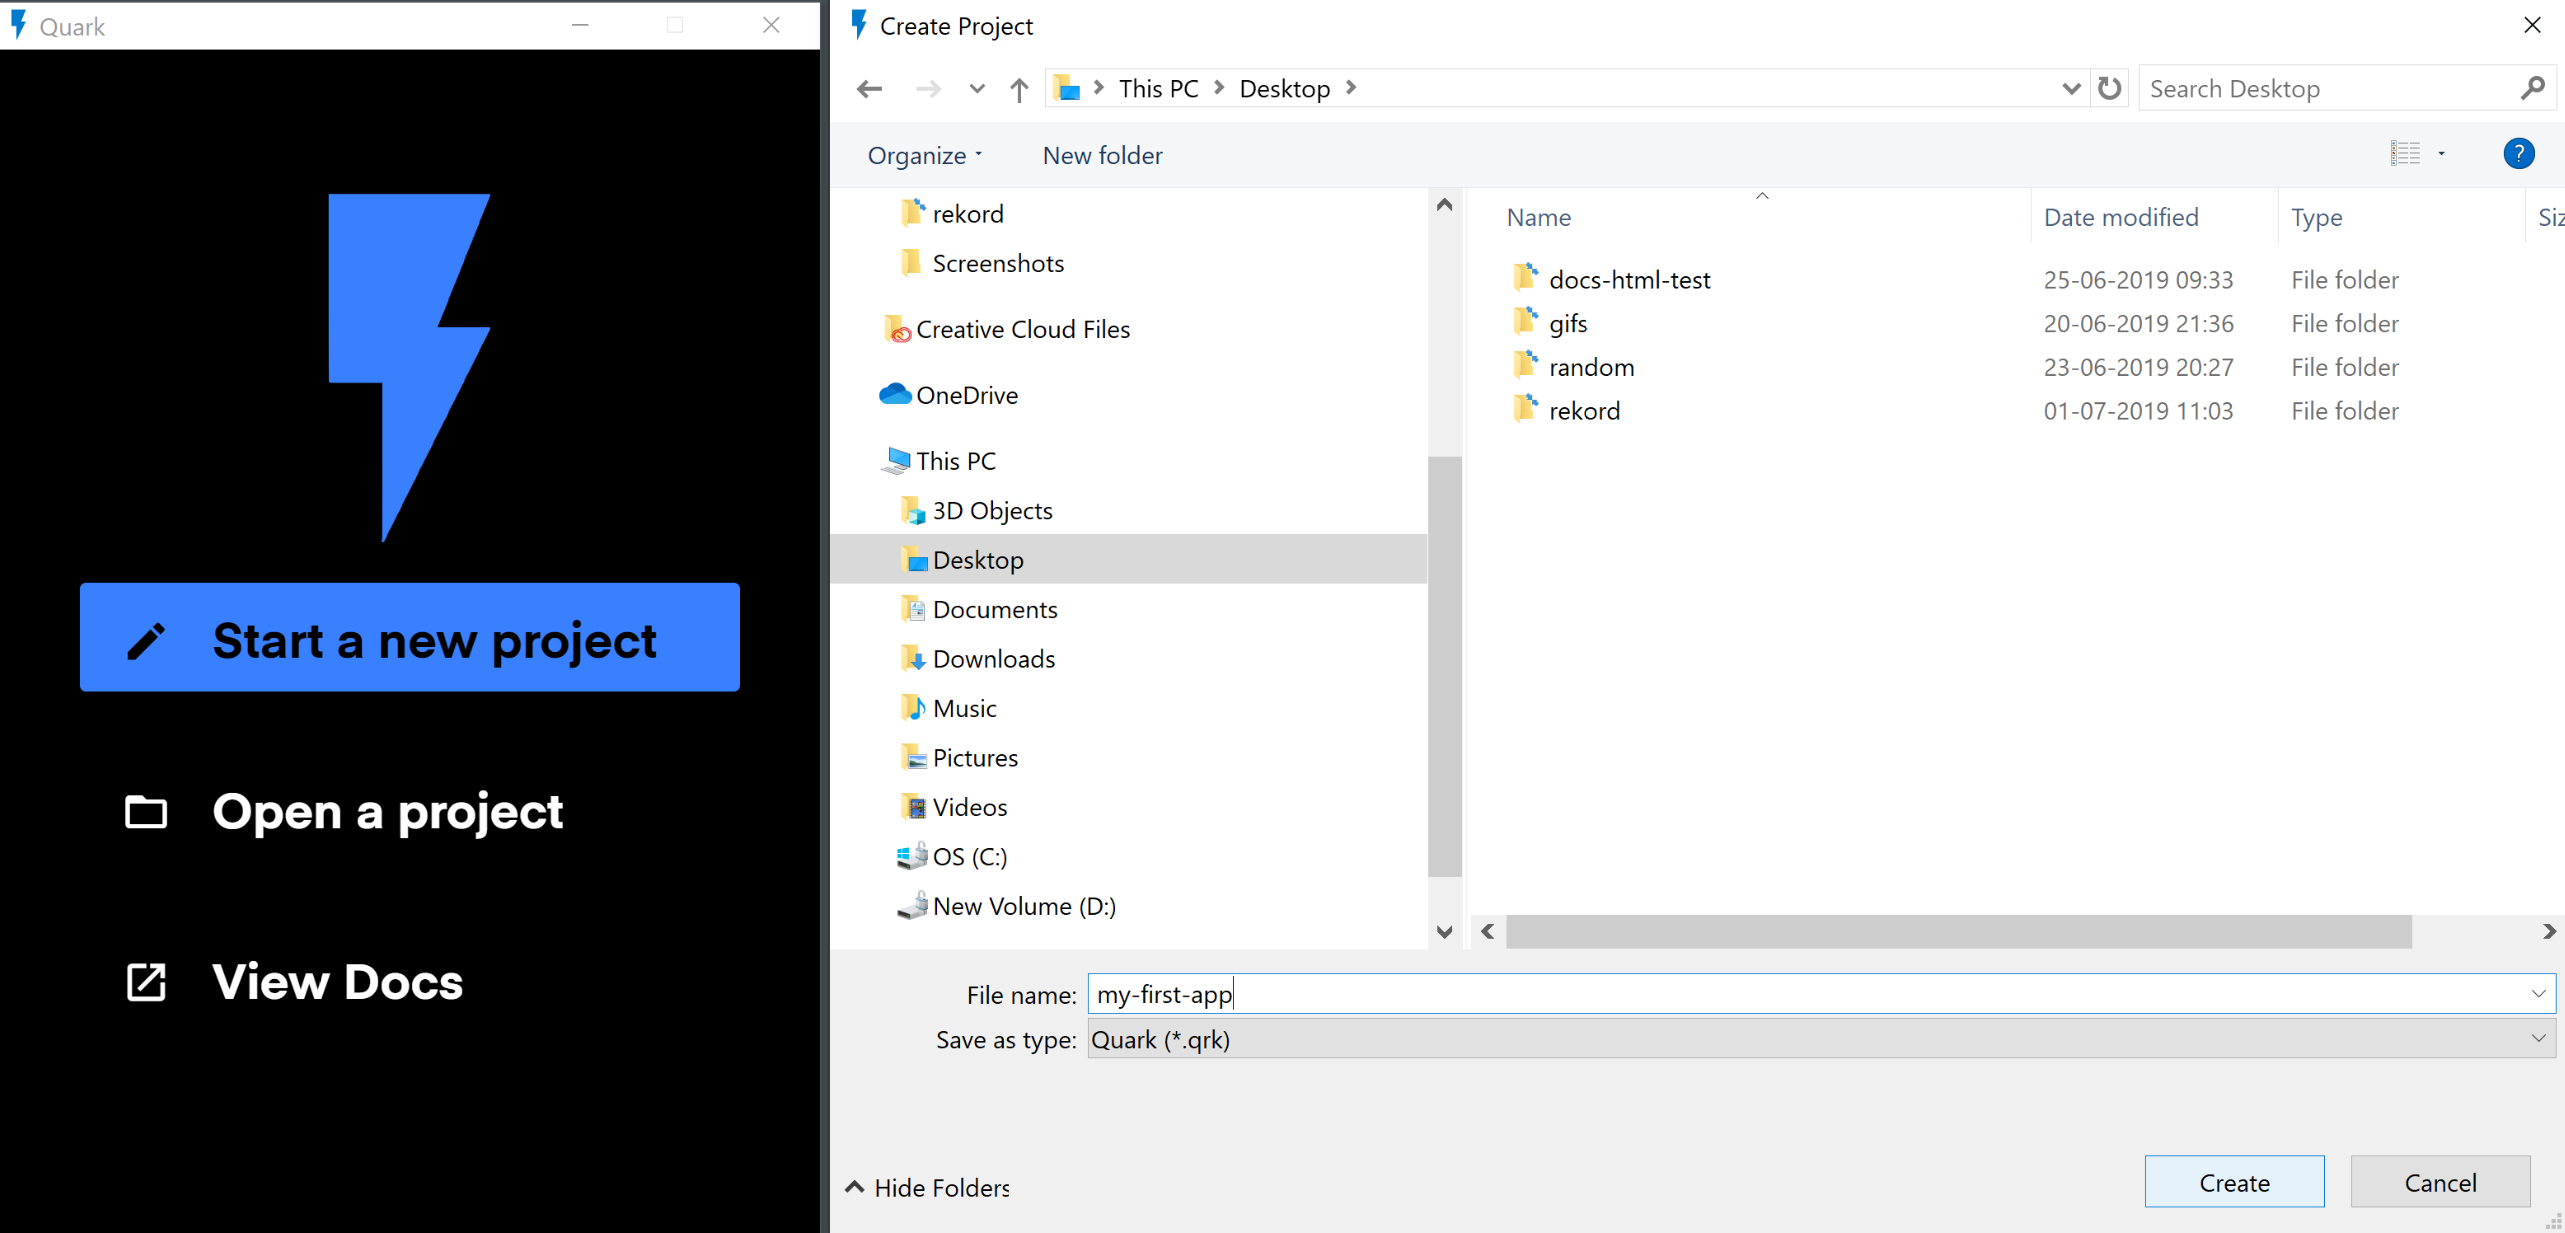
- After entering the project name, click on 'Create' button.
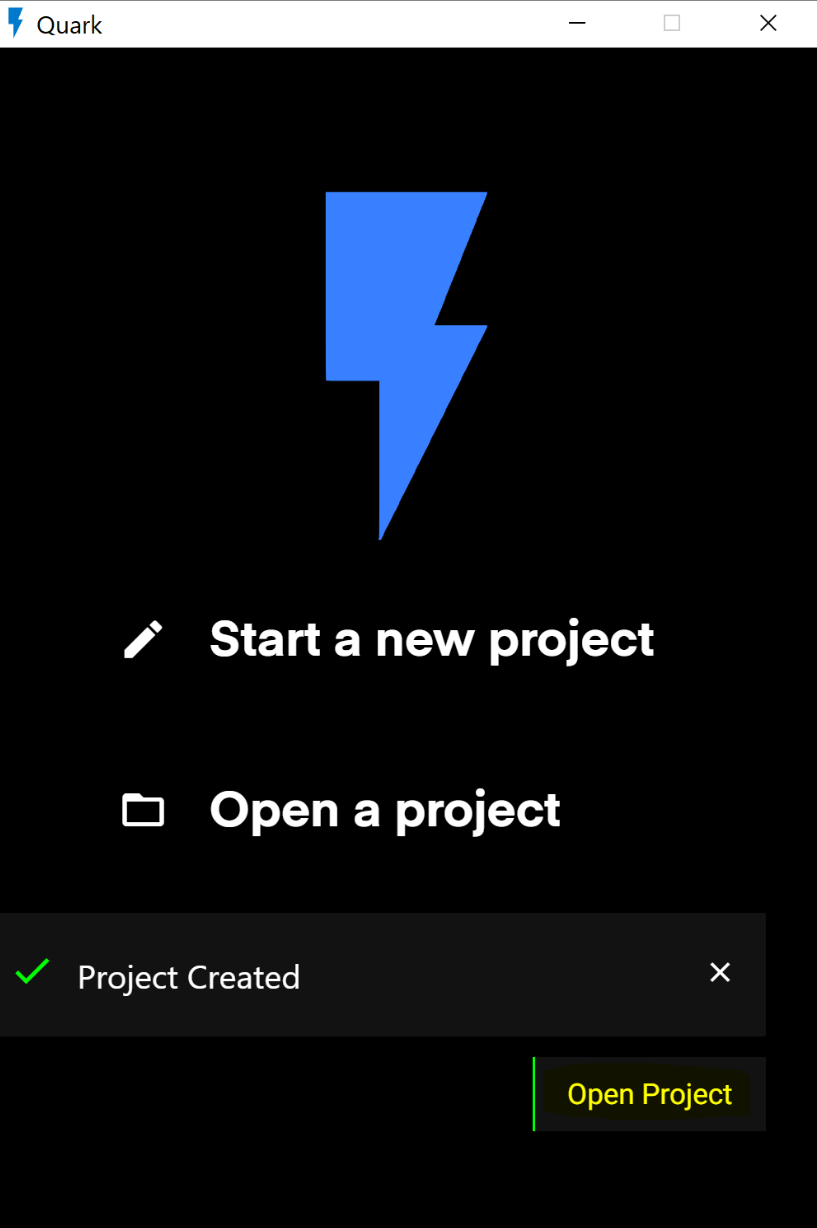
- If the project was created successfully, you will be prompted to open the project. Click on "Open Project".
Step 3: Navigating through the IDE
- After opening the project your view may look something like this.
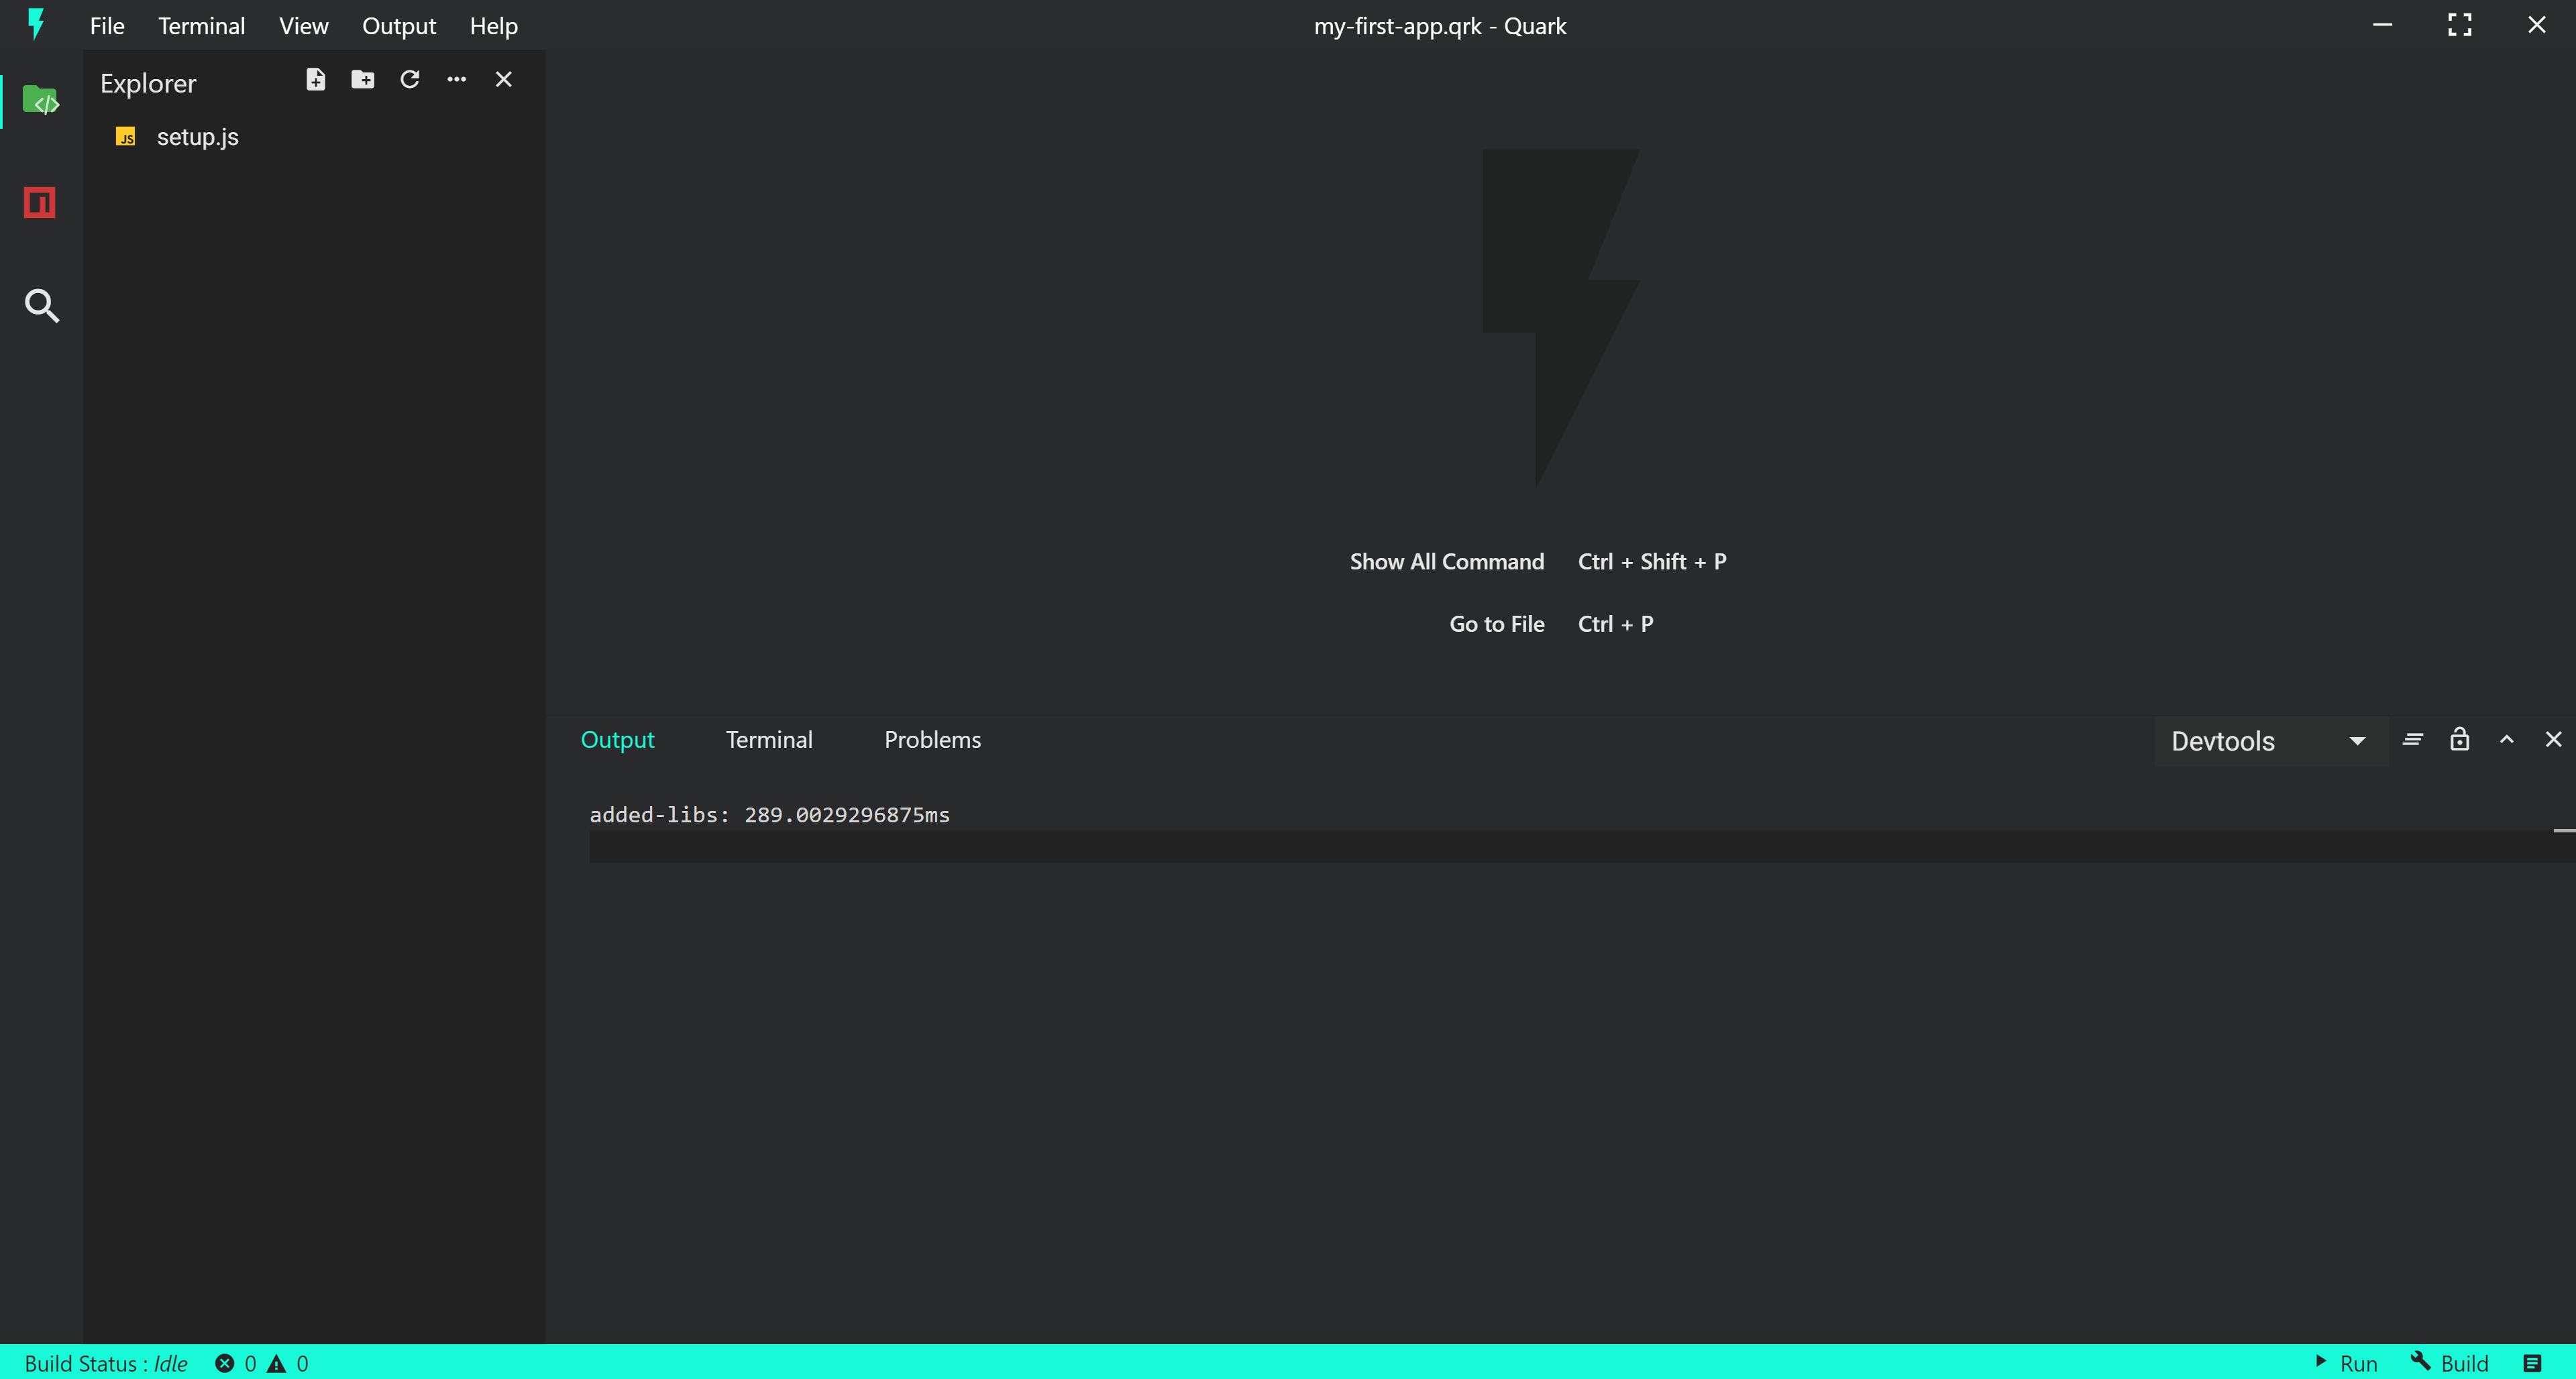
- On the left hand side is the navigation pane. Use this pane to navigate around files and folders.
- Also there is a setup.js file, this file is used as the entry point of your code by the Quark build system while building your sketch.
- Double click on the file to open the editor. Your view should look something like this.
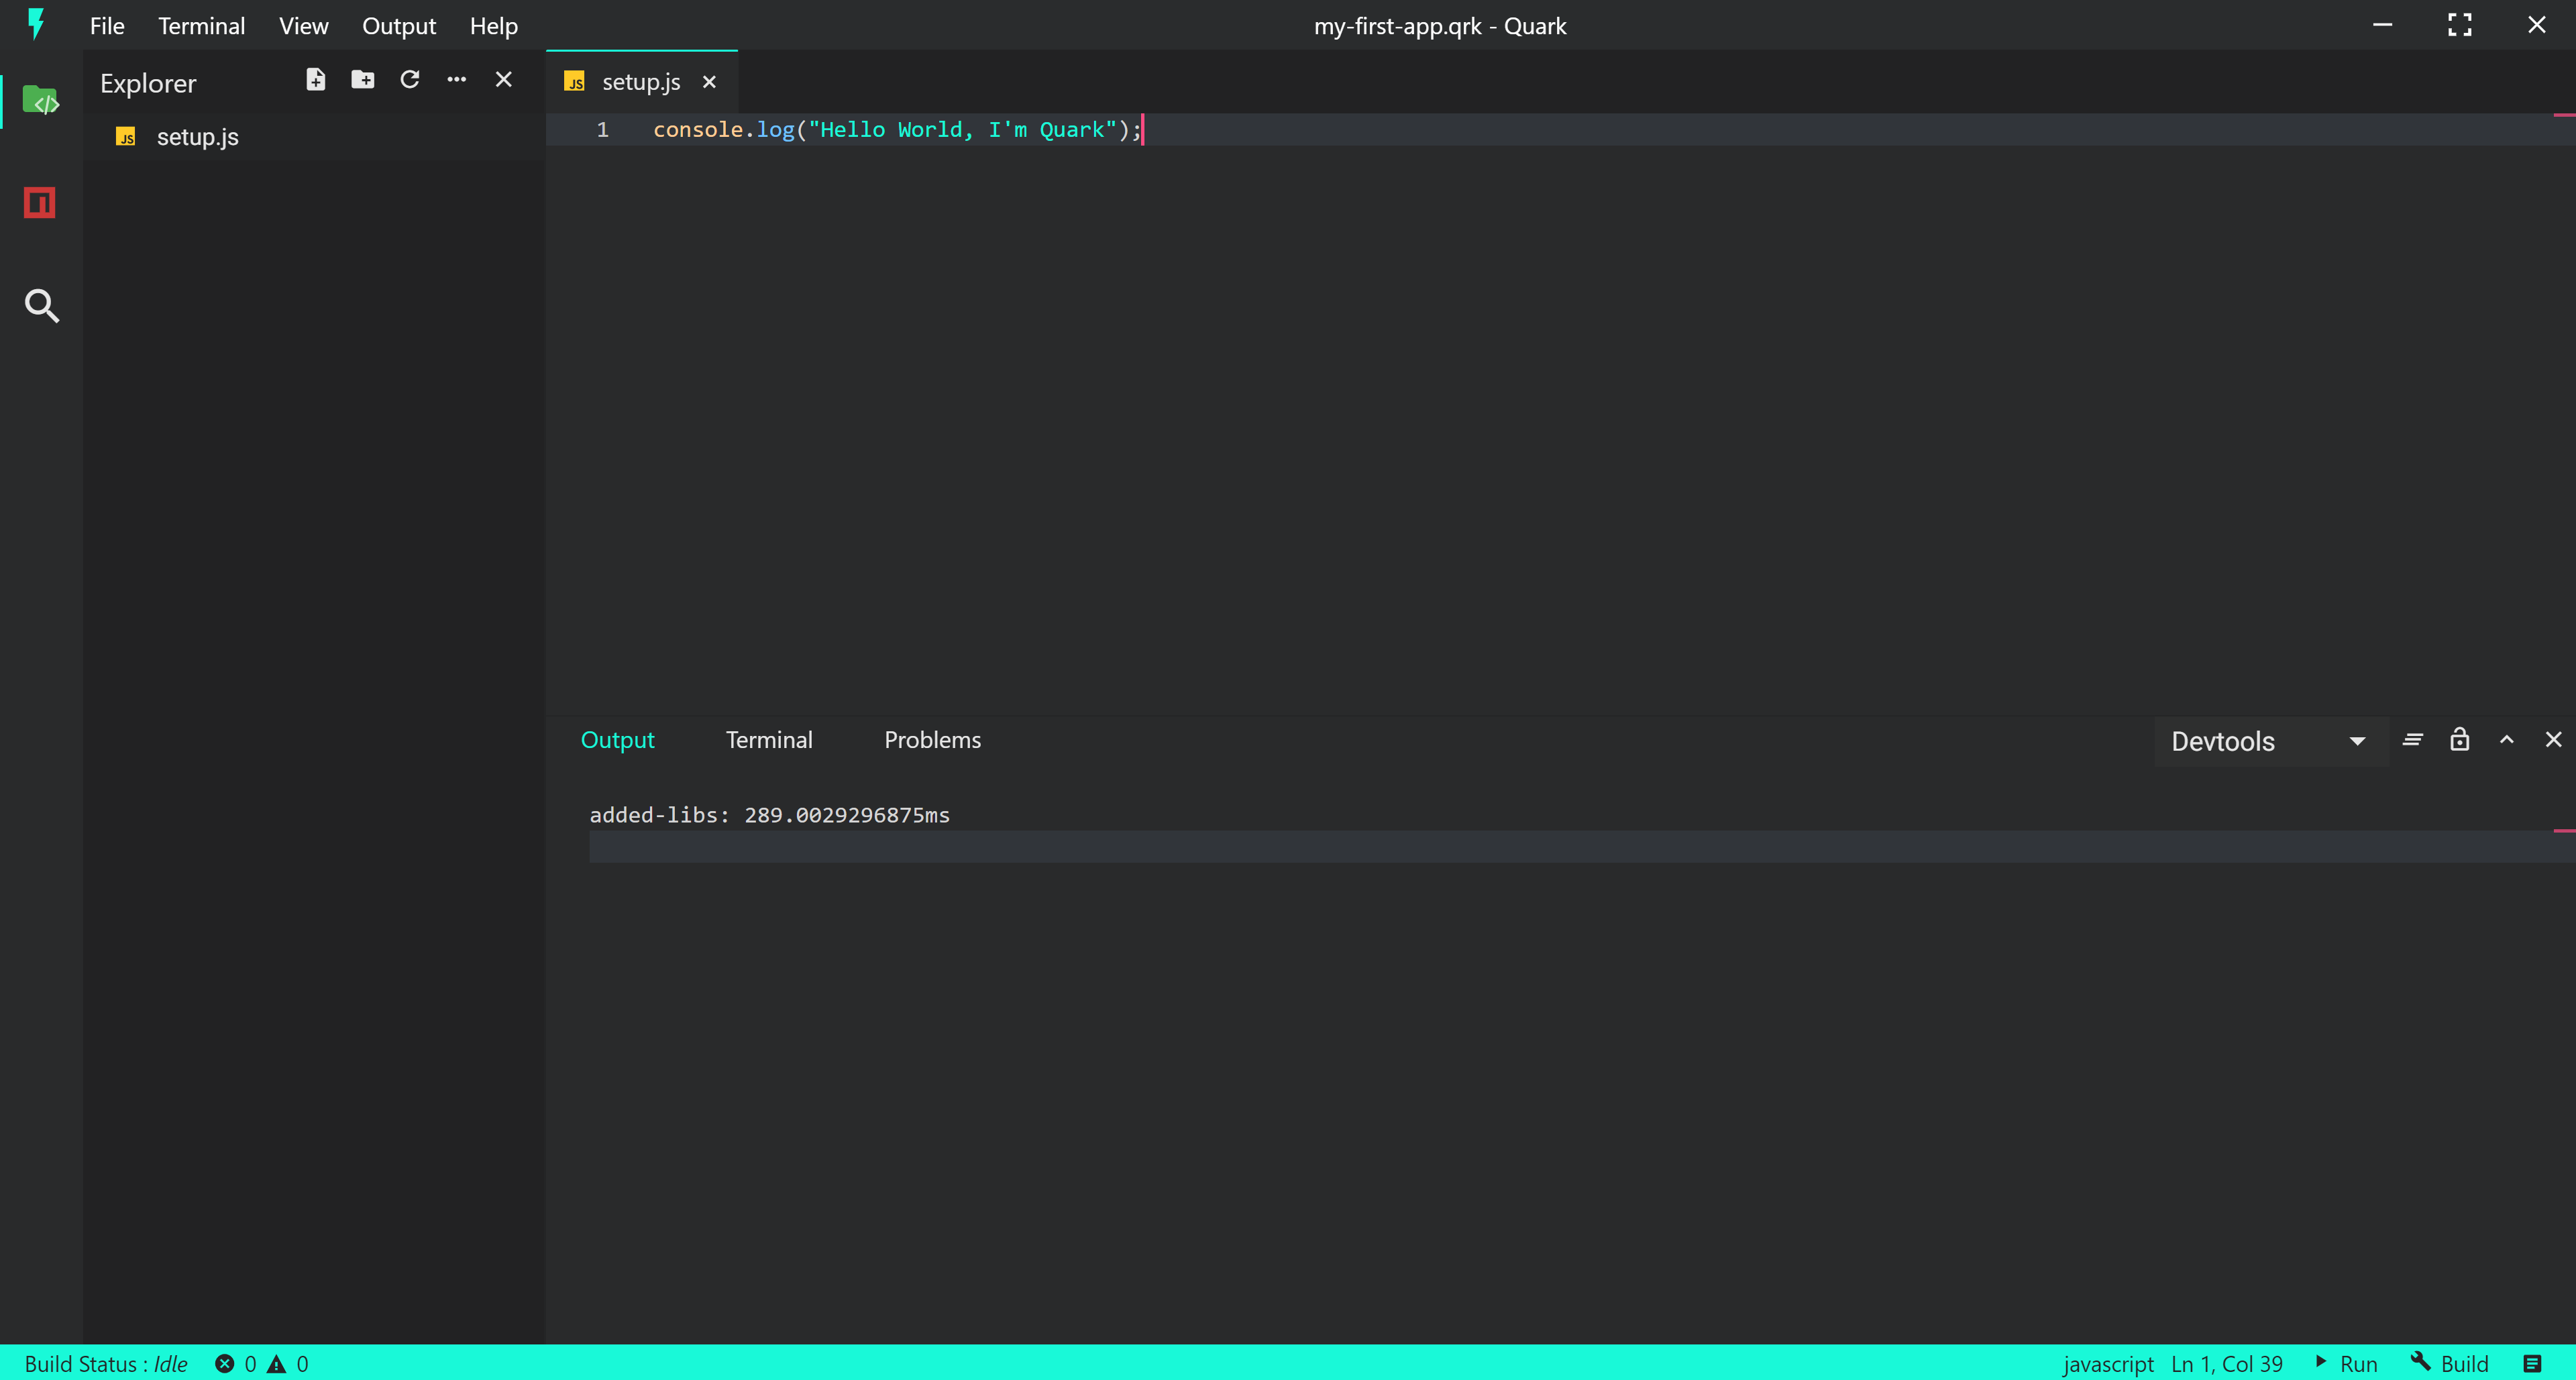
Step 4: Writing your Code.
- Notice that our file already has one line of code, that prints a console message. We'll keep this tutorial to only one line of code.
- Let us change the console message to "Hello World, I'm Quark". Your code should now look like this.
console.log("Hello World, I'm Quark");
Step 5: Building the sketch
- To build the sketch, press the build button at the bottom right corner of the IDE.
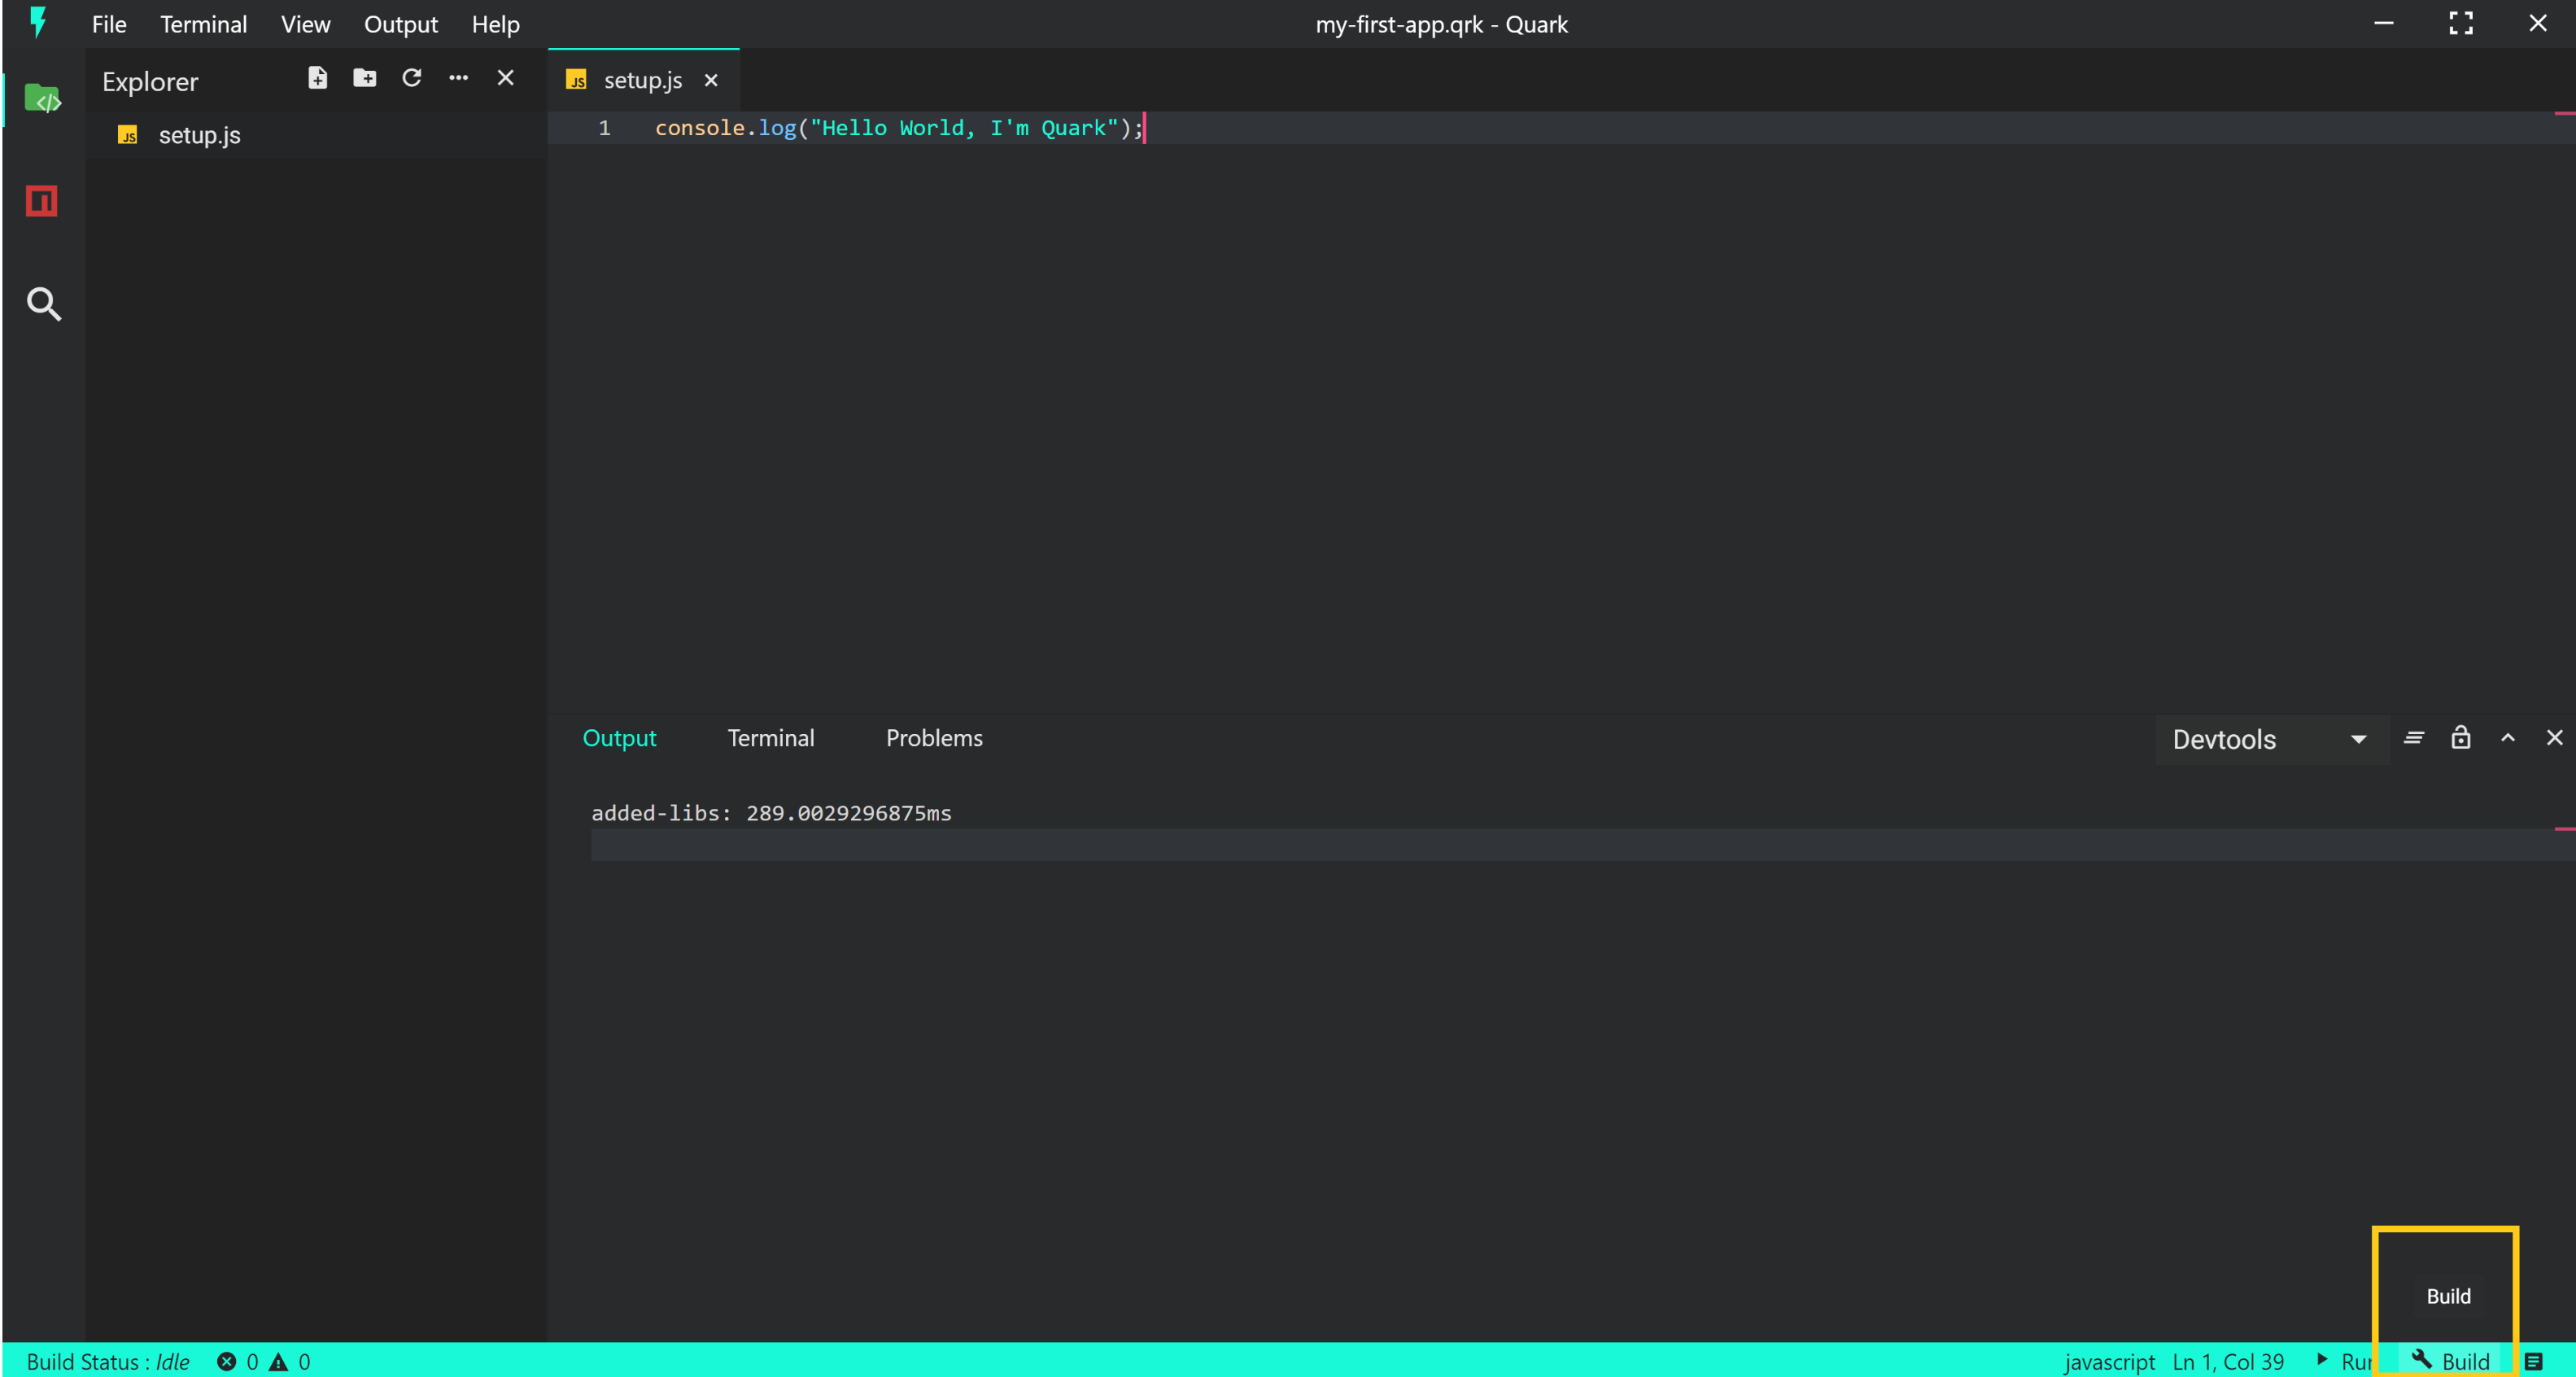
- To check the build logs, go to the Output section in Menu bar and select "Build: Focus". This will focus on the build logs output channel.
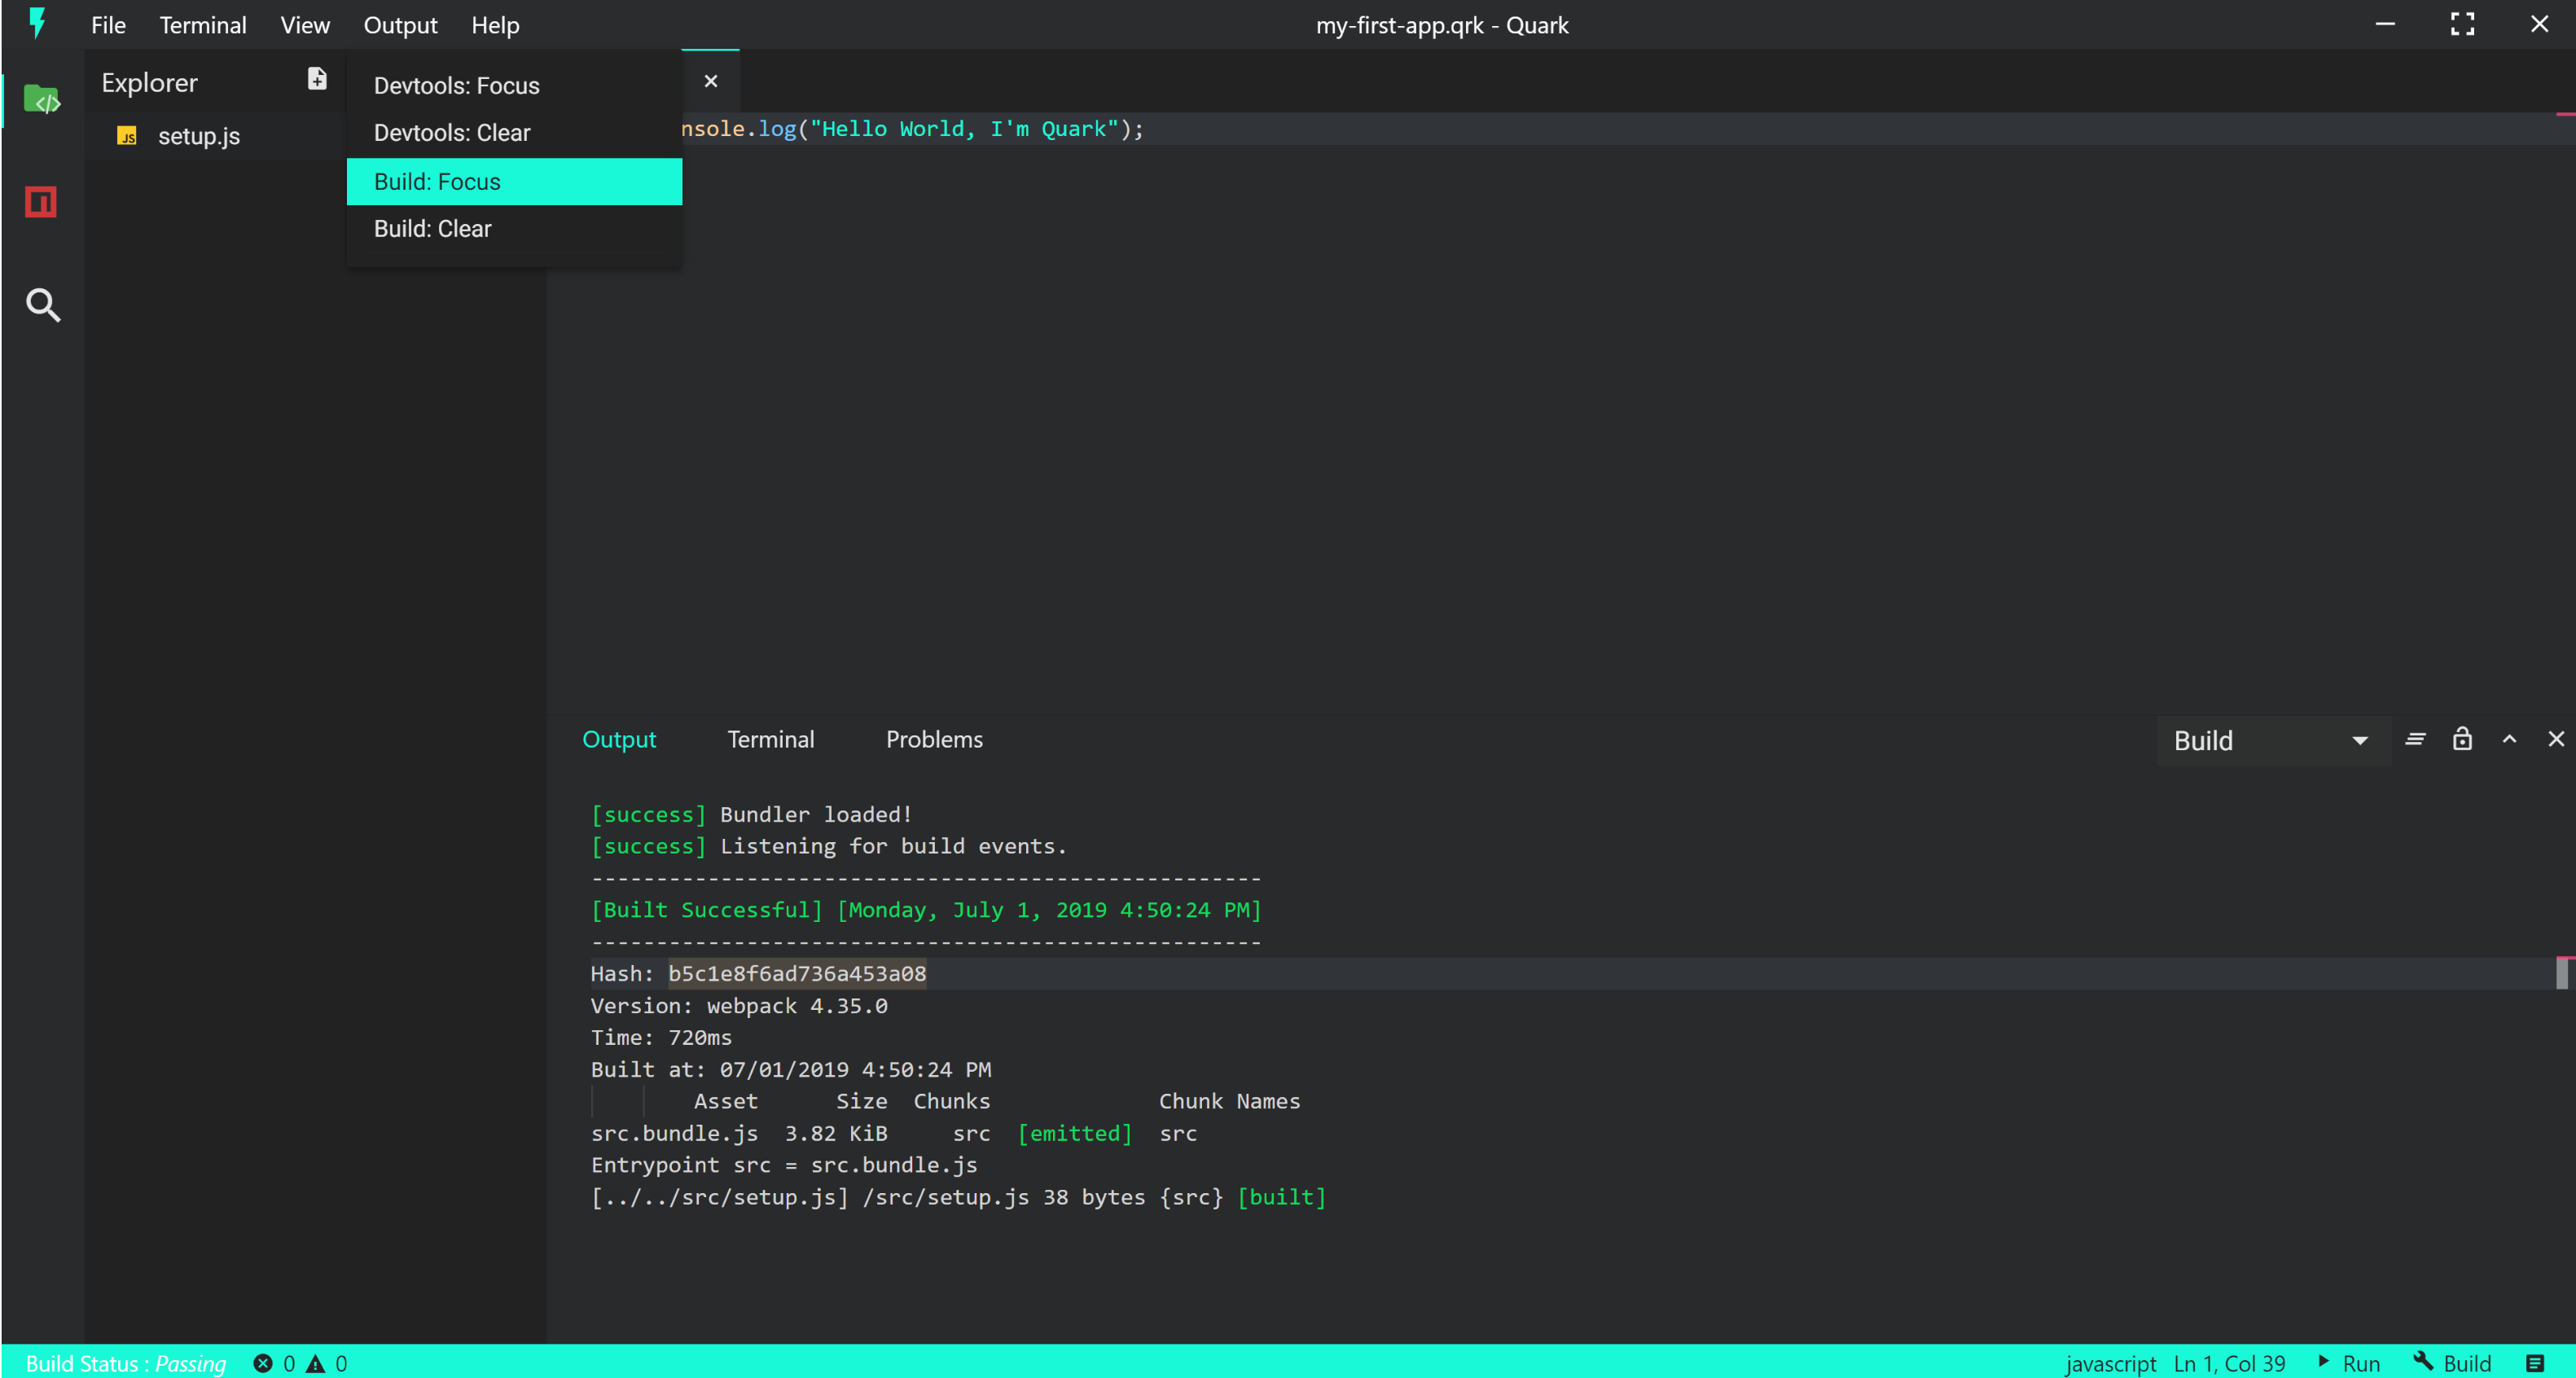
- As visible in the output, our build was successful, now lets run the sketch.
Step 6: Running the sketch
- To run the sketch, press the run button at the bottom right corner (adjacent to the build button) of the IDE.
- This should run our sketch and a new window will pop open like so.
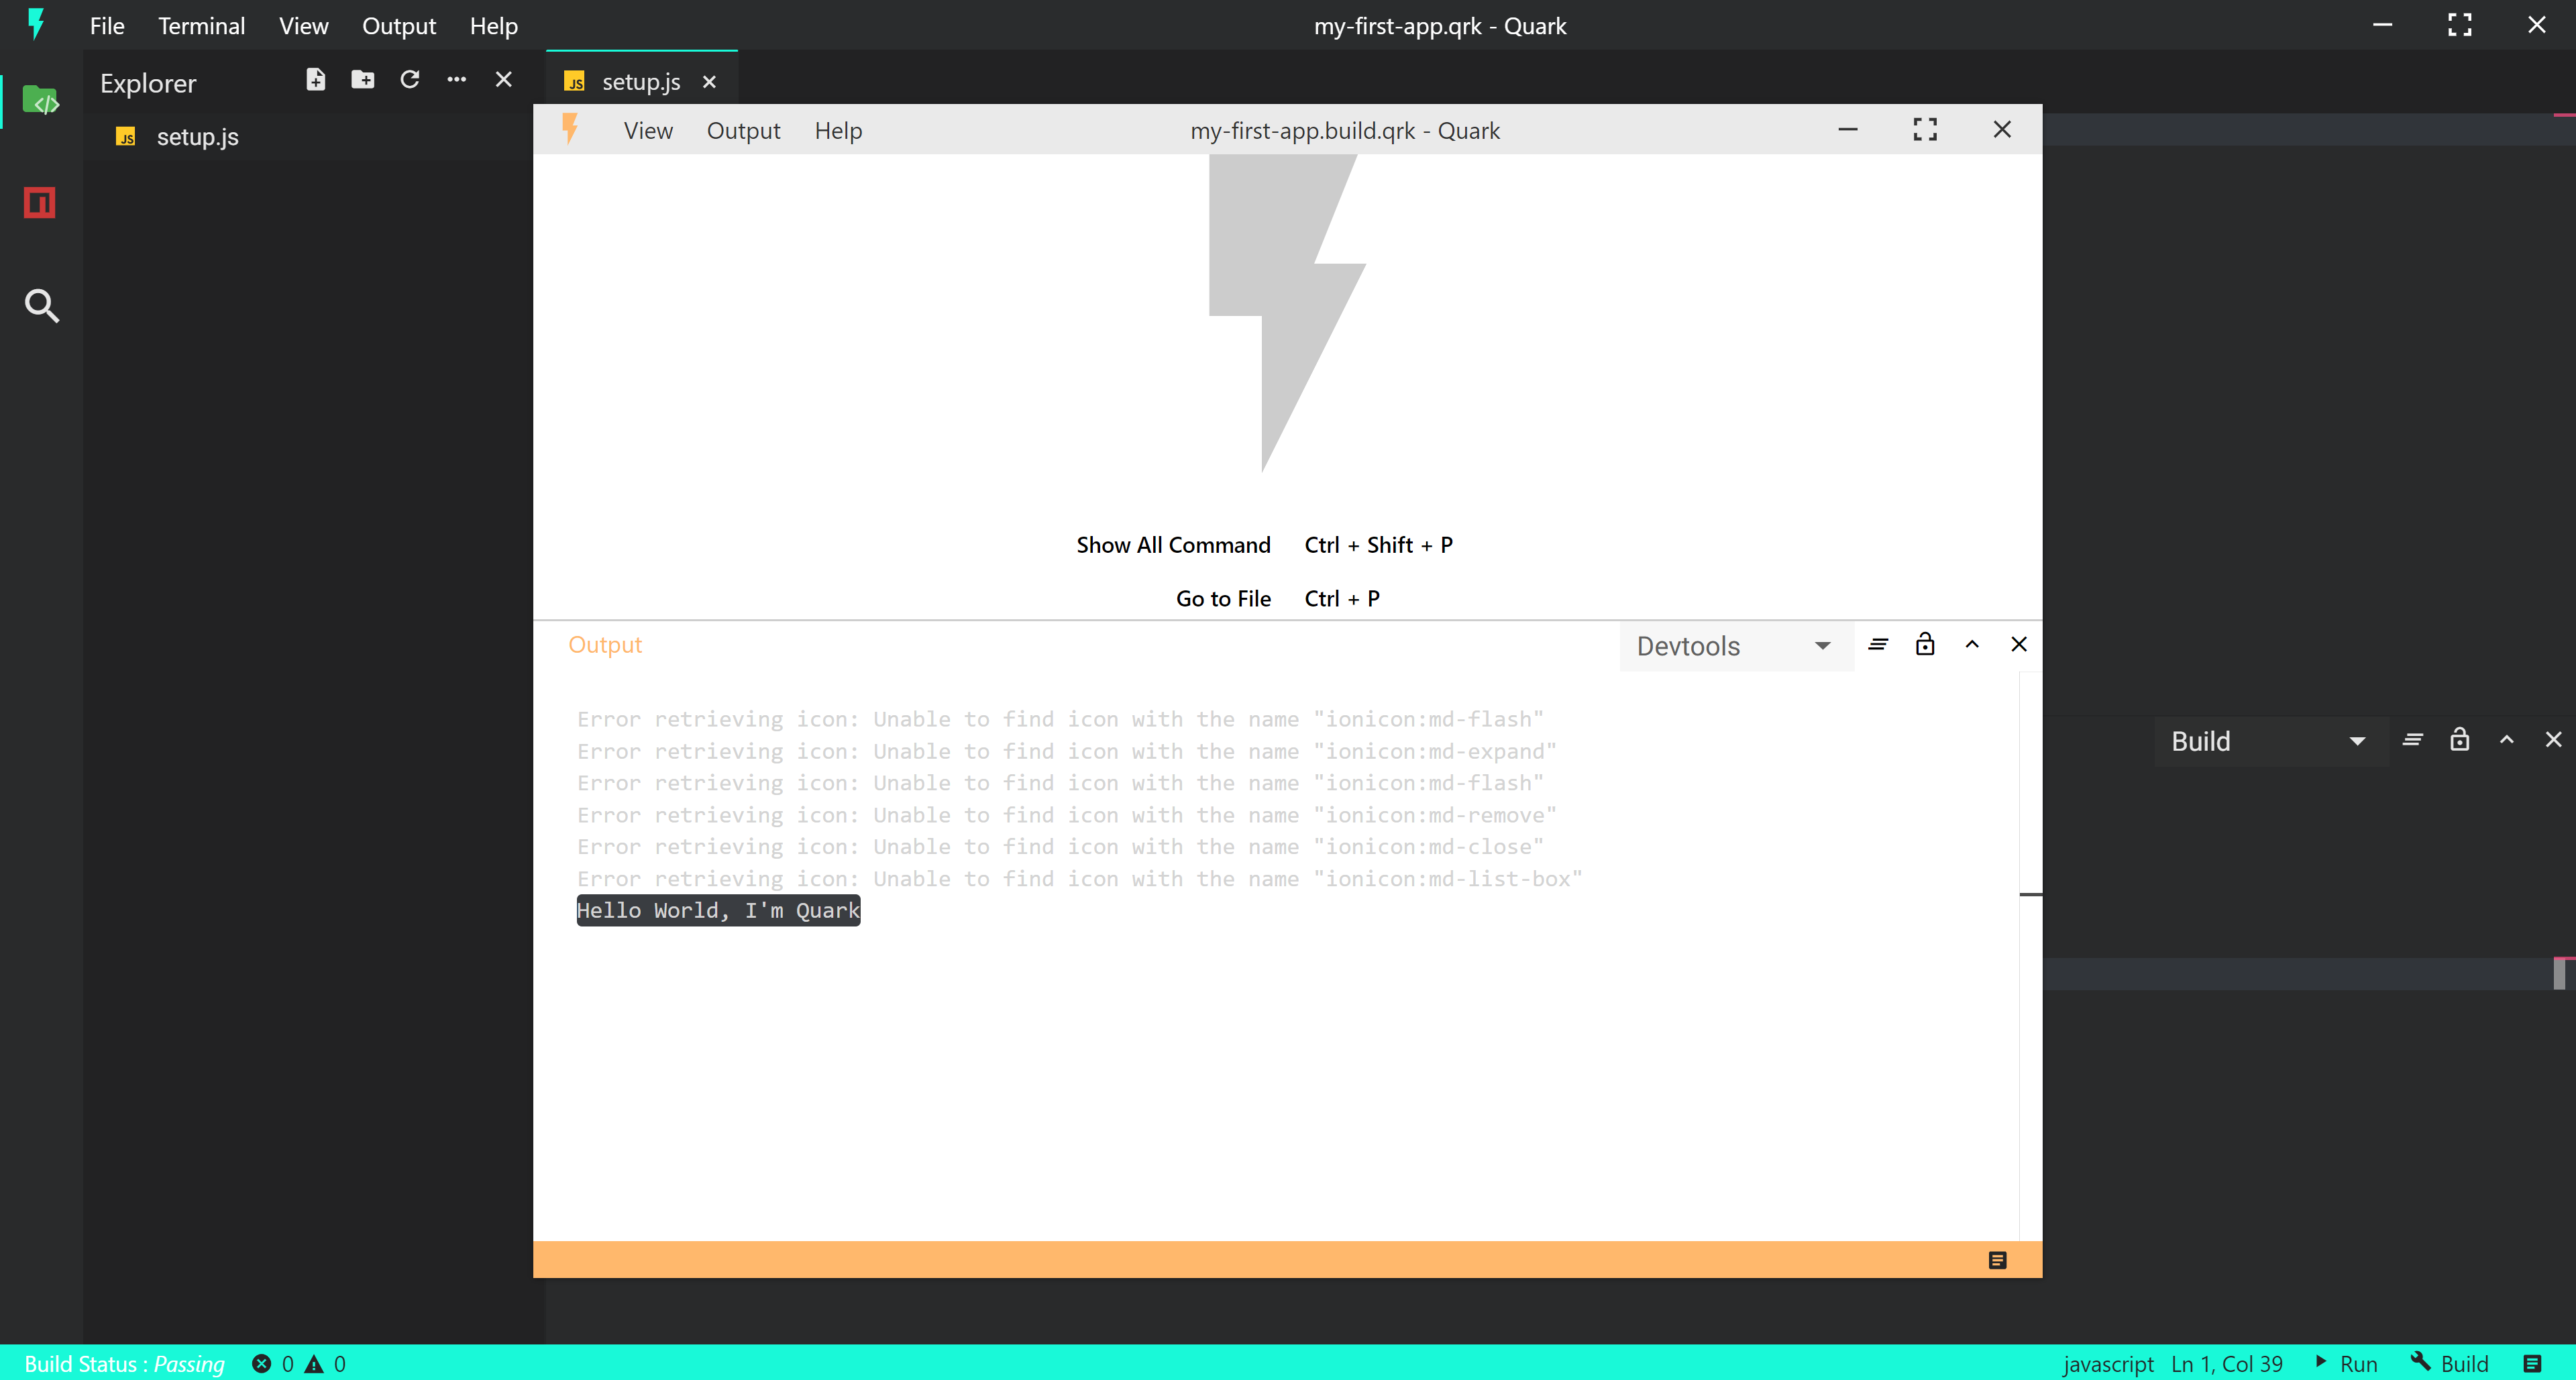
- Notice the console message printed in the devtools output channel. This shows that our code ran properly.
The entire process could be summarized in the following video.
We create a new project, build the project, and run the project. All of which can be done within 15 seconds!!
Next Steps
Of course this is not all Quark has to offer, checkout the tutorials to learn mode advanced concepts.
Quark development environment
All docs on one page.Now that you've seen Quark in action, let's see how you can configure it to get the most out of it.
Just like many other code editors, Quark adopts a common user interface and layout of an explorer on the left showing all of the files and folders in your project, an editor on the right showing contents of the file you've opened.
When you launch Quark project for the first time, you should get a screen that looks like this:

Basic Layout
The IDE comes with a simple and intuitive layout that maximizes the space provided for the editor while leaving ample room to browse and access the full context of your folder or project. The UI is divided into five areas:
- Editor - The main area to edit your files. You can open as many editors as you like side by side. Quark IDE uses the same code editor that powers the VS Code.
- Side Bar - Contains different views like the Explorer to assist you while working on your project.
- Status Bar - Information about the opened project and the files you edit.
- Activity Bar - Located on the far left-hand side, this lets you switch between views.
- Panels - You can display different panels below the editor region for output or debug information, errors and warnings, or an integrated terminal.
Code Editor
Quark comes bundled with Monaco code editor which is the same code editor used in VS Code. Monaco editor provides rich IntelliSense, validation and out of the box support for for HTML, CSS, SCSS, JSON, JavaScript and TypeScript.
Explorer
The Explorer is used to browse, open, and manage all of the files and folders in your project.
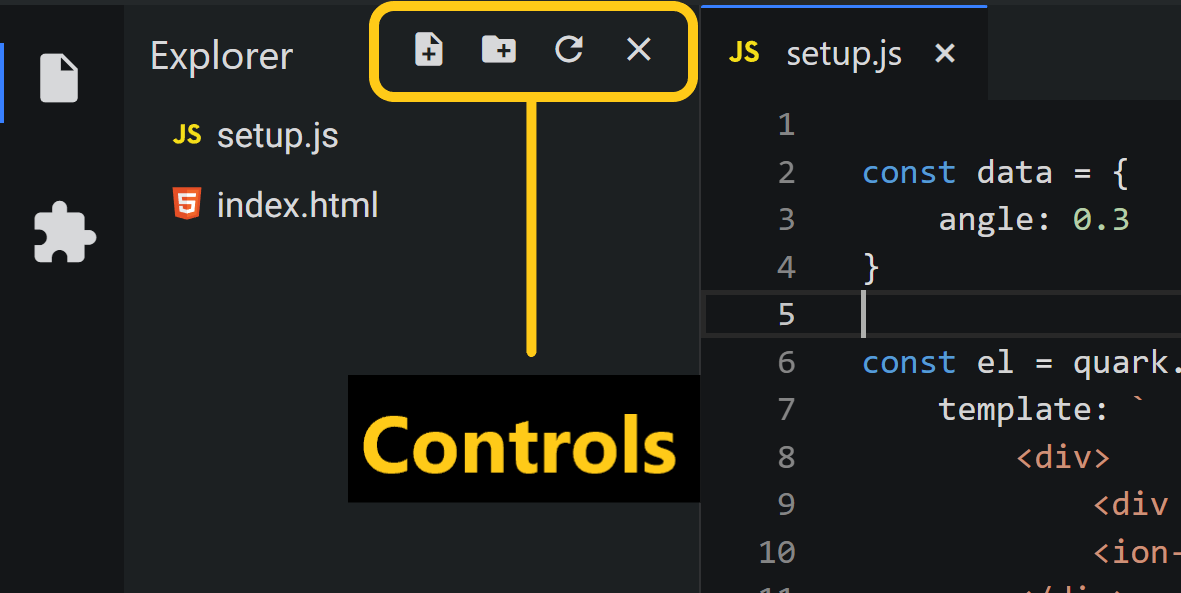
Here are the following things you can do in explorer:
- Create, delete, and rename files and folders.
- Move files and folders with drag and drop.
- Use the context menu to explore all options.
Virtual File System
One of the unique capabilities of Quark is that is uses virtual file system, sometimes also referred to as in-memory file system. That means all the code that you write and files you create inside the IDE are virtual files with no foot print on your real file system. This is done to make sharing a project as easy as sharing a single file.
Quick Open
If you press Ctrl+p a search box will open. This will let you quickly search and open any file in your project by typing the name of the file.

Command Palette
If you press Ctrl+Shift+P while focused in an editor pane, the command palette will pop up. This is a search driven menu that gives you access to just about any major task that is possible in Quark. Instead of clicking around all the application menus to look for something, you can press Ctrl+Shift+P and search for the command.
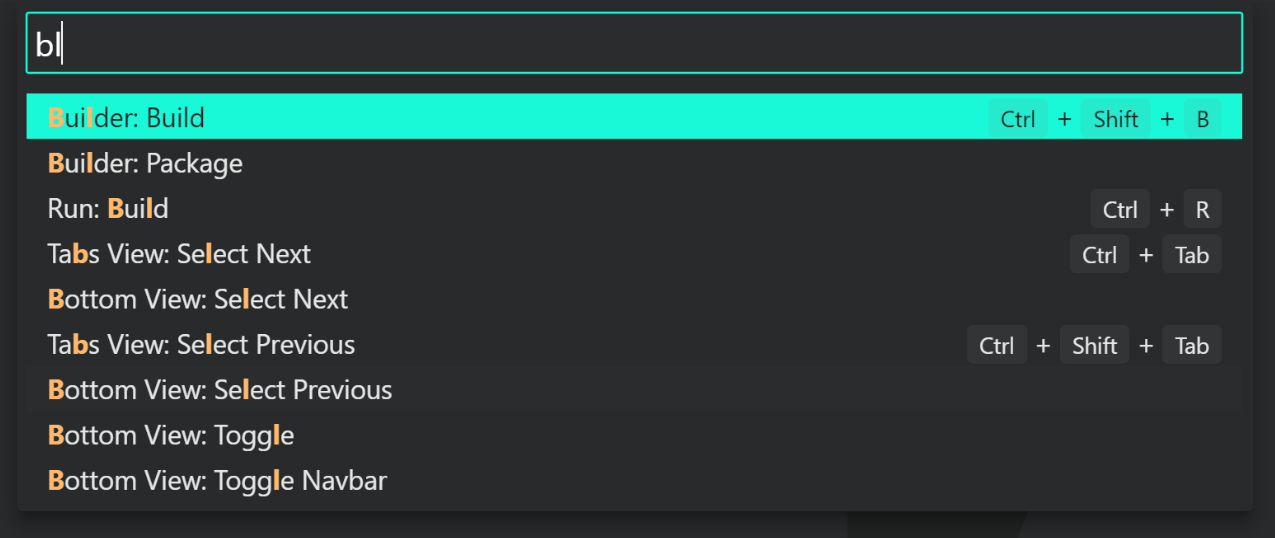
Not only you can quickly search through hundreds of commands, but you can also see if there is a keybinding associated with it. You can use these keybindings to execute the command.
Terminal
In Quark, you can open an integrated terminal, initially starting at the root of your project. This can be convenient as you don't have to switch windows or alter the state of an existing terminal to perform a quick command-line task.
To open the terminal:
- Use the
Ctrl+\keyboard shortcut with the backtick character. - Navigate to main menu and select
Terminal > Fork Terminal. - From the Command Palette (Ctrl+Shift+P), use the
Terminal: Fork Terminalcommand.
Managing multiple terminals
You can create multiple terminals open to different locations and easily navigate between them. Terminal instances can be added by clicking the plus icon on the top-right of the TERMINAL panel or by triggering the Ctrl+Shift+` command. This action creates another entry in the drop-down list that can be used to switch between them.
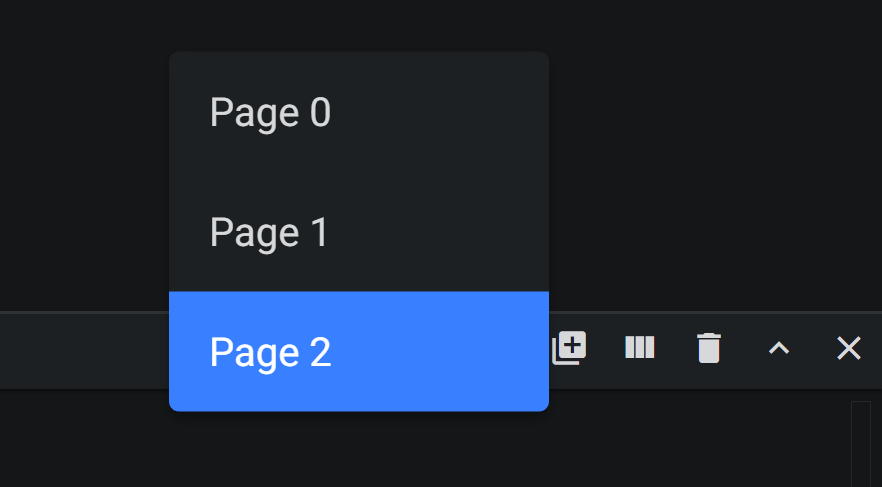
- Remove terminal instances by pressing the trash can button. The terminal instance last focused on gets deleted.
- You can also split the terminal by triggering the
Ctrl+\command or by pressing the Fork Terminal button or from the main menu.
Configuration
The shell used defaults to $SHELL on Linux and macOS, PowerShell on Windows. This can be changes in settings by going to Terminal > Process > Shell:*
Settings
It is easy to configure Quark to your liking through its various settings. Nearly every part of Quark's editor can be changed to your liking.
Quark provides two different scopes of settings:
- User Settings - Settings that apply globally to any instance of Quark you open.
- Workspace Settings - Settings stored inside your workspace and only apply when the workspace is opened. These settings are stored in the
.quark/${project-name}.store.qrkfile at the root of your project.
You can change the scope of settings by selecting the appropriate option from the select box at the top right corner of the settings window.
NOTE
Workspace settings take priority over user settings.
You can open the settings as follows:
- Go to
File > Preferences > Settingsor trigger theCtrl+,command. - Or, Open the Command Palette and select
Preferences: Open Settings
Settings groups
Common settings are grouped together so that you can navigate through them easily.
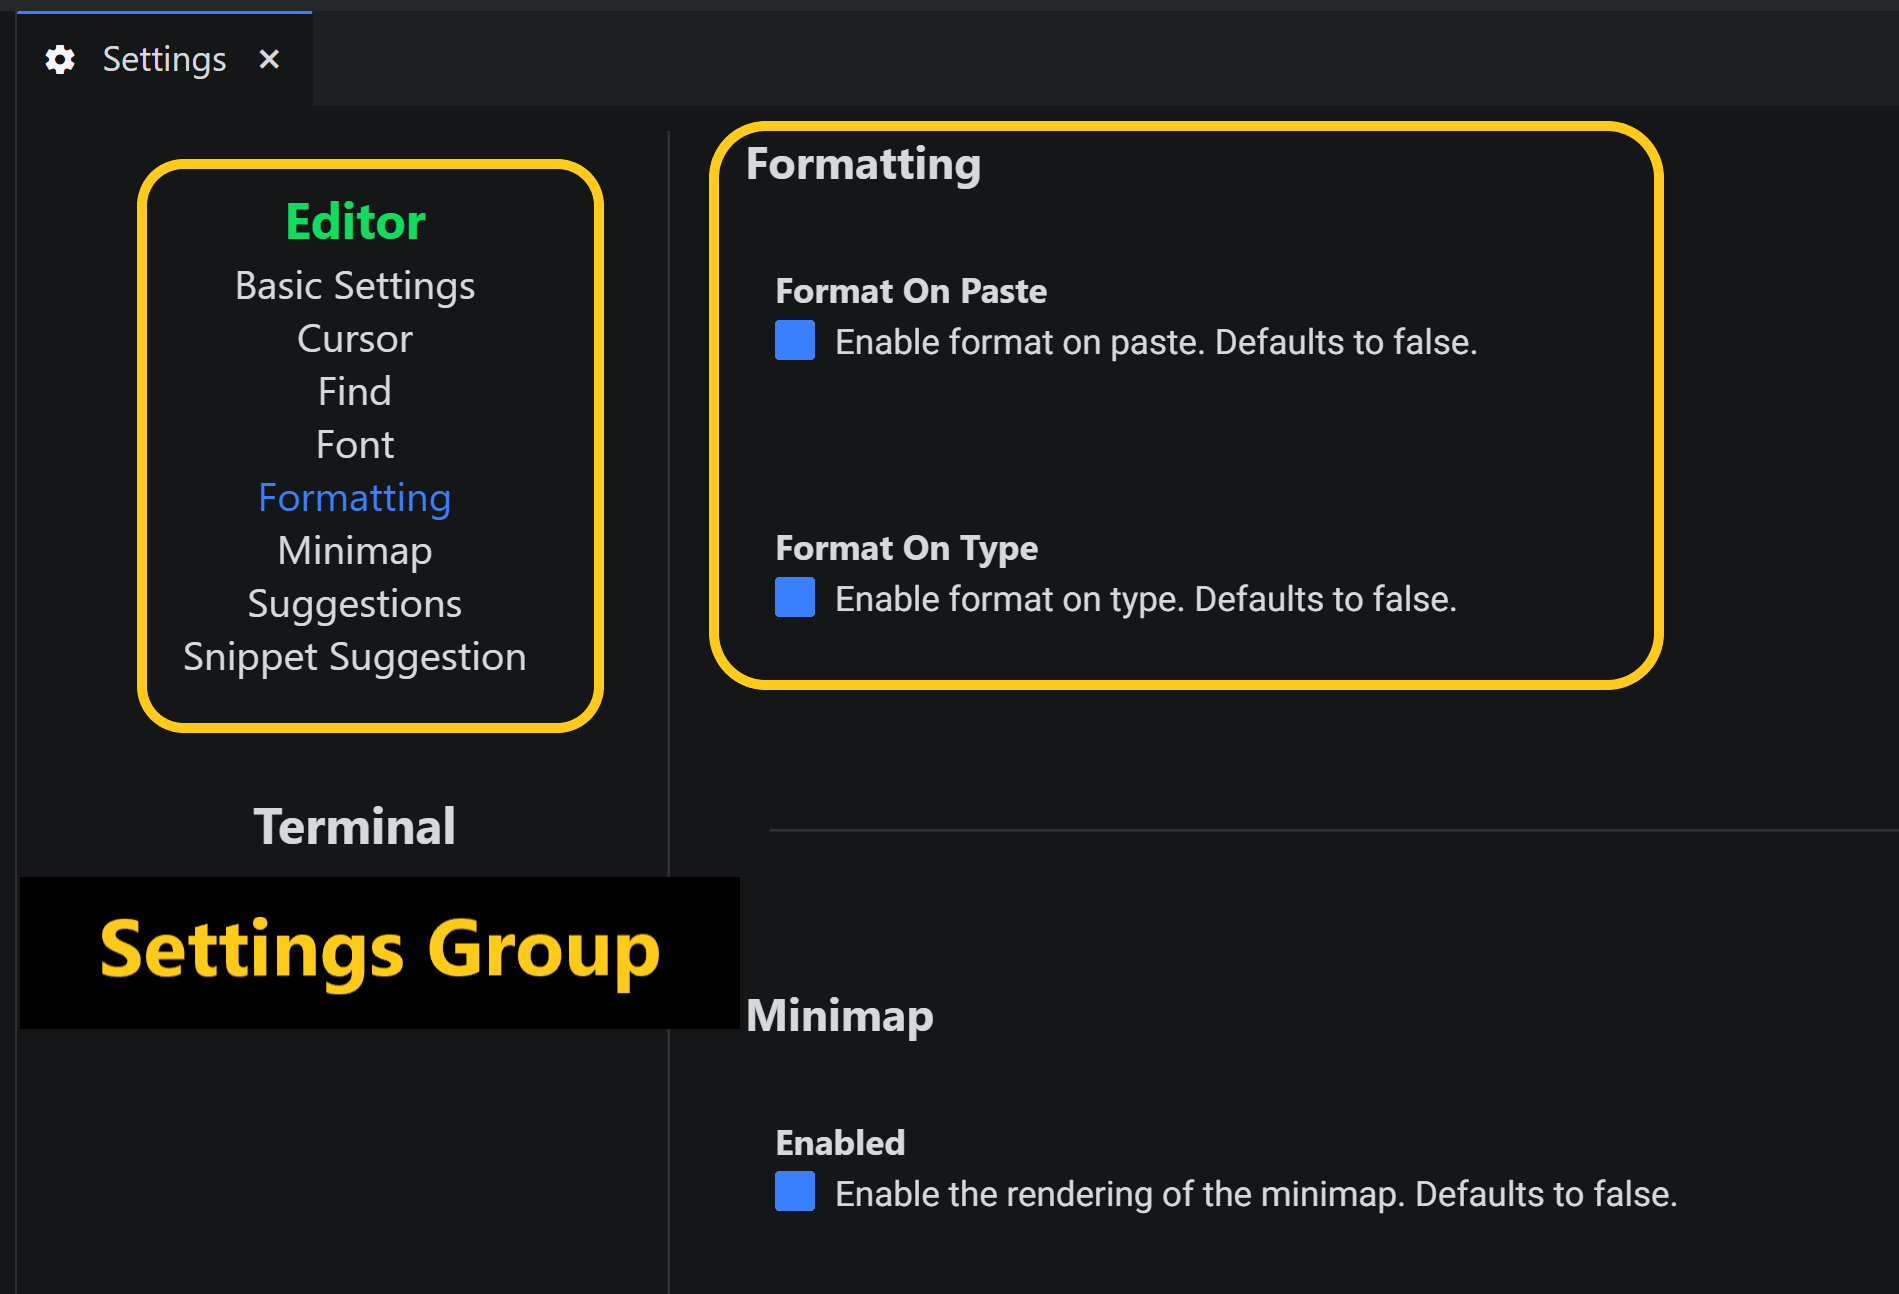
Edit Settings
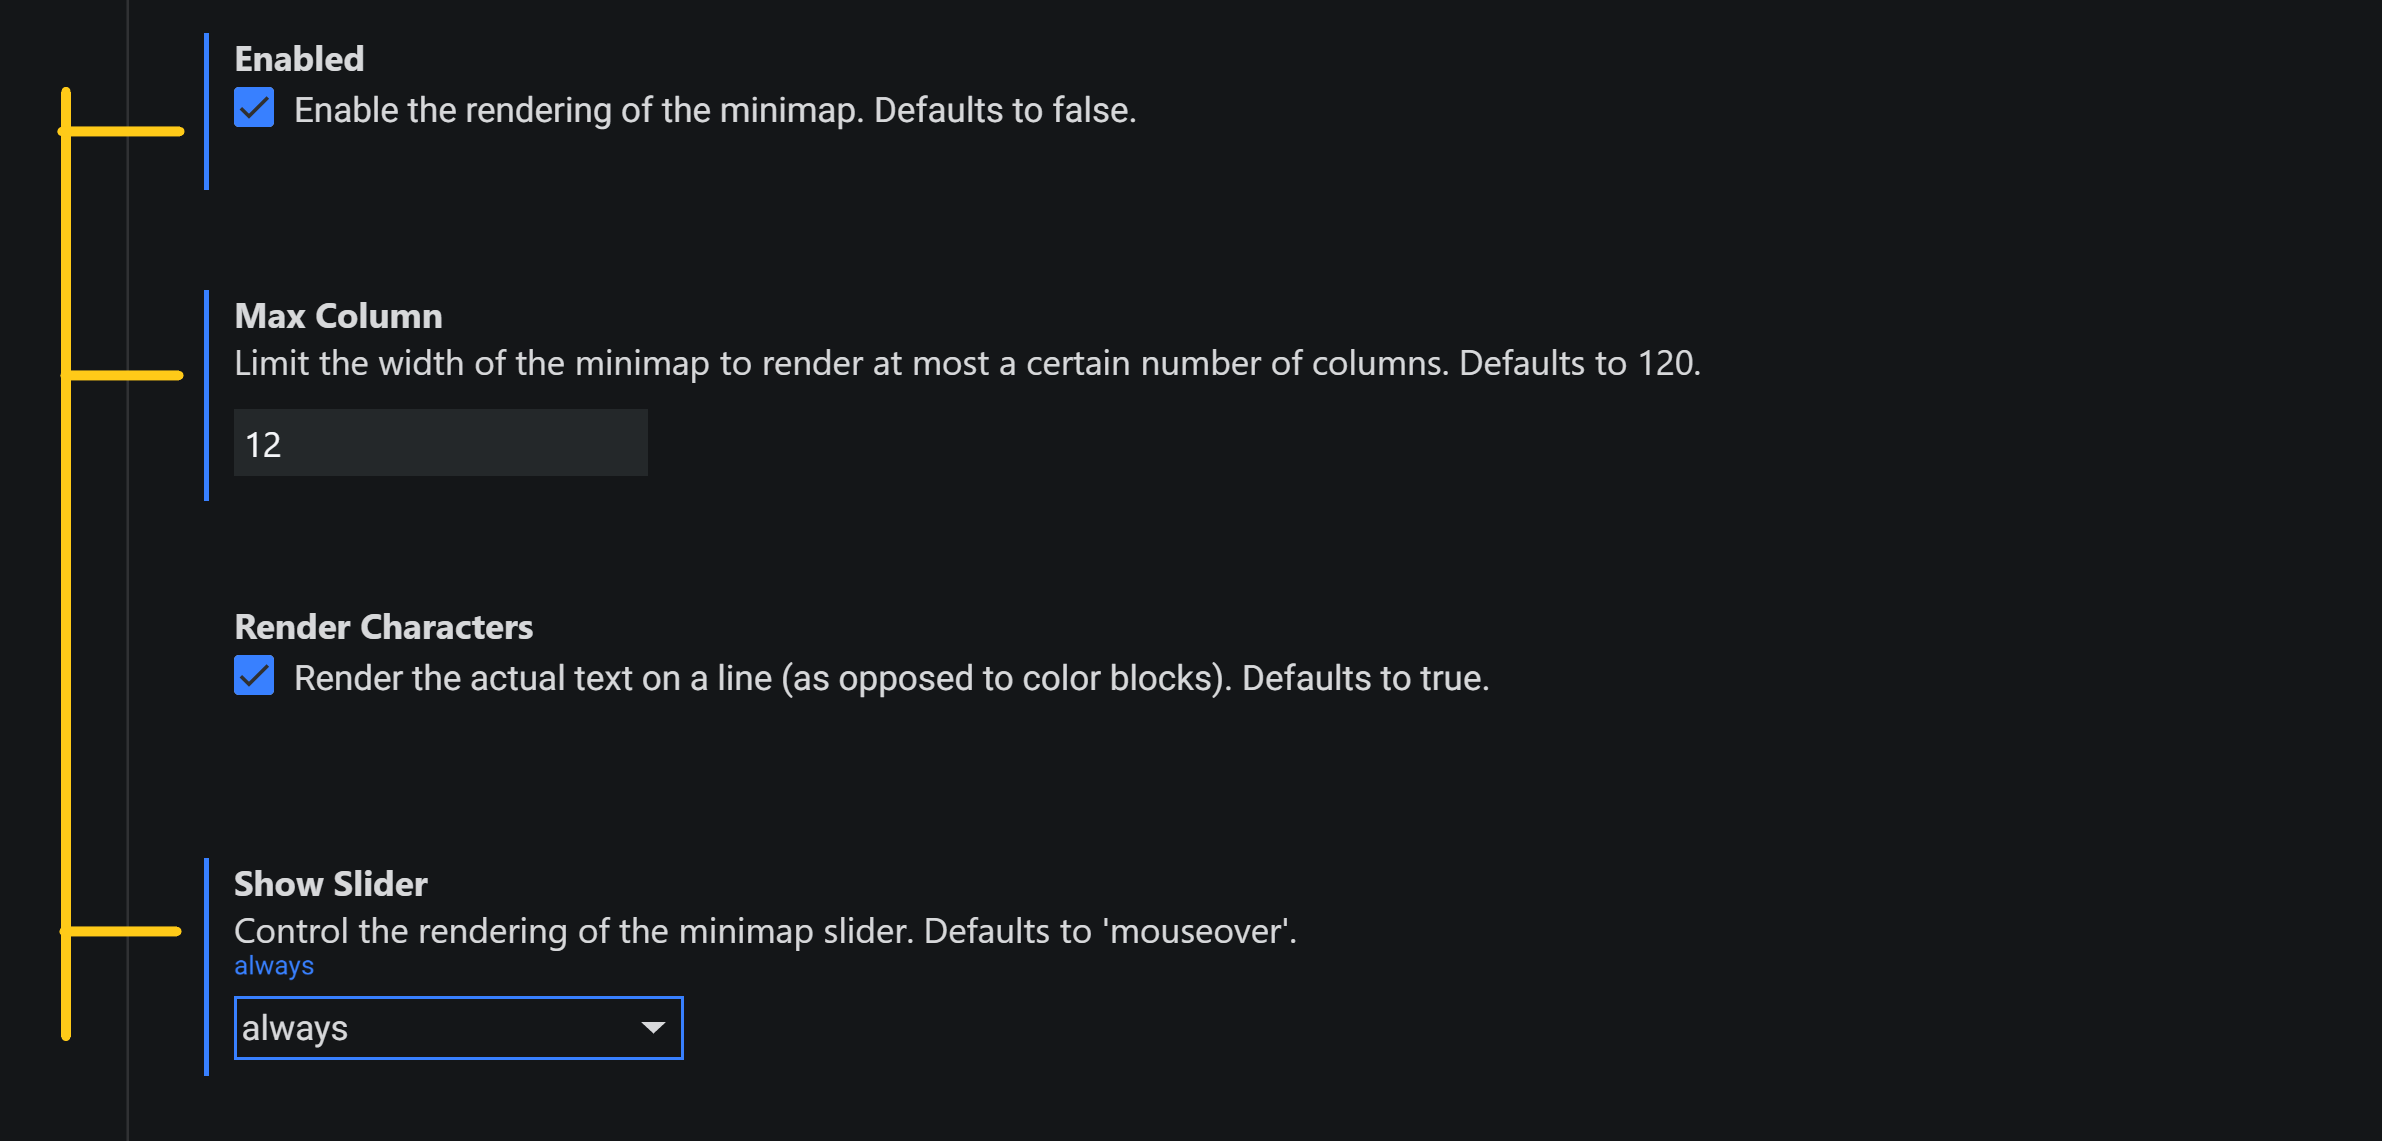
Each setting can be edited by either a checkbox, an input or by a drop-down. Simply edit the text or select the option you want to change to the desired settings.
NOTE
Note that changed settings have a marker besides them to help you identify them easily.
Changing the theme
You can change the theme by changing the setting Editor > Basic Settings > Theme of Editor.
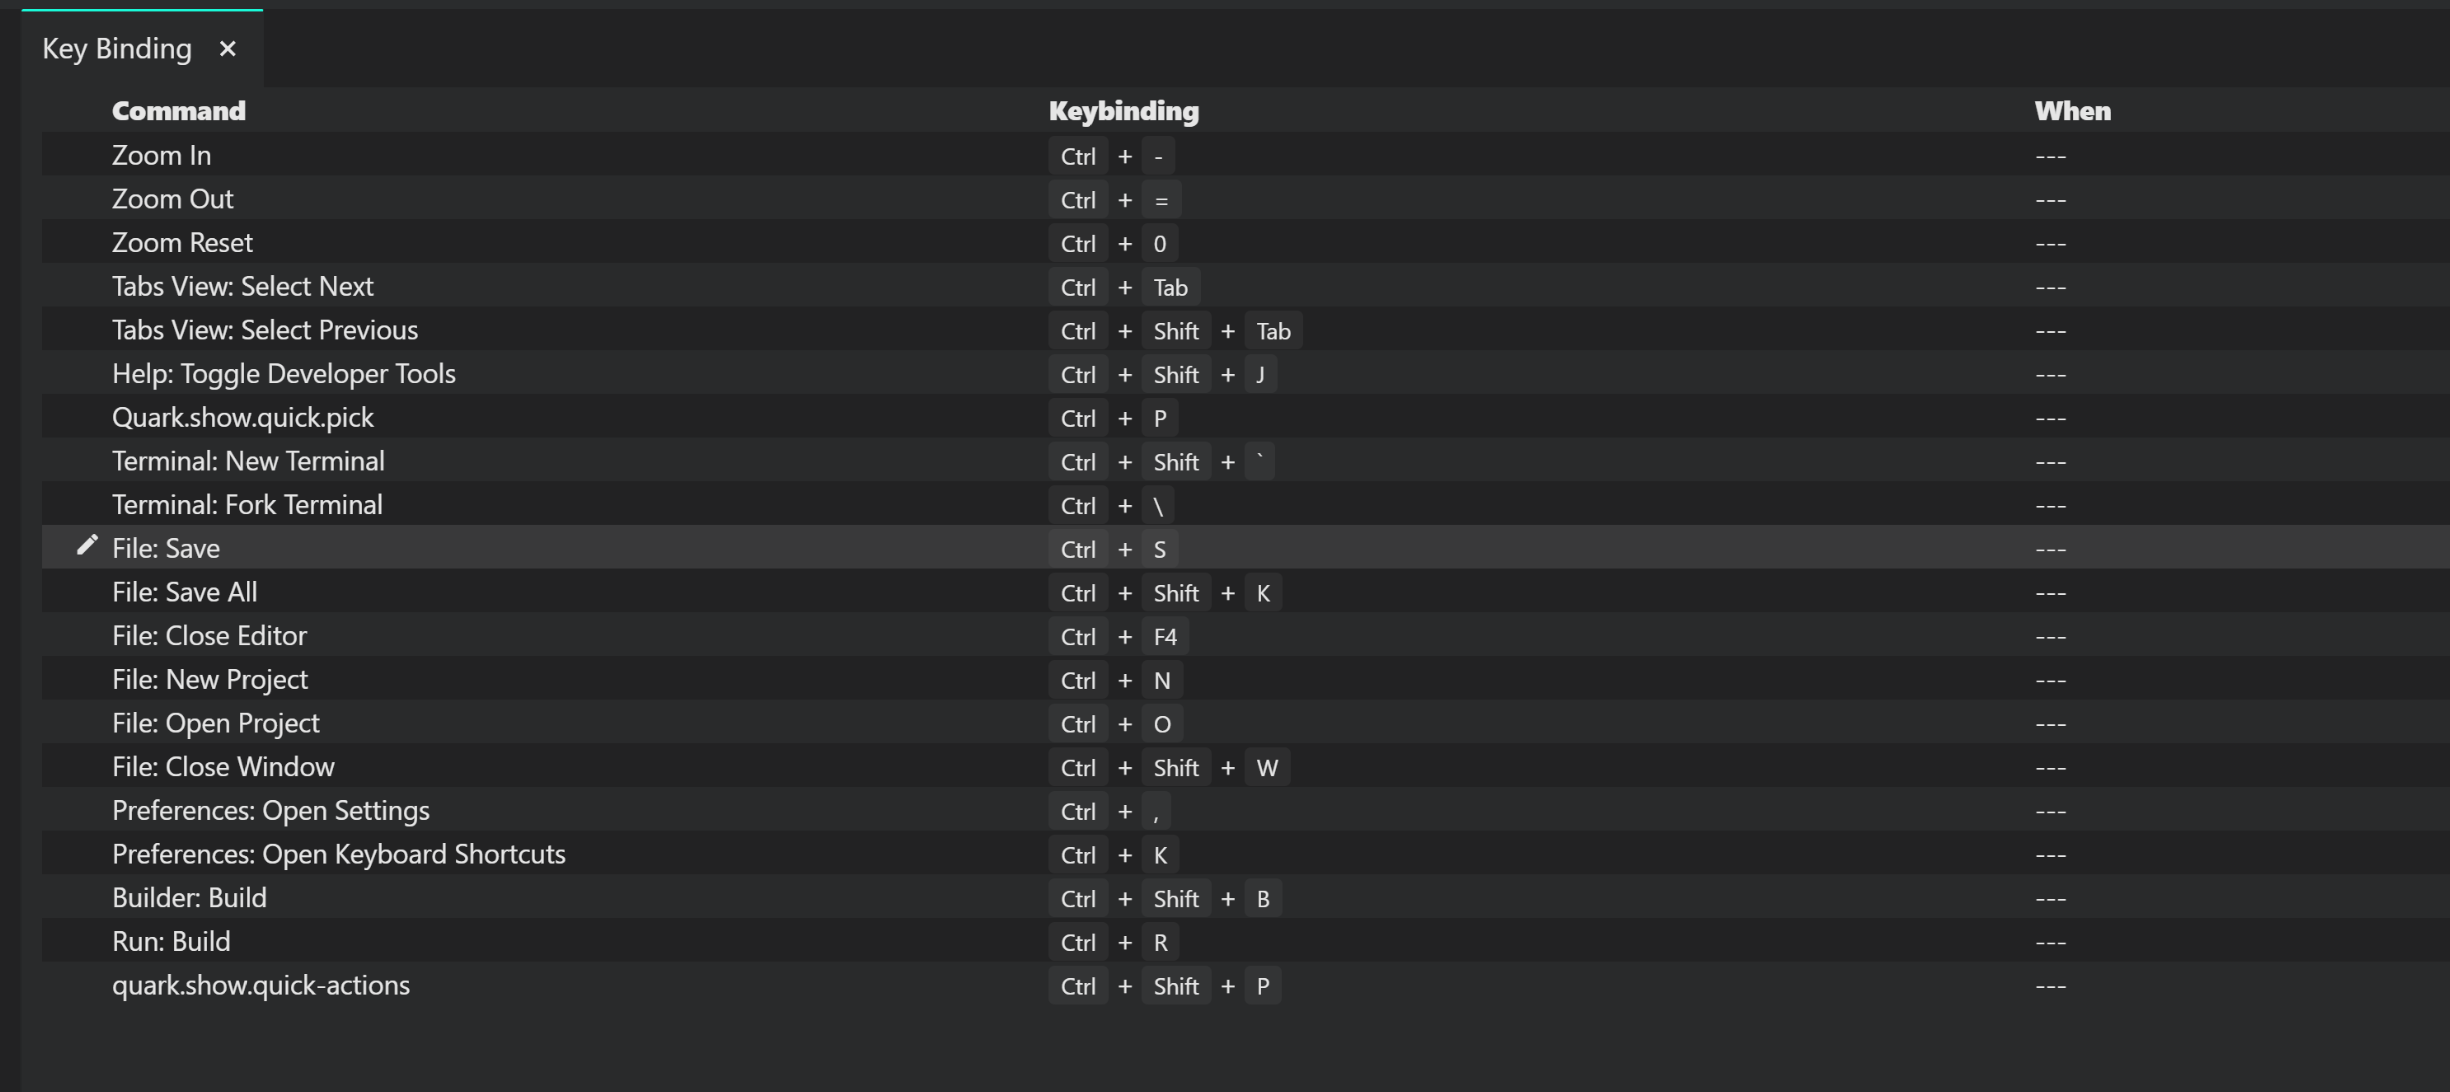
Changing default keyBindings
You can change the default keybindings for the commands.
- Press
Ctrl+kto open the keybinding editing panel. - Click on the edit icon to the left of the command you want to change keybinding for.
- Enter the key combination and press enter to accept.
Installing node packages
Use the inbuilt npm client to install node packages for your projects. Simply type the name of the package and click install on the package that you want to install.
Terminology
You can find definitions for all of the various terms that we use throughout this module in our Glossary.
Hello world app
All docs on one page.The project that we are finally going to build, will look something like this
Create a new Project
Just like we did it in previous module, create a new project.

Creating the directory structure
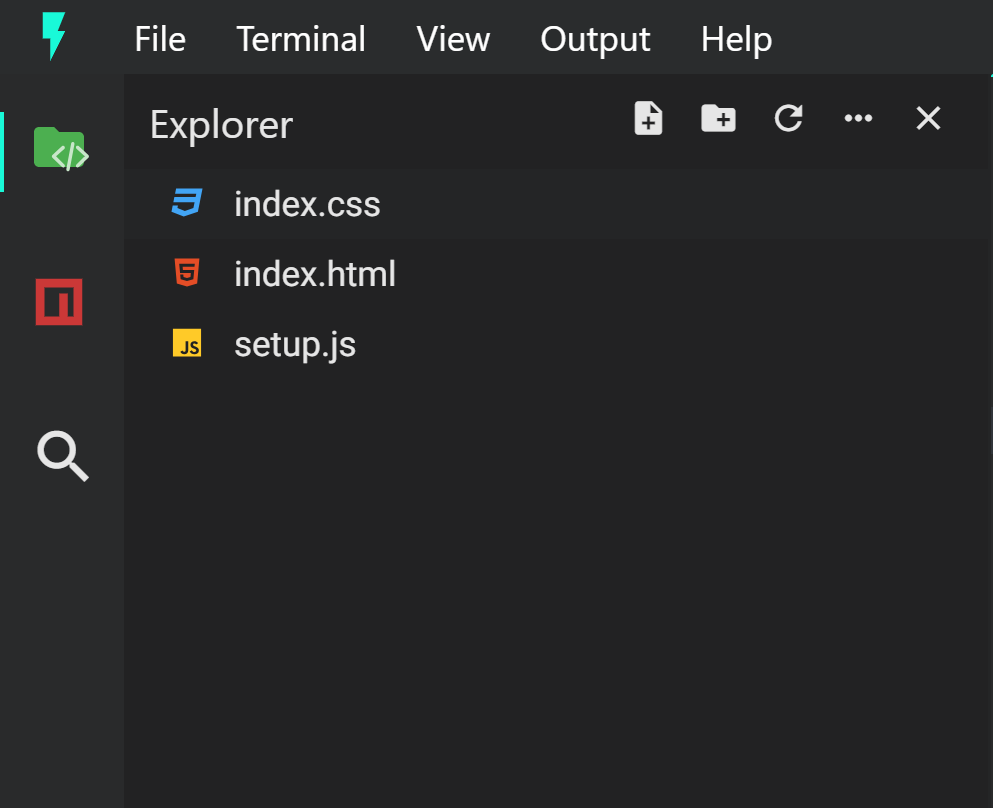
For this project, other than the base setup.js file, we are going to need 2 other files. Namely, index.css for our styles, and index.html for our HTML template.
Create both the files from the explorer view.## Your final directory structure should looke something like this:
Writing the code
First, copy the following code into their respective files. We'll explain the working later.
######## In the index.html file
<div class="hello-container">
	<div class="hello-world">
		<div> Hello World. I'm Quark! Yayyy!!!</div>
		<div class="emoji">😊</div>
	</div>
</div>
######## In the index.css file
.hello-container {
    font-weight: 900;
    display: block;
    height: 100%;
    background: #000000;## }

.hello-world {
    font-size: 50px;
    background-color: #000000;##     height: 100%;
    text-align: center;
    padding-top: 260px;
}

.emoji {
    font-size: 110px;
    animation: rotation 2s linear;
    animation-delay: 1s;
}

@keyframes rotation {
    from {
        -webkit-transform: rotate(0deg);
    }

    to {
        -webkit-transform: rotate(359deg);
    }
}
######## In the setup.js file
import html from './index.html';
import './index.css';

const element = quark.util.createElementFromHtml(html);
const view = quark.views.createTabsView('Hello World', element);
view.focus();

quark.util.setAppTheme({
    "background.dark": "#0D0A0B",##     "on.background.dark": "#ffffff",##
    "background.default": "#0D0A0B",##     "on.background.default": "#ffffff",##
    "background.light": "#1D1A1B",##     "on.background.light": "#ffffff",##
    "background.divider": "#4D4A4B",##
    "primary.default": "#25d55f",##     "on.primary.default": "#000000",##
    "secondary.default": "#ff7246",##     "on.secondary.default": "#000000"## });
Working
The index.html and index.css files are pretty straight forward. We are simply creating an HTML template and assigning some styles corresponding to it.
For the setup.js file, let us explore different sections of the programe one by one.
1. Import statements
import html from './index.html';
import './index.css';
Here, we are importing the html template from the index.html file. Behind the scenes, this import statement is handled by the webpack's raw-loader, which return the raw content of the html file.
In the second statement, we are importing the index.css file. Behind the scenes, this import statement is handled by the webpack's css-loader and style-loader. The effect of this import statement is that these styles are automatically injected in the DOM.
2. Creating the view
const element = quark.util.createElementFromHtml(html);
const view = quark.views.createTabsView('Hello World', element);
view.focus();
This part is very specific to the Quark API. Use this API to control various aspects of the application like controlling the window state, showing system notifications, system dialogs and controlling the views.
All of this is API is available under the global namespace quark and no import statement is required to use this object. You can find the complete API references here.
In the current example, we are using the createElementFromHtml## method, which returns an HTMLElement from a template string.
The second method that we use is createTabsView## where we pass the name of the view (Hello World) and the HTMLElement as arguments. After the build, we will see the effect of this method.
3. Setting an app theme
quark.util.setAppTheme({
    "background.dark": "#0D0A0B",##     "on.background.dark": "#ffffff",##
    "background.default": "#0D0A0B",##     "on.background.default": "#ffffff",##
    "background.light": "#1D1A1B",##     "on.background.light": "#ffffff",##
    "background.divider": "#4D4A4B",##
    "primary.default": "#25d55f",##     "on.primary.default": "#000000",##
    "secondary.default": "#ff7246",##     "on.secondary.default": "#000000"## });
This is another utility method that we use to set the applications theme by providing with some variables.
Building and running the project
As described in the previous tutorial, build the project by pressing the build button, and then run the project by pressing the run button.
Showcase
All docs on one page.System resource monitor
- Monitors system resources. View CPU loads, memory usage, process explorer.
Digital control systems
- Digital control system made with Arduino UNO using pre-installed serialport library.
Plot Charts
- Plot charts using plotly.js
Stock analyzing app
- Analyze historic/real-time stock data.
News App
- News app with multiple country and source filter.
Web Browser
- Web browser with multiple tabs, split view support. (Written under 200 lines of code!!)
Note
Find these projects on Github
References
app
Provides methods to perform lower level operations.app.showItemInFolder([fullPath])
Show the given file in a file manager. If possible, select the file. If no path is provided, opens the current process path.
- returns
void
app.beep()
Play the beep sound.
- returns
void
app.getAppMetrics()
Gets the ProcessMetric` object;
- returns
ProcessMetric
app.getAppPath()
Gets the installation path of the app.
- returns
string
app.getVersion()
Gets the current version of app.
- returns
string
app.showMessageBox(title, message, buttons[, type])
Shows a message box. Returns a promise that resolves to the text of the selected button.
- arguments
- title
string - message
string - buttons
Array<string> - type
("none" | "info" | "error" | "question" | "warning")(optional)
- title
- returns
Promise<string> - Usage
quark.app.showMessageBox('Select your hero', 'Superman or Batman?', ['Superman', 'Batman'], 'question')
.then((hero)=>{
    if(hero == 'Superman'){
        console.log('Meh!');
    }else {
        console.log('Yuss!');
    }
}).catch((err)=>{
    console.log(err);
});
app.showErrorBox(title, content)
Shows an error box.
- arguments
- title
string - content
string
- title
- returns
void - Usage
quark.app.showErrorBox('Connection Failed!','Failed to connect to board at COM port 5');
app.showOpenDialog([options])
Shows a file/folder open dialog.
- arguments
- options
OpenDialogOptions(optional)
- options
- returns
Promise<{ filePaths: Array<string>, bookmarks: Array<string> }? - Usage
quark.app.showOpenDialog({
    title : 'Open Logs',
    defaultPath : 'C://User/Desktop',
    properties : ['openFile', 'multiSelections']
}).then((result)=>{
    const filePaths = result.filePaths;
    const bookmarks = result.bookmarks;
    console.log(filePaths, bookmarks);
}).catch((err)=>{
    console.log(err);
});
app.showSaveDialog([options])
Shows a save dialog.
- arguments
- options
SaveDialogOptions
- options
- returns
Promise<{ filename: string, bookmark: string }> - Usage
quark.app.showSaveDialog({
     title : 'Open Logs',
    defaultPath : 'C://User/Desktop'
}).then((result)=>{
    const filename = result.fileName;
    const bookmark = result.bookmark;
    console.log(fileName, bookmark);
}).catch((err)=>{
    console.log('user dismissed the dialog');
});
util
Utilitiy methods to quark api.util.createContextMenu(items)
- arguments
- items
Array<MenuItem>
- items
- returns
ContextMenuRef
util.createElementFromHtml(html)
Creates an HTML element from string.
- arguments
- html
string
- html
- returns
Element
util.createFileSystemWatcher(path[, options])
Creates a file system watcher.
- arguments
- path
string | Array<string> - options
WatchOptions(optional)
- path
- returns
Watcher
util.createInputBox()
Creates an Input box
- returns
InputBox
util.createMainMenuItem(label, items[, priority])
Creates a main menu item.
- arguments
- label
string - items
Array<MenuItem>
- label
- returns
MenuRef
util.createOutputChannel(name)
Creates an output channel.
- arguments
- name
string
- name
- returns
OutputChannel
util.createQuickView(name)
Creates a quick view pannel. Similar to the one used by commands.
- arguments
- name
string
- name
- returns
IQuickPick
util.createSnackbar(message[, type, duration])
Creates a snackbar notification.
- arguments
- message
string - type
'danger' | 'success' | 'warning' | 'info' - duration
number
- message
- returns
SnackbarItem<!--
util.createVueWebComponent(name, data, createElement)
Creates a vuejs web component.
- arguments
- name
string - data
Vue.ComponentOptions<any> - createElement
boolean
- name
- returns
undefined | HTMLElement-->
window
Controls for window state of your app.window.blur()
Removes focus from the window.
- returns
void
window.center()
Moves window to the center of the screen.
- returns
void
window.close()
Try to close the window. This has the same effect as a user manually clicking the close button of the window.
- returns
void
window.focus()
Focuses on the window.
- returns
void
window.getBounds()
Returns the position and size of the current window.
- returns
Rectangle
window.getOpacity()
Gets the opacity of the current wondow.
- returns
number
window.hide()
Hides the current window.
- returns
void
window.maximize()
Maximizes the window. This will also show (but not focus) the window if it isn't being displayed already.
- returns
void
window.minimize()
Minimizes the window. On some platforms the minimized window will be shown in the Dock.
- returns
void
window.reload()
Reloads the current windiw.
- returns
void
window.restore()
Restores the window from minimized state to its previous state.
- returns
void
window.setAlwaysOnTop()
Sets whether the window should show always on top of other windows. After setting this, this window will always stay on top of other windows.
- returns
void
window.setBounds(bounds[, animate])
Resizes and moves the window to the supplied bounds. Any properties that are not supplied will default to their current values.
- arguments
- bounds -
Rectangle - animate -
boolean(optional) macOS
- bounds -
- returns
void - Usage
quark.window.setBounds({
    height : 600,
    width : 600,
    x : 0,
    y : 0
});
window.setEnabled([enabled])
Disable or enable the window.
- arguments
- enabled
boolean
- enabled
- returns
void - Usage
quark.window.setEnabled(true);
window.setOpacity(opacity)
Sets the opacity of the window. On Linux does nothing. Value must be between 0-1.
- arguments
- opacity
number
- opacity
- returns
void - Usage
quark.window.setOpacity(0.5);
window.setProgressBar(progress[, mode])
Focuses on the window.
- arguments
- progress
number - mode
('none' | 'normal' | 'indeterminate' | 'error' | 'paused')Windows
- progress
- returns
void
quark.window.setProgressBar(0.3);

//Or for windows
quark.window.setProgressBar(0.4, 'error');
window.isResizable()
Returns whether the window is resizable or not.
- returns
boolean
window.setResizable(resizable)
Sets the window as resizable or not resizable.
- argumants
- resizable
boolean
- resizable
- returns
void
window.show()
Shows and gives focus to the window.
- returns
void
window.unmaximize()
Unmaximizes the window.
- returns
void
window.capturePage(callback)
Captures a snapshot of the whole visible page. Upon completion callback will be called with callback(image). The image is an instance of NativeImage that stores data of the snapshot.
- arguments
- callback
(image : NativeImage) => void
- callback
- returns
void - Usage
quark.window.capturePage((image) => {
    //your code here, example:
    console.log(image);
});
window.executeJavaScript(code)
Evaluates code in page. Returns a promise with the result of the executed code.
- arguments
- code
string
- code
- returns
Promise<any> - Usage
const code = `
    console.log('Hello');
`
quark.window.executeJavaScript(code).then((result)=>{
    console.log(result);
}).catch((err)=>{
    console.log(err)
});
window.getFrameRate()
Returns the frameRate of the window
- returns
void
window.getZoomFactor()
Gets the current zoom factor and returns a promise that resolves to the value of zoom factor.
- returns
Promise<number> - Usage
quark.window.getZoomFactor().then((factor)=>{
    //Your code here; example:
    console.log(factor);
}).catch((err)=>{
    console.log(err)
});
window.getZoomLevel()
Gets the current zoom level and returns a promise that resolves to the value of zoom level.
- returns
Promise<number> - Usage
quark.window.getZoomLevel().then((level)=>{
    //Your code here; example:
    console.log(level);
}).catch((err)=>{
    console.log(err)
});
window.insertCSS(css)
Injects css into the current web page.
- arguments
- css
string
- css
- returns
void - Usage
const css = `
    my-element {
        background-color : red;
    }
`
quark.window.insertCSS(css);
window.setZoomFactor(factor)
Changes the zoom factor to the specified factor. Zoom factor is zoom percent divided by 100, so 300% = 3.0.
- arguments
- factor
number
- factor
- returns
void - Usage
quark.window.setZoomFactor(0.3);
window.setZoomLevel(level)
Changes the zoom level to the specified level. The original size is 0 and each increment above or below represents zooming 20% larger or smaller to default limits of 300% and 50% of original size, respectively. The formula for this is scale := 1.2 ^ level.
- arguments
- level
number
- level
- returns
void - Usage
quark.window.setZoomLevel(0.5);
views
Create and control views of your app.views.createSideView()
Creates a side view.
- returns
ViewProvider
views.createBottomView()
Creates a bottom view.
- returns
ViewProvider
views.createTabsView()
Creates a tabs view.
- returns
ViewProvider
views.sideviewController
views.bottomviewController
views.tabsviewController
commands
Register globally executable commands that trigger an action on invocation.commands.registerCommand(id, handle[, thisArg, label])
Registers a globally executable command.
- arguments
- id
string - handle
Function - thisArg
any(optional) - label
string(optional)
- id
- returns
IKeyBindingRegister - Usage
Registering a command.
quark.commands.registerCommand('my.awesome.command.id', () => {
    console.log('I ran');
});

quark.commands.executeCommand('my.awesome.command.id');
//logs `I ran` to console.
Adding a KeyBinding to the command.
const register = quark.commands.registerCommand('my.awesome.command.id', () => {
    console.log('I ran');
});
register.addKeyBinding('ctrl+i');
//Now pressing the key combination "ctrl+i" will invoke the command.
Passing arguments to the command.
quark.commands.registerCommand('my.awesome.command.id', (label) => {
    console.log(label);
});

quark.commands.executeCommand('my.awesome.command.id', 'I ran');
//logs `I ran` to console.
Adding command to the commands palette.
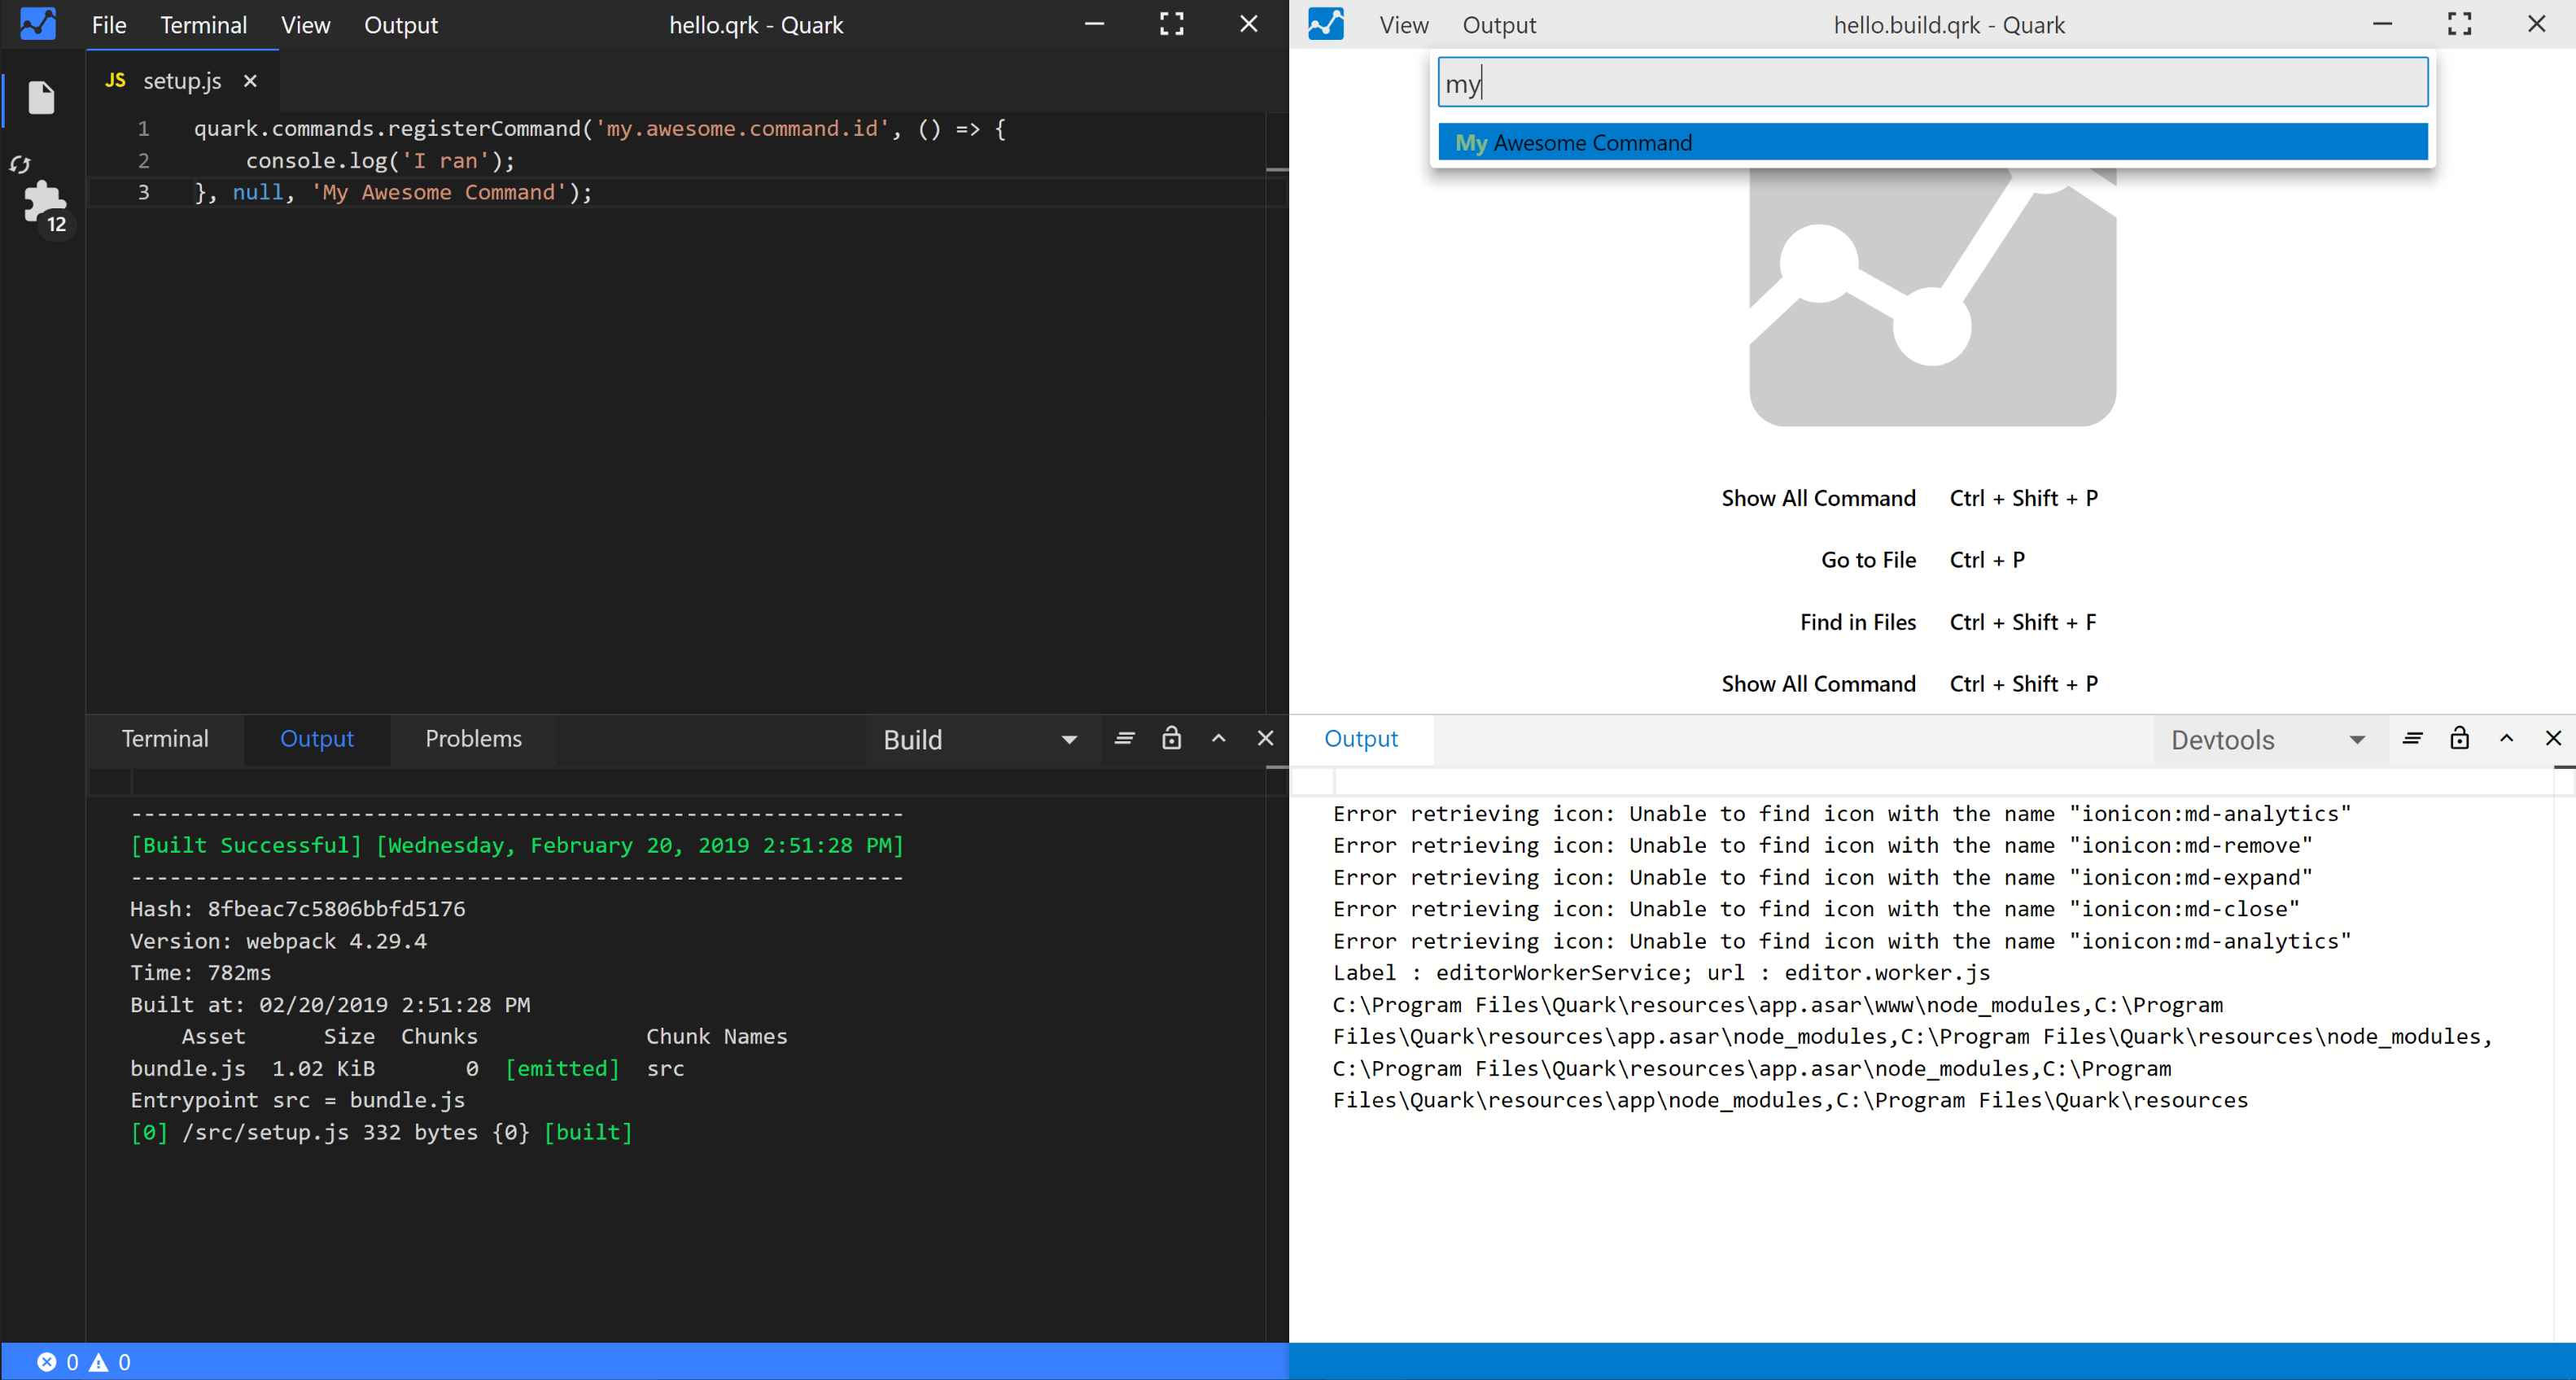
The example below shows how to add a command to the commands palette. The only thing you need to do differently is to provide the label argument to the commands.registerCommand function.
quark.commands.registerCommand('my.awesome.command.id', () => {
    console.log('I ran');
}, null, 'My Awesome Command');
Now the command should be available in the commands palette like so.
commands.executeCommand(id, [...args])
Executes a registered command.
- arguments
- id
string - ...args
any
- id
- returns
void
commands.getCommand(id)
Returns a registered command with the provided id.
- arguments
- id
string
- id
- returns
ICommand|undefined - Usage
//e.g. Getting a command and then disposing it.
const command = quark.commands.getCommand('my.awesome.command.id');
command.dispose();
//unregisters the command
commands.getAllCommands()
Returns an array of all the registered commands.
- returns
Array<ICommand> - Usage
//e.g. filtering all commands registered in commands palette.
const commands = quark.commands.getAllCommands().map((command) => {
    if(command.label) {
        return command;
    }
});
storage
Store datainMemory
Store temporary data in memory while your code is running. As soon as the window is closed, all data is lost. The data may or may not be JSON serializable.
- see MemoryStore
local
Store data locally in an external file. File is created on per project basis. You can only store JSON serializable data.
- see PersistantStore
global
Store data locally in an external file. Common for a system. You can only store JSON serializable data.
- see PersistantStore
clipboard
Perform copy and paste operations on the system clipboard.clipboard.readText()
Returns the text saved in clipboard.
- returns
string
clipboard.writeText(text)
Writes text to clipboard.
- arguments
- text
string
- text
- returns
void
clipboard.readHTML()
Returns the markup saved in clipboard.
- returns
string
clipboard.writeHTML(text)
Writes markup to the clipboard.
- arguments
- text
string
- text
- returns
void
clipboard.clear()
Clears the text saved in clipboard.
- returns
void
icons
Register icons to be used in UI components.icons.registerIcon(icon)
Registers an icon in global icon namespace.
- arguments
- icon
Icon
- icon
- returns
void - Usage
quark.icons.registerIcon({
    name: 'my-custom-icon',
    path: './my-custom-icon.svg'
});

const view = quark.views.createSideView('my-side-view', document.createElement('my-custom-element'));
view.icon = 'my-custom-icon';
view.focus();
icons.registerIcons(icons)
Registers multiple icons in global icon namespace.
- arguments
- icons
Array<Icon>
- icons
- returns
void
icons.registerIconInNamespace(icon, namespace)
Registers an icon under a namespace.
- arguments
- icon
Icon - namespace
string
- icon
- returns
void - Usage
quark.icons.registerIconInNamespace({
    name: 'my-custom-icon',
    path: './my-custom-icon.svg'
}, 'my-namespace');

const view = quark.views.createSideView('my-side-view', document.createElement('my-custom-element'));
view.icon = 'my-namespace:my-custom-icon';
view.focus();
icons.registerIconsInNamespace(icons, namespace)
Registers multiple icons under a namespace.
- arguments
- icons
Array<Icon> - namespace
string
- icons
- returns
void
Tip
Quark comes pre installed with Material icons and Ionicons. You can use them in your views as follows:
/*
 * Using material icons.
 * All material icons are registered under the namespace 'mat'
 */

const view = quark.views.createSideView('my-material-icon-view', document.createElement('my-custom-element'));
view.icon = 'mat:close';

/*
 * Using ionicons.
 * All ionicons are registered under the namespace 'ionicon'
 *
 * Important: You also have to specify the platform of the icon. i.e. 'md-' or 'ios-' before the name of the icon.
 * e.g. 'ionicon:md-close' would work but 'ionicon:close' would not.
 */

const view = quark.views.createSideView('my-ionicon-view', document.createElement('my-custom-element'));
view.icon = 'ionicon:md-close';
Structures
ViewProvider
Methods
dispose()
Removes the view
- returns
void
isVisible()
Returns boolean.
- returns
void
hide()
Hides the view.
- returns
void
show()
Shows the view.
- returns
void
isFocused()
Returns true if the view is focused.
- returns
boolean
blur()
Removes the focus from view and selects previous view.
- returns
boolean
onWillCreateElement()
Removes the focus from view and selects previous view.
- returns
void
onDidCreateElement()
Removes the focus from view and selects previous view.
- returns
void
onDidConnectElement()
Removes the focus from view and selects previous view.
- returns
void
onWillRemoveElement()
Removes the focus from view and selects previous view.
- returns
void
onDidRemoveElement()
Removes the focus from view and selects previous view.
- returns
void
onCanEnterView()
Removes the focus from view and selects previous view.
- returns
Promise<boolean> | boolean
onDidEnterView()
Removes the focus from view and selects previous view.
- returns
void
onCanRemoveView()
Removes the focus from view and selects previous view.
- returns
Promise<boolean> | boolean
onDidRemoveView()
Removes the focus from view and selects previous view.
- returns
void
getProgressBarValue()
Removes the focus from view and selects previous view.
- returns
number | 'indeterminate'
setProgressBar([value])
Removes the focus from view and selects previous view.
- arguments
- value
number
- value
- returns
void
Properties
label
- type
string
element
- type
Element
keepConnected
- type
boolean
busy
- type
boolean
badge
- type
string | number
icon
- type
string
tooltip
- type
string
data
- type
any
actionIcon
- type
string
contextMenu
- type
ContextMenuRef
buttons
- type
Array<ButtonField>
inputField
- type
InputField
selectField
- type
SelectField
TabsviewController
getCurrentView()
Returns the current .
- returns
ViewProvider
getCurrentView()
Returns all registered s.
- returns
Array<ViewProvider>
isNavbarVisible()
Returns boolean.
- returns
boolean
toggleNavbar()
Toggles the navbar.
- returns
void
hideNavbar()
Hides the navbar.
- returns
void
showNavbar()
Shows the navbar.
- returns
void
selectNextView()
Selects the next .
- returns
void
selectPreviousView()
Selects the previous .
- returns
void
triggerUpdate()
Triggers update.
- returns
void
removeView(view)
Removed the view.
- arguments
- view -
ViewProvider
- view -
- returns
void
getViewById(id)
Removed the view.
- arguments
- id -
string
- id -
- returns
void
setView(view)
Removed the view.
- arguments
- view -
ViewProvider
- view -
- returns
void
SideviewController
getCurrentView()
Returns the current .
- returns
ViewProvider
getCurrentView()
Returns all registered s.
- returns
Array<ViewProvider>
isNavbarVisible()
Returns boolean.
- returns
boolean
toggleNavbar()
Toggles the navbar.
- returns
void
hideNavbar()
Hides the navbar.
- returns
void
showNavbar()
Shows the navbar.
- returns
void
selectNextView()
Selects the next .
- returns
void
selectPreviousView()
Selects the previous .
- returns
void
triggerUpdate()
Triggers update.
- returns
void
removeView(view)
Removed the view.
- arguments
- view -
ViewProvider
- view -
- returns
void
getViewById(id)
Removed the view.
- arguments
- id -
string
- id -
- returns
void
setView(view)
Removed the view.
- arguments
- view -
ViewProvider
- view -
- returns
void
isVisible()
Returns boolean
- returns
boolean
toggle()
Toggles view visibility.
- returns
void
hide()
Hides the view.
- returns
void
show()
Shows the view.
- returns
void
maximize()
Maximizes the view.
- returns
void
minimize()
Minimized the view.
- returns
void
BottomviewController
getCurrentView()
Returns the current .
- returns
ViewProvider
getCurrentView()
Returns all registered s.
- returns
Array<ViewProvider>
isNavbarVisible()
Returns boolean.
- returns
boolean
toggleNavbar()
Toggles the navbar.
- returns
void
hideNavbar()
Hides the navbar.
- returns
void
showNavbar()
Shows the navbar.
- returns
void
selectNextView()
Selects the next .
- returns
void
selectPreviousView()
Selects the previous .
- returns
void
triggerUpdate()
Triggers update.
- returns
void
removeView(view)
Removed the view.
- arguments
- view -
ViewProvider
- view -
- returns
void
getViewById(id)
Removed the view.
- arguments
- id -
string
- id -
- returns
void
setView(view)
Removed the view.
- arguments
- view -
ViewProvider
- view -
- returns
void
isVisible()
Returns boolean
- returns
boolean
toggle()
Toggles view visibility.
- returns
void
hide()
Hides the view.
- returns
void
show()
Shows the view.
- returns
void
maximize()
Maximizes the view.
- returns
void
minimize()
Minimized the view.
- returns
void
ButtonField
label
- type
string
handle
- type
Function
icon
- type
string(optional)
ContextMenuRef
Methods
dispose()
Removed the menu and clears the associated resources.
- returns
void
update(menu)
Updates the menu.
- arguments
- menu
Array<MenuItem>
- menu
- returns
void
show(x, y)
Shows the ContextMenu at the specified x and y positions.
- arguments
- x
number - y
number
- x
- returns
void
Properties
items
Menu items.
- type
Array<MenuItem>
ICommand
id
- type
string
handle
- type
Function
thisArg
- type
any(optional)
label
- type
string(optional)
dispose
- type
Function
SnackbarItem
buttons
- type
ISnackbarButton[]
dispose()
- type
Function
duration
- type
number
element
- type
HTMLElement
id
- type
string
message
- type
string
show()
- type
Function - returns
void
type
- type
"danger" | "success" | "warning" | "info"
SnackbarItem
label
- type
string
handle()
- type
Function
icon
- type
string
Icon
name
The name of the icon.
- type
string
path
The path of the icon file.
- type
string
IKeyBindingRegister
addKeyBinding(keybindings[, when])
- arguments
- keybindings -
string | Array<string> - when -
string(optional)
- keybindings -
- returns
void
InputField
placeholder
Placeholder for the select field.
- type
string
currentValue
Current value of the select field. Must be one of the values provided in options array.
- type
Function
isHidden
Controls whether the field is visible or hidden.
- type
boolean
handle
- type
(value?: string) => void
MemoryStore
get(path[, defaultValue])
Gets the property value at path of object. If the resolved value is undefined the defaultValue is used in its place.
- arguments
- path
string - defaultValue
any(optional)
- path
- returns
any
set(path, value)
Sets the value at path of object. If a portion of path doesn’t exist it’s created. Arrays are created for missing index properties while objects are created for all other missing properties.
- arguments
- path
string - value
any
- path
- returns
any
update(path, updater)
This method is like set except that accepts updater to produce the value to set.
- arguments
- path
string - updater
(value) => any
- path
- returns
any
has(path)
Checks if path is a direct property of object.
- arguments
- path
string
- path
- returns
boolean
delete(path)
Deletes the property of the object.
- arguments
- path
string
- path
- returns
void
size()
Gets the size of collection by returning its length for array-like values or the number of own enumerable properties for objects.
- returns
number
MenuItem
label
Label of the menu item.
- type
string
command
Command to execute on click.
- type
string | Function(optional)
children
Children of the menu item.
- type
Array<MenuItem>(optional)
divider
Controls whether to show divider or not.
- type
boolean(optional)
icon
Icon to show at the menu item.
- type
string(optional)
disabled
Icon to show at the menu item.
- type
boolean(optional)
MenuRef
Methods
dispose()
Removed the menu and clears the associated resources.
- returns
void
update(menu)
Updates the menu.
- arguments
- menu
Array<MenuItem>
- menu
- returns
void
Properties
items
Menu items.
- type
Array<MenuItem>
PersistantStore
get(path[, defaultValue])
Gets the property value at path of object. If the resolved value is undefined the defaultValue is used in its place.
- arguments
- path
string - defaultValue
any(optional)
- path
- returns
any
set(path, value)
Sets the value at path of object. If a portion of path doesn’t exist it’s created. Arrays are created for missing index properties while objects are created for all other missing properties.
- arguments
- path
string - value
any
- path
- returns
any
update(path, updater)
This method is like set except that accepts updater to produce the value to set.
- arguments
- path
string - updater
(value) => any
- path
- returns
any
has(path)
Checks if path is a direct property of object.
- arguments
- path
string
- path
- returns
boolean
delete(path)
Deletes the property of the object.
- arguments
- path
string
- path
- returns
void
size
Gets the size of collection by returning its length for array-like values or the number of own enumerable properties for objects.
- returns
number
forceUpdate([, key])
Writes the store's data to the file system.
- arguments
- key
string(optional)
- key
- returns
void
onDidChange(key, callback)
Watches the given key, calling callback on any changes. When a key is first set oldValue will be undefined, and when a key is deleted newValue will be undefined.
- arguments
- key
string - callback
(newValue, oldValue) => void
- key
- returns
void
SelectField
placeholder
Placeholder for the select field.
- type
string
currentValue
Current value of the select field. Must be one of the values provided in options array.
- type
Function
isHidden
Controls whether the field is visible or hidden.
- type
boolean
options
- type
Array<string>
viewOptions
- type
Array<string>
handle
- type
(option?: string) => void
Snippets
Auto updates
All docs on one page.Quark comes pre-built with auto-updates feature. But this feature is only supported in a few distributions.
Auto-updatable distributions
- MacOS: DMG
- Linux: AppImage
- Windows: EXE
Since Quark is currently a beta software, we are shipping updates almost daily. It is highly reccomended that you only download these distributions to get the latest features and bug fixes.
Release channels
We support 2 release channels.
- Insiders release: Insiders has the most recent code pushes and may lead to the occasional broken build. New releases are published almost every other day.
- Stable release: Only stable releases are published on this channel. This channel may be updated once a month.
By default, your release channel is set to Stable. You will need to change this setting to move to the insiders release.
Selecting the release channel
You can select the release channel from settings.## (Settings > General > Auto Updates > Release channel)
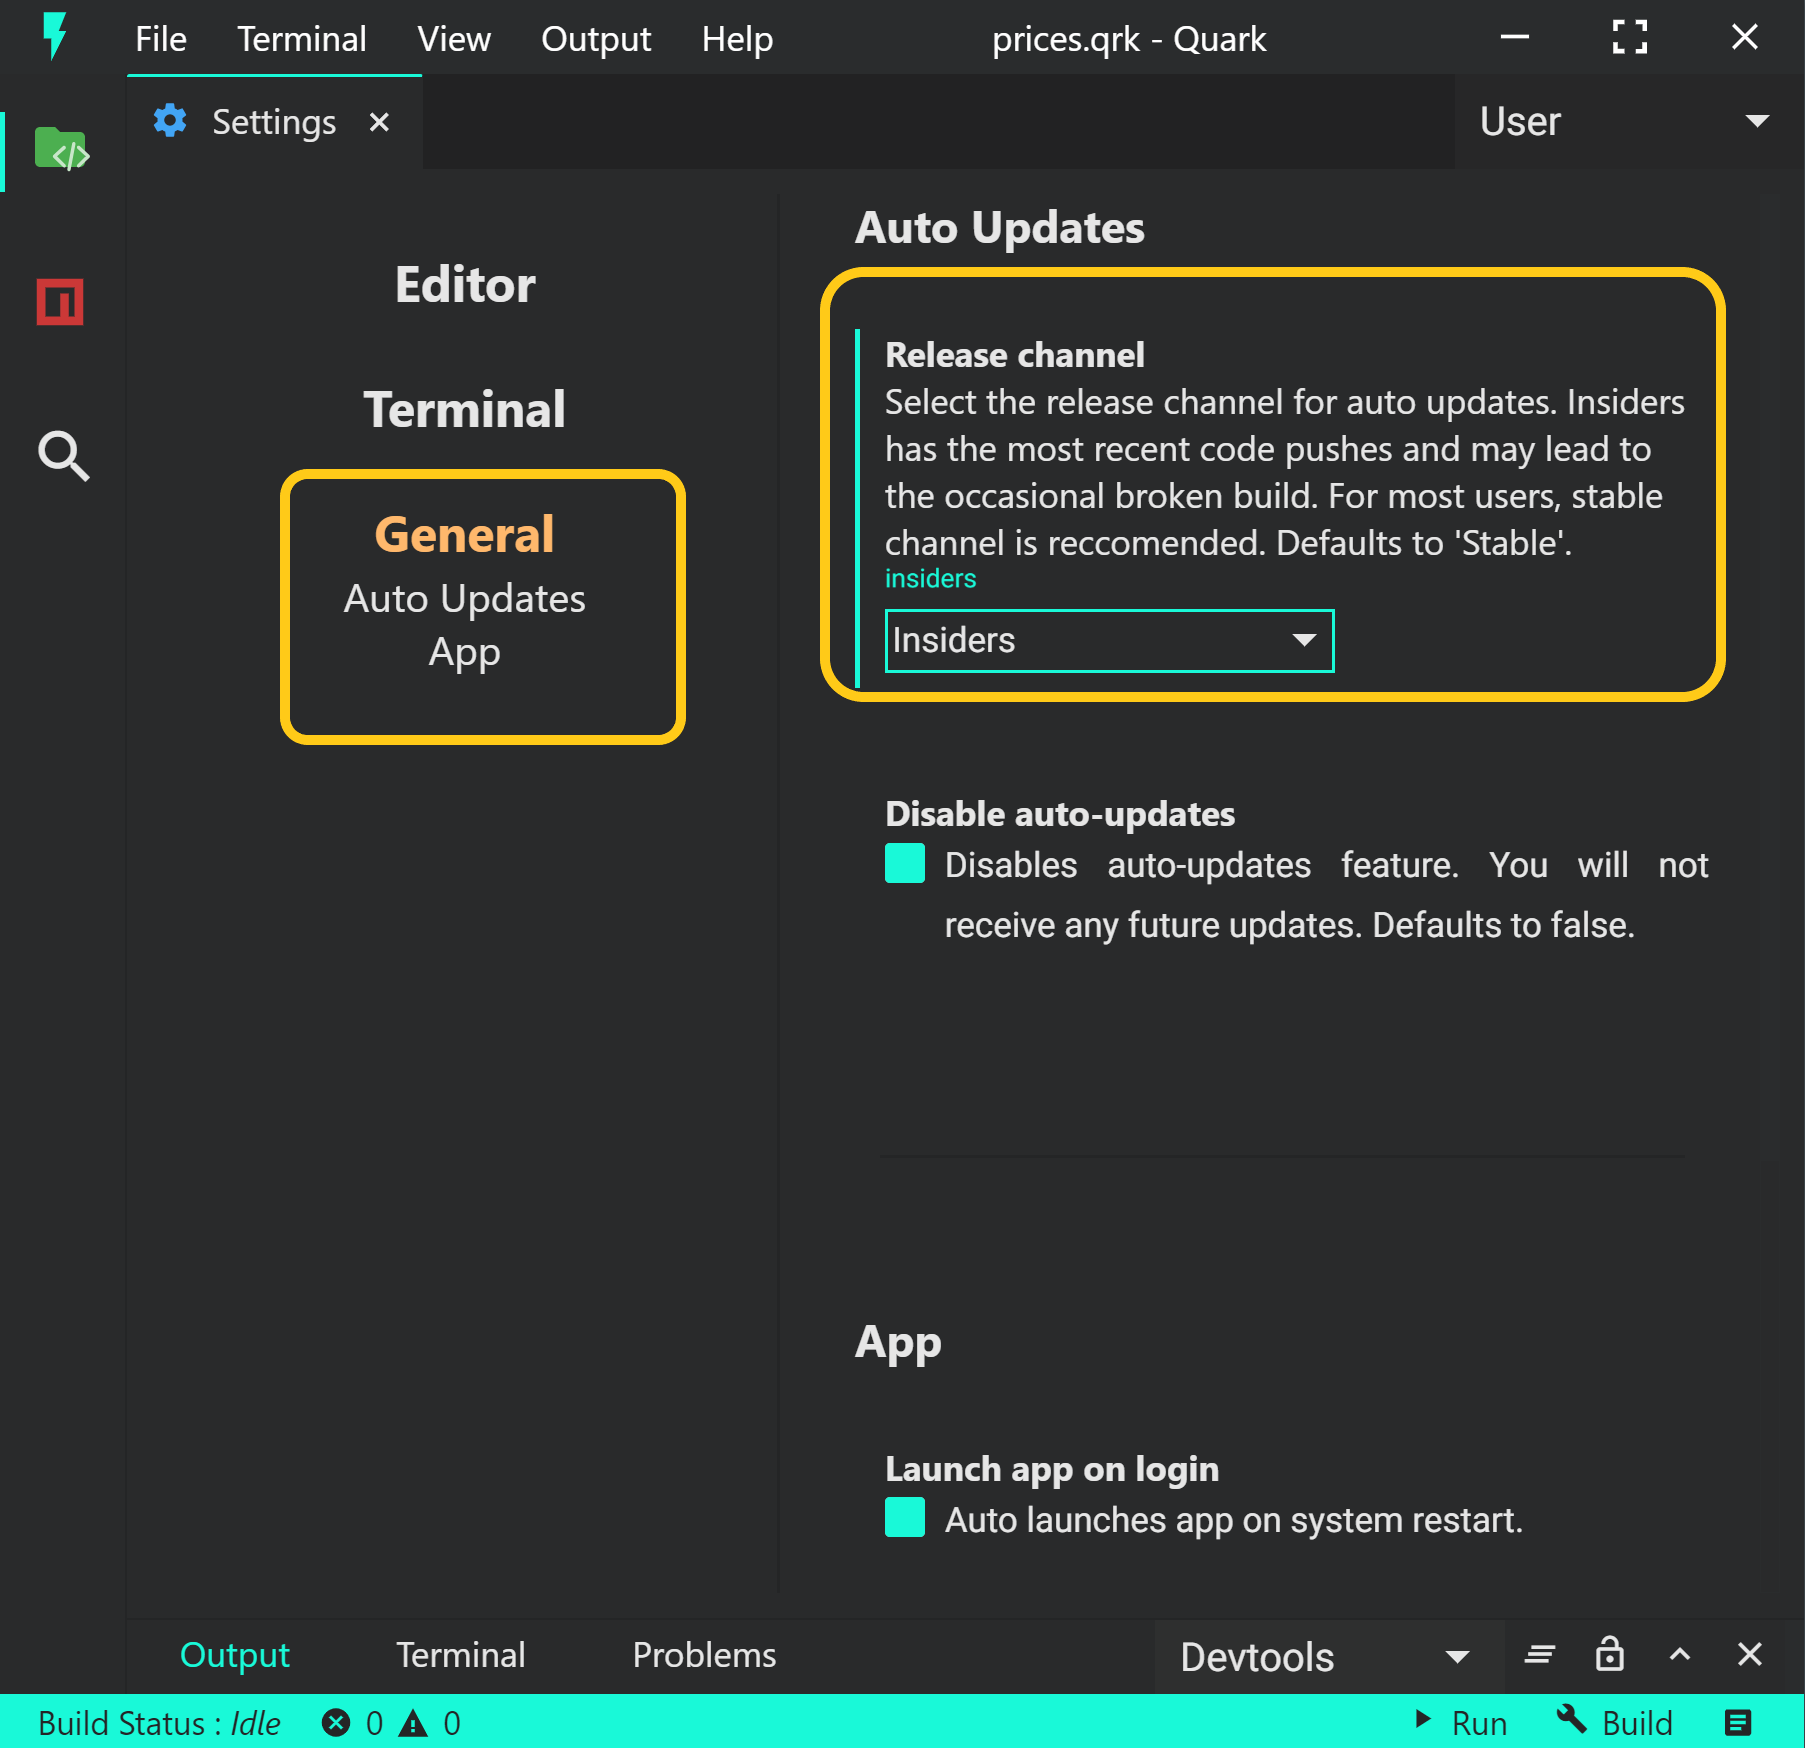
Disabling auto-updates
You can optionally choose to disable auto-updates feature from Settings > General > Auto Updates > Disable auto-updates
Convert existing electron app to a sketch
All docs on one page.####### Write the following code in the entry point of your application. In this case, index.js file.
// index.ts
import * as path from 'path';
import * as fs from 'fs';
import { remote } from 'electron';

quark.views.tabsviewController.hideNavbar();

const indexFilePath = path.resolve(`./${__projectfile}/index.html`);

const view = quark.views.createTabsView('My Electron App', document.createElement('webview'));
view.onDidConnectElement = () => {

    const url = `file://` + indexFilePath;

    let webview: Electron.WebviewTag = view.element as any;
    webview.setAttribute('src', url);
    webview.setAttribute('nodeintegration', '');
    webview.setAttribute('style', "display:flex;height:100%");

    const devtools = quark.util.createOutputChannel('App logs');
    devtools.show();

    webview.getWebContents().on('console-message', (e, level, message, line, sourceId) => {
        devtools.appendLine(message);
    });

    const status = quark.util.createStatusBarItem();
    status.text = 'Toggle dev tools';
    status.show();
    status.command = () => {
        webview.getWebContents().toggleDevTools();
    }
}
view.focus();
####### Build and test the application.
First build the application, and then package the application into the archive format. To pack the application, select Builder: Package command from the command palette.
If the application was packed successfully, test the app by running the command Run: Package.
Configuring build
All docs on one page.####### Create the config file
Create a webpack.config.js file at the root of your project. e.g.
.
├─ setup.js
└─ webpack.config.js
####### Add webpack config Config reference
// webpack.config.js
module.exports = {
    ...
}
Caveats
Quark uses an in-memory file system with webpack. This requires a little patch behind the scenes. The only thing you need to remember is that:-
- The
entrykey must be an object with asrckey. - The value of this key must concat
/src/in front of the absolute file path of the file you want to be the entry point of your application.
Example: If your entry point file is index.ts at the root of your project, your config must look like this-
// .
// ├─ setup.js
// ├─ index.ts
// └─ webpack.config.js
{
    ...
    "entry": {
        "src" : "/src/index.ts"
    }
}
Example: If your entry point file is index.ts nested inside of a folder (view), your config must look like this-
// .
// ├── view
// │   └── index.ts
// ├── setup.js
// └── webpack.config.js
{
    ...
    "entry": {
        "src" : "/src/view/index.ts"
    }
}
Releases
Release Notes
Version: Quark-v0.6.x
Quark 0.6.2 - September 29, 2019
Minor Changes:
- 🚑 Fixed angular-split issue
🐞 Bug Fixes:
- 🚑 Fixed menubar showing issue on landing page
- Enabled webview tag
🚀 Dependencies:
- ⬆️ Updated:
@babel/core@^7.6.2(Previous: v^7.5.5) - ⬆️ Updated:
@babel/plugin-proposal-object-rest-spread@^7.6.2(Previous: v^7.5.5) - ⬆️ Updated:
@babel/preset-env@^7.6.2(Previous: v^7.5.5) - ⬆️ Updated:
@babel/preset-typescript@^7.6.0(Previous: v^7.3.3) - ⬆️ Updated:
electron-log@^3.0.8(Previous: v^3.0.7) - ⬆️ Updated:
node-pty@^0.9.0-beta26(Previous: v^0.8.1) - ⬆️ Updated:
npm@^6.11.3(Previous: v^6.11.2) - ⬆️ Updated:
react@^16.10.1(Previous: v^16.9.0) - ⬆️ Updated:
react-dom@^16.10.1(Previous: v^16.9.0) - ⬆️ Updated:
serialport@^8.0.2(Previous: v^7.1.5) - ⬆️ Updated:
styled-components@^4.4.0(Previous: v^4.3.2) - ⬆️ Updated:
typescript@^3.6.3(Previous: v^3.6.2) - ⬆️ Updated:
webpack@^4.41.0(Previous: v^4.39.3) - ⬆️ Updated:
electron@^6.0.10(Previous: v^4.2.10) - ⬆️ Updated:
electron-builder@^21.2.0(Previous: v^20.44.4) - Removed:
johnny-five@^1.3.0
See SHA-512 Hashes
Quark 0.6.1 - September 19, 2019
This version was never released in the stable channel because the insiders release was found to have major bugs.
💔 Breaking:
- Removed johnny-file library
Major Changes:
- ⬆️ Updated electron from version 4 to version 6
🚀 Dependencies:
- ⬆️ Updated:
@babel/core@^7.6.0(Previous: v^7.5.5) - ⬆️ Updated:
@babel/preset-env@^7.6.0(Previous: v^7.5.5) - ⬆️ Updated:
@babel/preset-typescript@^7.6.0(Previous: v^7.3.3) - ⬆️ Updated:
electron-log@^3.0.8(Previous: v^3.0.7) - ⬆️ Updated:
node-pty@^0.9.0-beta26(Previous: v^0.8.1) - ⬆️ Updated:
npm@^6.11.3(Previous: v^6.11.2) - ⬆️ Updated:
serialport@^8.0.1(Previous: v^7.1.5) - ⬆️ Updated:
typescript@^3.6.3(Previous: v^3.6.2) - ⬆️ Updated:
webpack@^4.40.2(Previous: v^4.39.3) - ⬆️ Updated:
electron@^6.0.10(Previous: v^4.2.10) - ⬆️ Updated:
electron-builder@^21.2.0(Previous: v^20.44.4) - Removed:
johnny-five@^1.3.0
See SHA-512 Hashes
Quark 0.6.0 - August 30, 2019
Other changes:
- Dependency updates
🚀 Dependencies:
- ⬆️ Updated:
chokidar@^2.1.8(Previous: v^2.1.6) - ⬆️ Updated:
npm@^6.11.2(Previous: v^6.10.3) - ⬆️ Updated:
stylus@^0.54.7(Previous: v^0.54.6) - ⬆️ Updated:
typescript@^3.6.2(Previous: v^3.5.3) - ⬆️ Updated:
webpack@^4.39.3(Previous: v^4.39.2) - ⬆️ Updated:
webpack-merge@^4.2.2(Previous: v^4.2.1) - ⬆️ Updated:
electron@^4.2.10(Previous: v^4.2.9)
See SHA-512 Hashes
Release Notes
Version: Quark-v0.5.x
Quark 0.5.8 - August 21, 2019
🐞 Bug Fixes:
- 🚑 Fixed MacOS app notarization bug.
Other changes:
- Dependency updates.
🚀 Dependencies:
- ⬆️ Updated:
electron-log@^3.0.7(Previous: v^3.0.5) - ⬆️ Updated:
johnny-five@^1.3.0(Previous: v^1.2.0) - ⬆️ Updated:
markdown-loader@^5.1.0(Previous: v^5.0.0) - ⬆️ Updated:
npm@^6.10.3(Previous: v^6.10.2) - ⬆️ Updated:
react@^16.9.0(Previous: v^16.8.6) - ⬆️ Updated:
react-dom@^16.9.0(Previous: v^16.8.6) - ⬆️ Updated:
stylus@^0.54.6(Previous: v^0.54.5) - ⬆️ Updated:
uuid@^3.3.3(Previous: v^3.3.2) - ⬆️ Updated:
webpack@^4.39.2(Previous: v^4.38.0) - ⬆️ Updated:
electron@^4.2.9(Previous: v^4.2.8)
See SHA-512 Hashes
Quark 0.5.7 - July 29, 2019
Minor Changes:
- Mainly dependency updates.
🚀 Dependencies:
- ⬆️ Updated:
@babel/core@^7.5.5(Previous: v^7.5.4) - ⬆️ Updated:
@babel/plugin-proposal-class-properties@^7.5.5(Previous: v^7.5.0) - ⬆️ Updated:
@babel/plugin-proposal-object-rest-spread@^7.5.5(Previous: v^7.5.4) - ⬆️ Updated:
@babel/preset-env@^7.5.5(Previous: v^7.5.4) - ⬆️ Updated:
electron-updater@^4.1.2(Previous: v^4.0.14) - ⬆️ Updated:
johnny-five@^1.2.0(Previous: v^1.1.0) - ⬆️ Updated:
npm@^6.10.2(Previous: v^6.10.0) - ⬆️ Updated:
vue-loader@^15.7.1(Previous: v^15.7.0) - ⬆️ Updated:
webpack@^4.38.0(Previous: v^4.35.3) - ⬆️ Updated:
electron@^4.2.8(Previous: v^4.2.6)
See SHA-512 Hashes
Quark 0.5.6 - July 22, 2019
Minor Changes:
- Added: Telemetry
- Added: Telemetry settings and privacy settings
🚀 Dependencies:
- Added:
uuid@^3.3.2
See SHA-512 Hashes
Quark 0.5.5 - July 19, 2019
🎉 Features:
- Added MacOS builds (.dmg and .zip).
🐞 Bug Fixes:
- 🚑 Fixed: commands were getting removed from quickView on opening files.
🚀 Dependencies:
- Added:
electron-notarize@^0.1.1
See SHA-512 Hashes
Quark 0.5.4 - July 14, 2019
This version was never released in the stable channel because the insiders release was found to have major bugs.
🐞 Bug Fixes:
- Commands were getting removed from quick view on opening editor.
See SHA-512 Hashes
Quark 0.5.3 - July 11, 2019
This version was never released in the stable channel because the insiders release was found to have major bugs.
🐞 Bug Fixes:
- Removed auto-launcher. Was not respecting user input.
See SHA-512 Hashes
Quark 0.5.2 - July 11, 2019
Minor Changes:
- Mainly dependency updates.
🚀 Dependencies:
- ⬆️ Updated:
@babel/core@^7.5.4(Previous: v^7.4.5) - ⬆️ Updated:
@babel/plugin-proposal-class-properties@^7.5.0(Previous: v^7.4.4) - ⬆️ Updated:
@babel/plugin-proposal-object-rest-spread@^7.5.4(Previous: v^7.4.4) - ⬆️ Updated:
@babel/preset-env@^7.5.4(Previous: v^7.4.5) - ⬆️ Updated:
electron-updater@^4.0.14(Previous: v^4.0.6) - ⬆️ Updated:
fs-extra@^8.1.0(Previous: v^8.0.1) - ⬆️ Updated:
npm@^6.10.0(Previous: v^6.9.2) - ⬆️ Updated:
typescript@^3.5.3(Previous: v^3.5.2) - ⬆️ Updated:
webpack@^4.35.3(Previous: v^4.35.0) - ⬆️ Updated:
electron@^4.2.6(Previous: v^4.2.5)
See SHA-512 Hashes
Quark 0.5.1 - July 8, 2019
🐞 Bug Fixes:
- 🚑 Fixed: Editor executing paste command twice.
- 🚑 Fixed: command not getting removed from command Palette on dispose issue.
💔 Breaking:
- Removed:
keyBindingsnamespace from global quark object.
🎉 Features:
- Added:
addKeybindingConditionfunction incommandnamespace
See SHA-512 Hashes
Quark 0.5.0 - July 3, 2019
🐞 Bug Fixes:
- 🚑 Fixed: Context menu not updating on language change.
- 🚑 Fixed: Keybindings not getting removed when associated command is disposed.
- 🚑 Fixed: Keybindings triggers random actions inside monaco-editor issue.
- 🚑 Fixed: ASAR packager issue. (cannot pack single file)
Other changes:
- New files created are automatically opened in the editor.
- Editor is now automatically focused when file is opened.
- Added select-next and select-previous tabs bindings.
💔 Breaking:
- Removed:
createVueWebComponentmethod from quark.util object.
See SHA-512 Hashes
Release Notes
Version: Quark-v0.4.x
Quark 0.4.8 - June 28, 2019
🐞 Bug Fixes:
- 🚑 Fixed asar packager build failing error.
🚀 Dependencies:
- ⬆️ Updated:
npm@^6.9.2(Previous: v^6.9.0) - ⬆️ Updated:
styled-components@^4.3.2(Previous: v^4.2.0) - ⬆️ Updated:
webpack@^4.35.0(Previous: v^4.34.0) - ⬆️ Updated:
electron@^4.2.5(Previous: v^4.2.4) - ⬆️ Updated:
electron-builder@^20.44.4(Previous: v^20.41.0)
See SHA-512 Hashes
Quark 0.4.7 - June 27, 2019
🐞 Bug Fixes:
- 🚑 Fixed file change on open issue. (File used to change just by opening and viewing contents).
- 🚑 Fixed "AppMainProcessData" data-structure.
See SHA-512 Hashes
Quark 0.4.6 - June 25, 2019
🎉 Features:
- Added github releases.
See SHA-512 Hashes
Quark 0.4.5 - June 25, 2019
🐞 Bug Fixes:
- 🚑 Fixed 'leaveAppRunningOnWindowClose' and 'launchAppOnLogin' settings bug. (Changing settings did not changed behaviour).
See SHA-512 Hashes
Quark 0.4.4 - June 24, 2019
🐞 Bug Fixes:
- Auto updates not working for insiders release. (Change in settings key from '🎉 Features' to 'general' caused the bug.)
See SHA-512 Hashes
Quark 0.4.3 - (Release skipped)
This version was never released in the stable channel because the insiders release was found to have major bugs.
Quark 0.4.2 - (Release skipped)
This version was never released in the stable channel because the insiders release was found to have major bugs.
Quark 0.4.1 - June 22, 2019
🐞 Bug Fixes:
- 🚑 Fixed tray icon missing error.
- 🚑 Fixed third-party-notice missing error.
See SHA-512 Hashes
Quark 0.4.0 - (Release skipped)
This version was never released in the stable channel because the insiders release was found to have major bugs.
Release Notes
Version: Quark-v0.3.x
Quark 0.3.9 - June 17, 2019
🐞 Bug Fixes:
- 🚑 Fixed drag not working issue. (from dependency angular-split).
See SHA-512 Hashes
Quark 0.3.8 - (Release skipped)
This version was never released in the stable channel because the insiders release was found to have major bugs.
Quark 0.3.7 - June 15, 2019
🎉 Features
- Added clipboard readHTML and writeHTML functions.
Other changes
- ⬆️ Updated test scripts.
- ⬆️ Updated default runtime theme.
See SHA-512 Hashes
Quark 0.3.6 - June 15, 2019
🎉 Features
- 🚑 Fixed textmate-tokens issue. TMThemes are not working properly #5##
See SHA-512 Hashes
Quark 0.3.5 - June 15, 2019
🎉 Features
- Removed window on-did-load handle. Window is now shown open by default.
🚀 Dependencies:
- ⬆️ Updated:
electron@^4.2.4(Previous: v4.1.3)
See SHA-512 Hashes
Quark 0.3.4 - June 14, 2019
🐞 Bug Fixes:
- 🚑 Fixed allow downgrade bug.
See SHA-512 Hashes
Quark 0.3.3 - June 14, 2019
Other changes
- Partially added crash reporter.
- Dependency updates.
🚀 Dependencies:
- ⬆️ Updated:
typescript@^3.5.2(Previous: v^3.4.5) - ⬆️ Updated:
webpack@^4.34.0(Previous: v^4.32.2)
See SHA-512 Hashes
Quark 0.3.2 - June 14, 2019
Other changes
- removed quit and install dialog on auto-update.
🎉 Features
- added auto-update settings selector in view.
See SHA-512 Hashes
Quark 0.3.1 - June 14, 2019
Other changes
- Testing auto-updates for cloud-releaes.
🚀 Dependencies:
- Removed:
electron-builder-squirrel-windows@^20.42.0
See SHA-512 Hashes
Quark 0.3.0 - June 14, 2019
🐞 Bug Fixes:
- 🚑 Fixed slow devtools open and reload issue.
Other changes
- added branch master-all.
- added cloudflare CDN in front of release channel.
- First fully cloud-built release. 💃 💃
💔 Breaking:
- old auto-updates will stop working.
🚀 Dependencies:
- ⬆️ Updated:
electron-store@^3.3.0(Previous: v^3.2.0) - ⬆️ Updated:
[email protected](Previous: v^4.2.2)
See SHA-512 Hashes
Release Notes
Version: Quark-v0.2.x
Quark 0.2.17 - June 8, 2019
🎉 Features
- Added recently-opened file menu item.
- Added inbuild e2e tests. 😭 (finally)
- Running tests on travis-ci and appveyor.
- Partially added firebase-user console.
See SHA-512 Hashes
Quark 0.2.16 - May 26, 2019
🐞 Bug Fixes:
- 🚑 Fixed output-channel bug.
Other changes
- Changes @squirtle namespace to @quarkjs.
- Removed p5.js package.
🚀 Dependencies:
- ⬆️ Updated:
[email protected](Previous: v4.31.0) - ⬆️ Updated:
[email protected](Previous: v6.8.0) - ⬆️ Updated:
[email protected](Previous: v4.2.1) - ⬆️ Updated:
[email protected](Previous: v20.40.2) - ⬆️ Updated:
[email protected](Previous: v20.41.0) - ⬆️ Updated:
[email protected](Previous: v2.1.5) - Added:
@quarkjs/api@file - ⬆️ Updated:
@babel/[email protected](Previous: v7.4.4) - ⬆️ Updated:
@babel/[email protected](Previous: v7.4.4) - Removed:
[email protected] - Removed:
@squirtle/api@file
See SHA-512 Hashes
Quark 0.2.15 - May 23, 2019
🐞 Bug Fixes:
- 🚑 Fixed snippets default import error.
- 🚑 Fixed output-channel settings error.
See SHA-512 Hashes
Quark 0.2.14 - May 19, 2019
🐞 Bug Fixes:
- Wrong config.entry file name (data type) caused window to crash.
See SHA-512 Hashes
Quark 0.2.13 - May 15, 2019
Minor changes
- ⬆️ Updated snippets to dynamic imports.
- Removed old definition providers.
- Dependency update release.
🚀 Dependencies:
- ⬆️ Updated:
[email protected](Previous: v4.30.0) - ⬆️ Updated:
[email protected](Previous: v3.3.3333) - ⬆️ Updated:
[email protected](Previous: v5.3.3) - ⬆️ Updated:
[email protected](Previous: v7.1.4) - ⬆️ Updated:
[email protected](Previous: v4.1.3) - ⬆️ Updated:
[email protected](Previous: v20.39.0) - ⬆️ Updated:
[email protected](Previous: v20.40.0) - ⬆️ Updated:
[email protected](Previous: v8.0.5) - ⬆️ Updated:
@babel/[email protected](Previous: v7.4.3) - ⬆️ Updated:
@babel/[email protected](Previous: v7.4.3)
See SHA-512 Hashes
Quark 0.2.12 - May 15, 2019
Minor changes
- ⬆️ Updated monaco-editor version to 0.15.6.
- Removed emmet css.
- Implemented new monaco-editor context menu.
- Implemented new definition/reference provider.
🚀 Dependencies:
- ⬆️ Updated:
[email protected](Previous: v1.0.0)
See SHA-512 Hashes
Quark 0.2.11 - May 13, 2019
🐞 Bug Fixes:
- 🚑 Fixed html-emmet bug.
Other changes
- Removed p5.js due to license issues.
🎉 Features
- Added path intellisence.
- Added icons in suggest-widget.
- Added and tested eslint. Working out on use-cases.
- Added text-to-worker method in util.
🚀 Dependencies:
- Added:
[email protected] - Added:
[email protected] - Added:
@babel/[email protected]
See SHA-512 Hashes
Quark 0.2.10 - May 9, 2019
🐞 Bug Fixes:
- 🚑 Fixed app.secondInstance new browserWindow issue. (Needs more testing)
Other changes
- Added close dialog on browserWindow fail.
See SHA-512 Hashes
Quark 0.2.9 - May 9, 2019
🎉 Features
- Implemented asar packager and runtime.
See SHA-512 Hashes
Quark 0.2.8 - May 9, 2019
🐞 Bug Fixes:
- 🚑 Fixed 'main file path' null error in auto-colpletion.
- Replaced spawn with fork in npm install script.
- 🚑 Fixed imports from relative paths.
🎉 Features
- partially implemented asar packager in backend.
Other changes
- New project now starts in a folder.
See SHA-512 Hashes
Quark 0.2.7 - May 4, 2019
🐞 Bug Fixes:
- Re-uploaded code signed binary.
See SHA-512 Hashes
Quark 0.2.6 - May 3, 2019
🎉 Features
- Added react-styled-components.
- Added partial typescript support.
- Added find and replace component.
- Added react snippets.
- Added textmate grammar for scss and json.
- Added vscode-monaco theme converter.
- Added electron, one-dark theme.
- ⬆️ Updated tmLanguage definitions.
Other changes
- Changed webpack default mode from 'production' to 'development'.
🚀 Dependencies:
- Added:
[email protected] - Added:
[email protected] - ⬆️ Updated:
[email protected](Previous: vgithub) - Added:
@babel/[email protected] - Added:
@babel/[email protected] - Removed:
[email protected] - Removed:
[email protected]
See SHA-512 Hashes
Quark 0.2.5 - April 29, 2019
🎉 Features
- added material theme icons.
- added recent file sorting in file explorer.
- added recent file sorting in quick open file.
🐞 Bug Fixes:
- 🚑 Fixed onDidRemoveView handle.
- 🚑 Fixed file rename handle css.
See SHA-512 Hashes
Quark 0.2.4 - April 28, 2019
🎉 Features:
- Added emmet through emmet-monaco-es dependency.
- Added type definition support for in-memory files.
🐞 Bug Fixes:
- 🚑 Fixed react's
regeneratorRuntime not definederror.
Minor Changes:
- 🚑 Fixed output channel theme issue.
- Terminal theme now borrows colors from global css variables.
🚀 Dependencies:
- Added:
@babel/[email protected]
See SHA-512 Hashes
Quark 0.2.3 - April 27, 2019
🎉 Features:
- Added textmate for better syntax highlighting.
- Added monokai and one dark theme.
🐞 Bug Fixes:
- 🚑 Fixed settings scope bug.Workspace settings now take precedence over global settings.
- 🚑 Fixed persistant store onDidChange() method. Now using fs.watcher to detect file changes.
- 🚑 Fixed window crash while adding extra libs to an opened editor.
- 🚑 Fixed window state restore handle.
See SHA-512 Hashes
Quark 0.2.2 - April 25, 2019
🎉 Features:
- Added restore view state snackbar.
- ⬆️ Updated monaco addExtraLibs scripts.
🐞 Bug Fixes:
- 🚑 Fixed snackbar.dispose (not working) bug.
🚀 Dependencies:
- Added:
[email protected]
See SHA-512 Hashes
Quark 0.2.1 - April 23, 2019
Minor Changes:
- Adding element in view.createView* methods now optional.
- ⬆️ Updated landing page.
- ⬆️ Updated npm install component script.
🎉 Features:
- Added support for jsx.
- Added bable-loader presets for react.
- Added markdown support with markdown-loader.
- Added support for types definition in project directory.
🐞 Bug Fixes:
- 🚑 Fixed missing bable-presets path error.
- Downgraded electron version to 4.1.3.
🚀 Dependencies:
- Added:
[email protected] - Added:
[email protected] - Added:
[email protected] - Added:
[email protected] - ⬆️ Updated:
[email protected](Previous: v4.1.4) - Added:
@babel/[email protected]
See SHA-512 Hashes
Quark 0.2.0 - April 22, 2019
Minor Changes:
- ⬆️ Updated angular version in template.
- Major dependency updates in build.
🚀 Dependencies:
- ⬆️ Updated:
[email protected](Previous: v4.29.6) - ⬆️ Updated:
[email protected](Previous: v2.6.8) - ⬆️ Updated:
[email protected](Previous: v2.6.8) - ⬆️ Updated:
[email protected](Previous: v0.7.3) - ⬆️ Updated:
[email protected](Previous: v0.7.8) - ⬆️ Updated:
[email protected](Previous: v0.15.0) - ⬆️ Updated:
[email protected](Previous: v4.10.2) - ⬆️ Updated:
[email protected](Previous: v4.1.3) - ⬆️ Updated:
[email protected](Previous: v2.0.0) - ⬆️ Updated:
[email protected](Previous: v3.0.1) - ⬆️ Updated:
[email protected](Previous: v2.1.0) - ⬆️ Updated:
[email protected](Previous: v2.1.2) - ⬆️ Updated:
[email protected](Previous: v2.7.3) - ⬆️ Updated:
[email protected](Previous: v3.0.0) - ⬆️ Updated:
@babel/[email protected](Previous: v7.3.4)
See SHA-512 Hashes
Release Notes
Version: Quark-v0.1.x
Quark 0.1.19 - April 20, 2019
Minor Changes:
- 🚑 Fixed windows nsis installer issue.
- Added builds for *.tar.gz, *.deb and *.zip
- Added shasum check table
See SHA-512 Hashes
Libraries
Introduction
All docs on one page.Using existing libraries
Quark comes pre-installed with a few libraries. You can check which libraries are pre-installed by going to
Help > View Installed Libraries from the main menu.
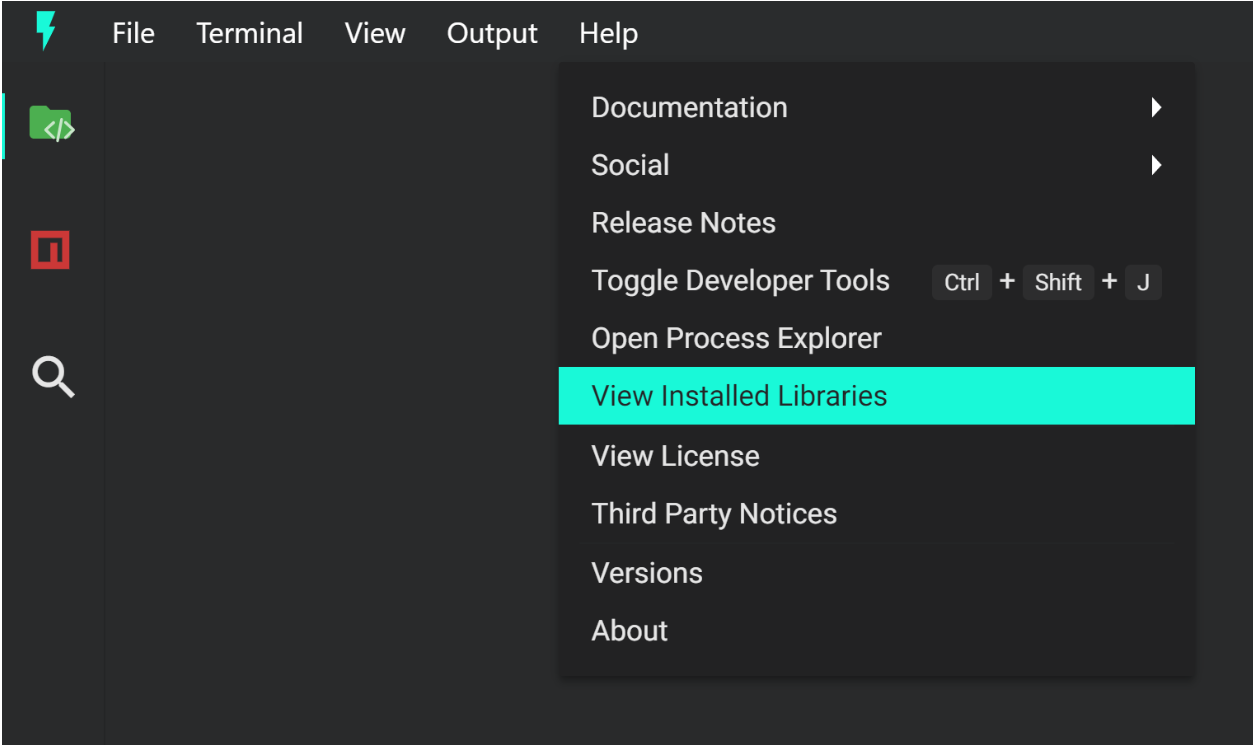
This will open a dialog listing all the pre-installed libraries.
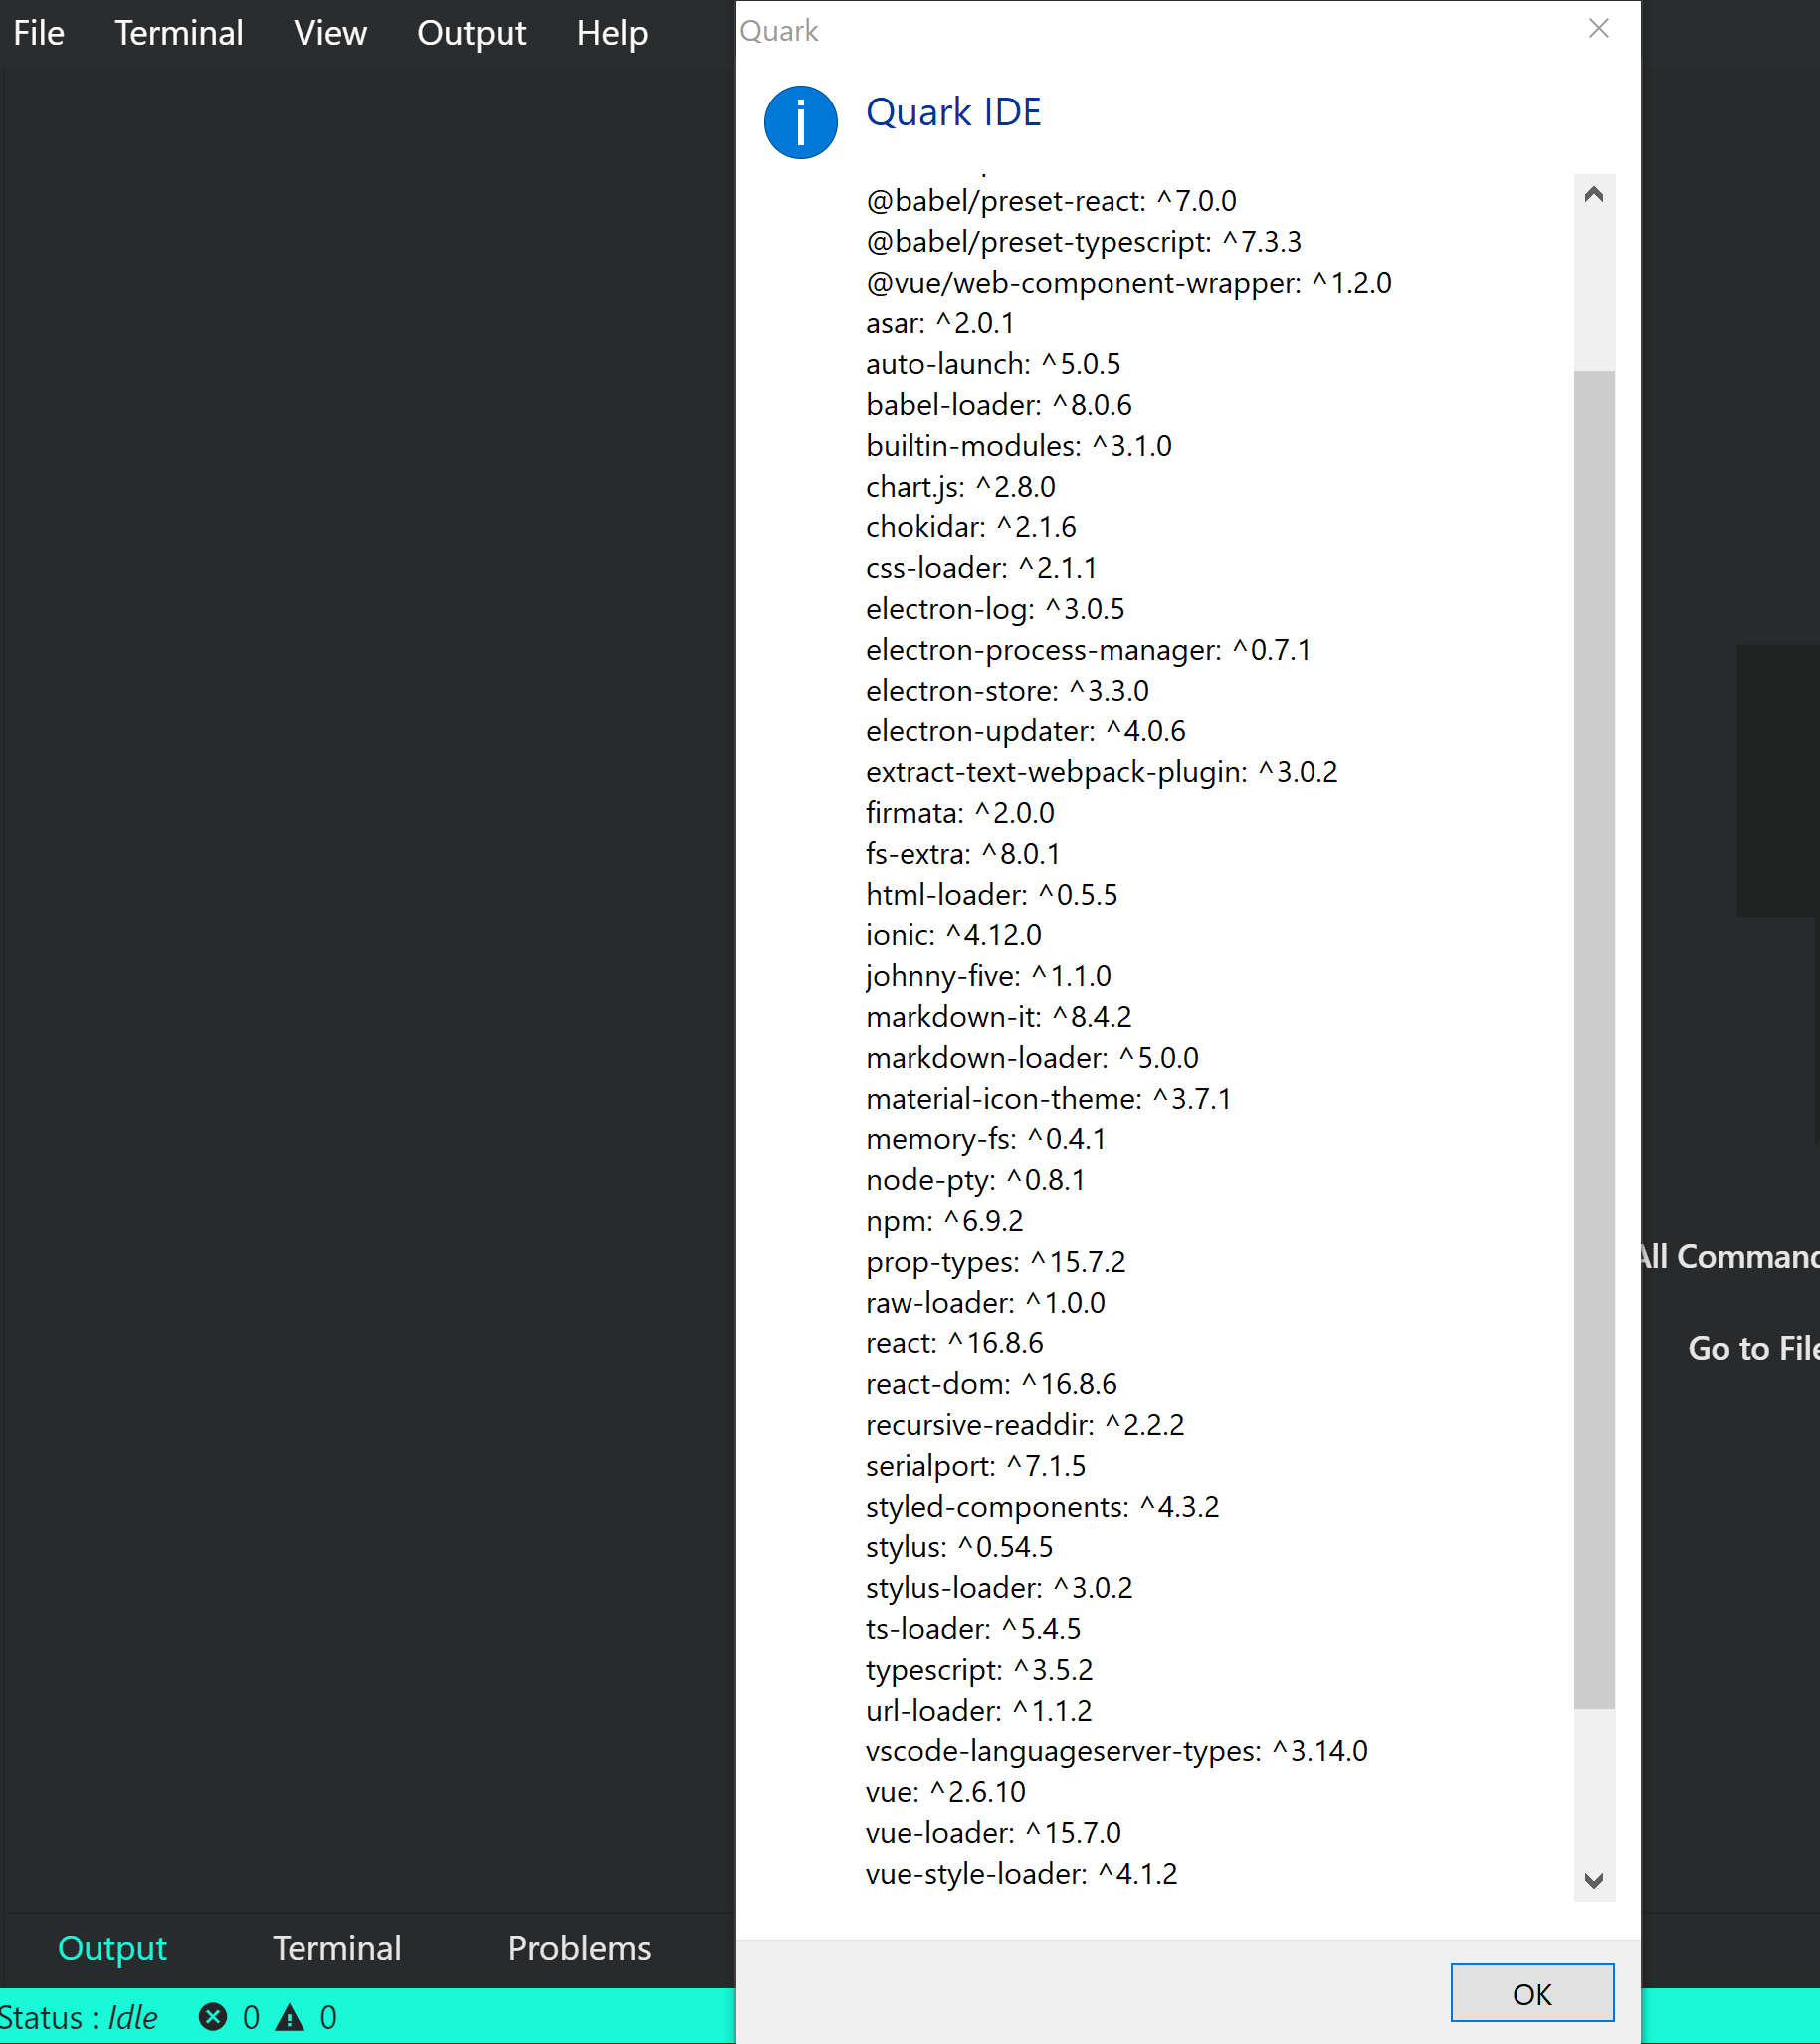
Some of these libraries are used internally by the software, some of these libraries are proxied and exposed as an API, and some are used by the build system. Nonetheless all of them can be used from your project. Find out specific tutorials of using some of those libraries here.
Installing new libraries
Once you are comfortable with the Quark software and using the built-in functions/features, you may want to extend the ability of your project with additional libraries.
####### Using the built-in npm client
To install a new library in your project you can use the built-in npm client. Click on the npm logo in the sideview to open the client, and search for the library you want to use.
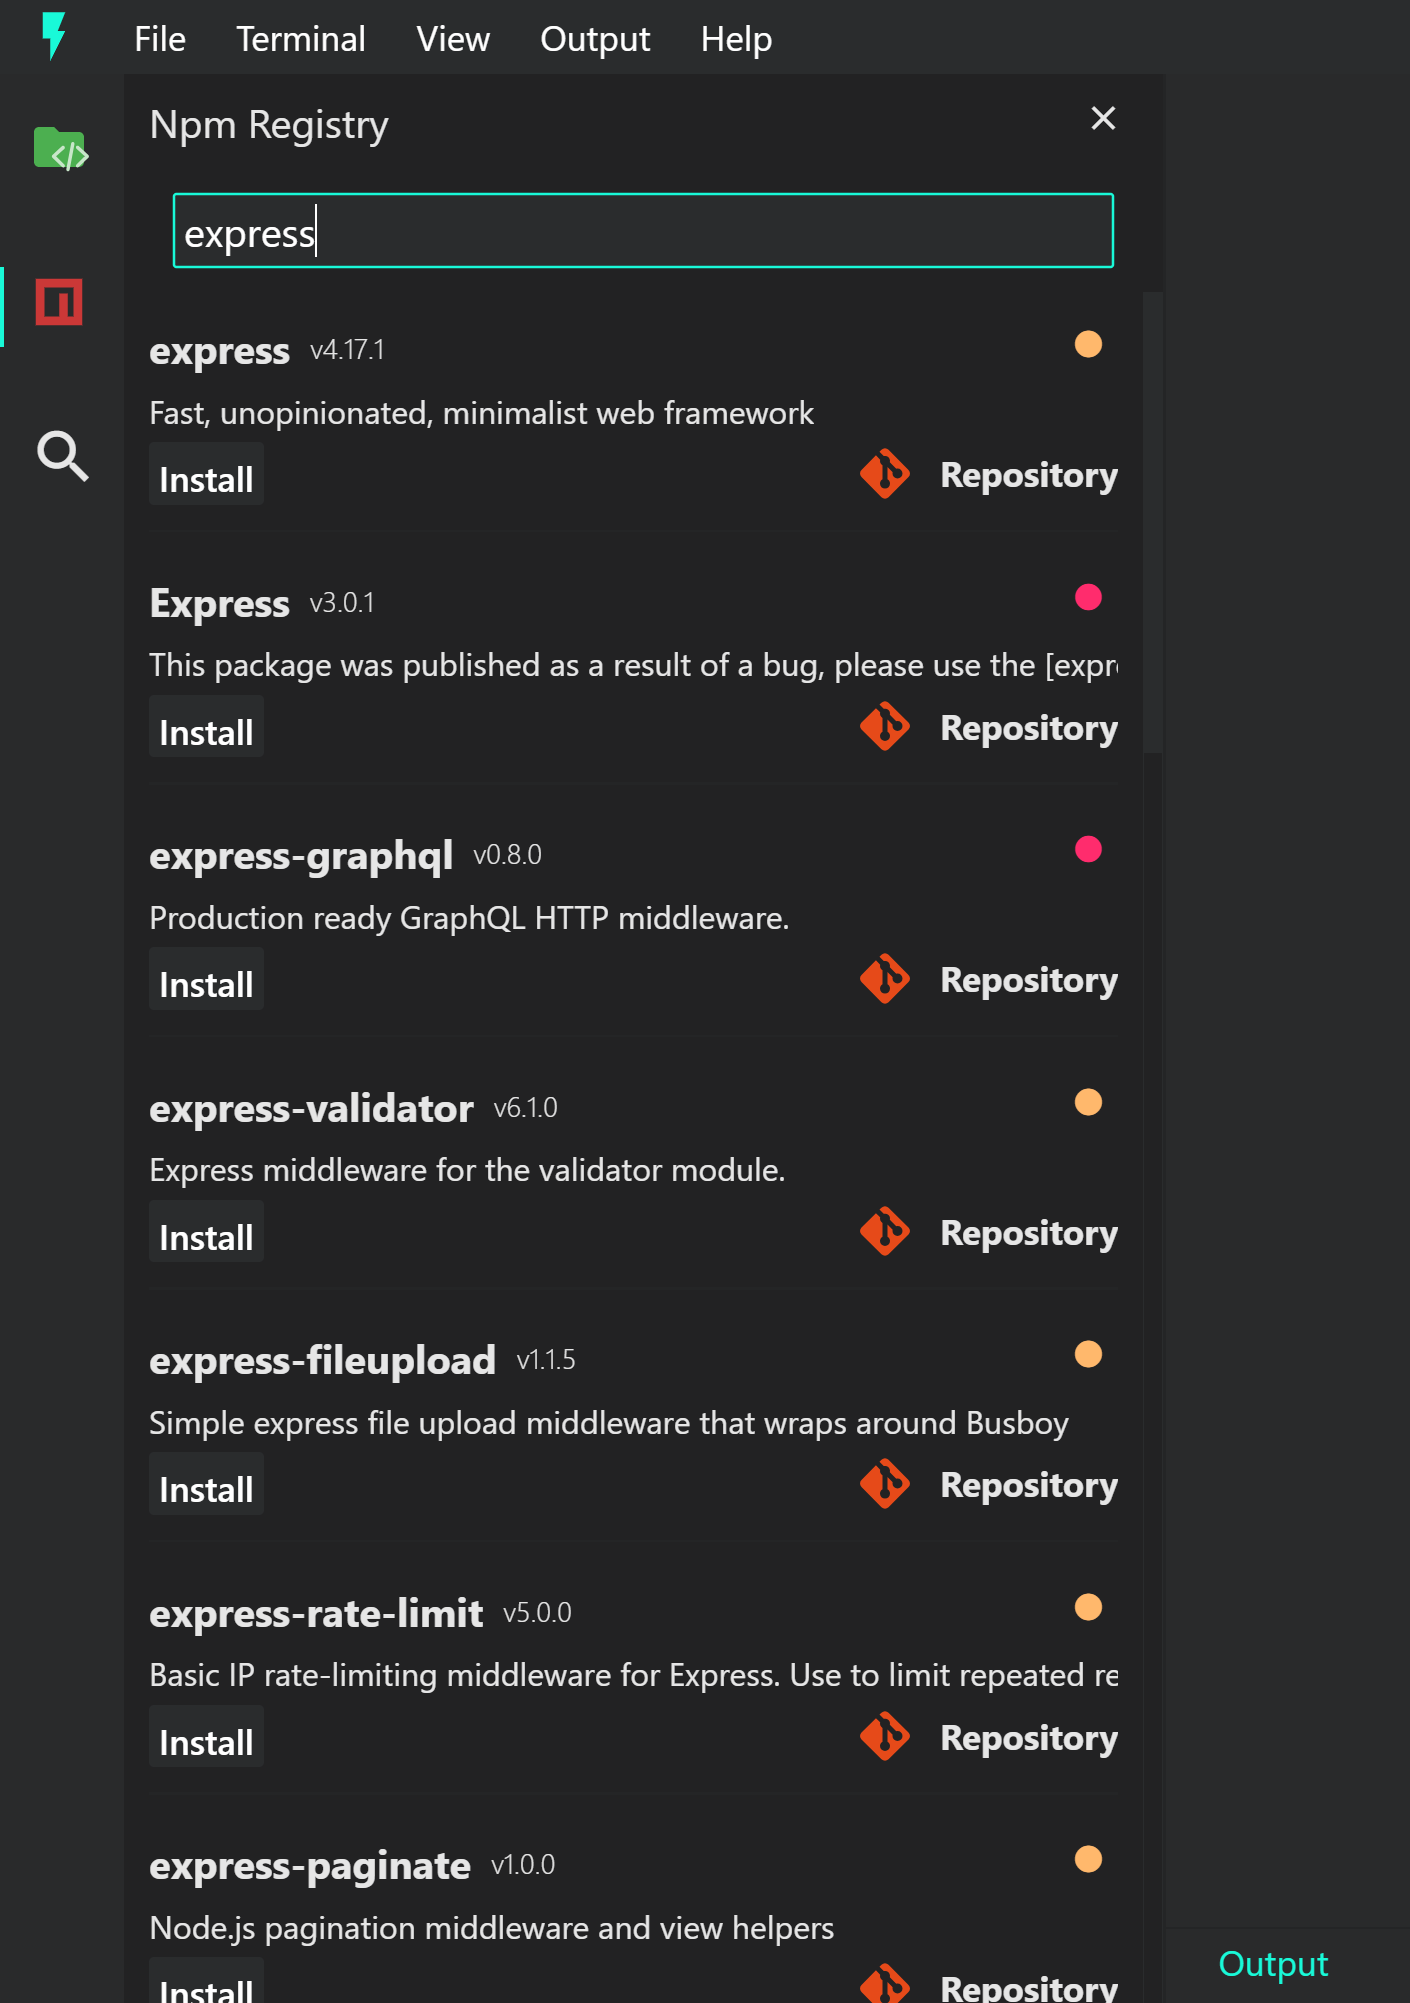
You can install the library by pressing on the install button, or first view the library repository by pressing on the Repository button.
After hitting the install button, you will be presented with an install status snackbar. If installing the library fails, you can check the logs from the Devtools section in the output-channel.

####### Using systems package manager
If you happen to have a package manager installed on your machine (e.g. npm or yarn) you can use that too.
### e.g. npm
npm install express

### e.g. yarn
yarn add express
Electron
All docs on one page.Using the electron's renderer process api.
In your sketches you have access to all of the electron's renderer process API's. Let's see how we can use the notifications api in your sketches.
// setup.js
import { remote } from 'electron';
import * as path from 'path';

// notificationWithImage
const notificationWithImage = new remote.Notification({
    title: 'Notification with image',
    body: 'Short message plus a custom image',
    icon: path.join(remote.app.getAppPath(), '/appAssets/32x32.png')
});

notificationWithImage.addListener('click', (e, i) => {
    console.log('Notification clicked');
});
notificationWithImage.show();


// notificationWithoutImage
const notificationWithoutImage = new remote.Notification({
    title: 'Basic notification',
    body: 'Short message'
});

notificationWithoutImage.addListener('click', (e, i) => {
    console.log('Notification clicked');
});
notificationWithoutImage.show();
React
All docs on one page.Creating and using a react functional component.
// setup.js
import { render } from 'react-dom';

function App() {
    const greeting = 'Hello Functional Component!';
    return <h1 style={{margin : '0px'}}>{greeting}</h1>;
}

const view = quark.views.createTabsView('React view');
view.onDidConnectElement = () => {
    view.element.style.backgroundColor = '#f0f0f0';##     view.element.style.height = '100%';
    render(<App />, view.element);
};

view.focus();
####### Result
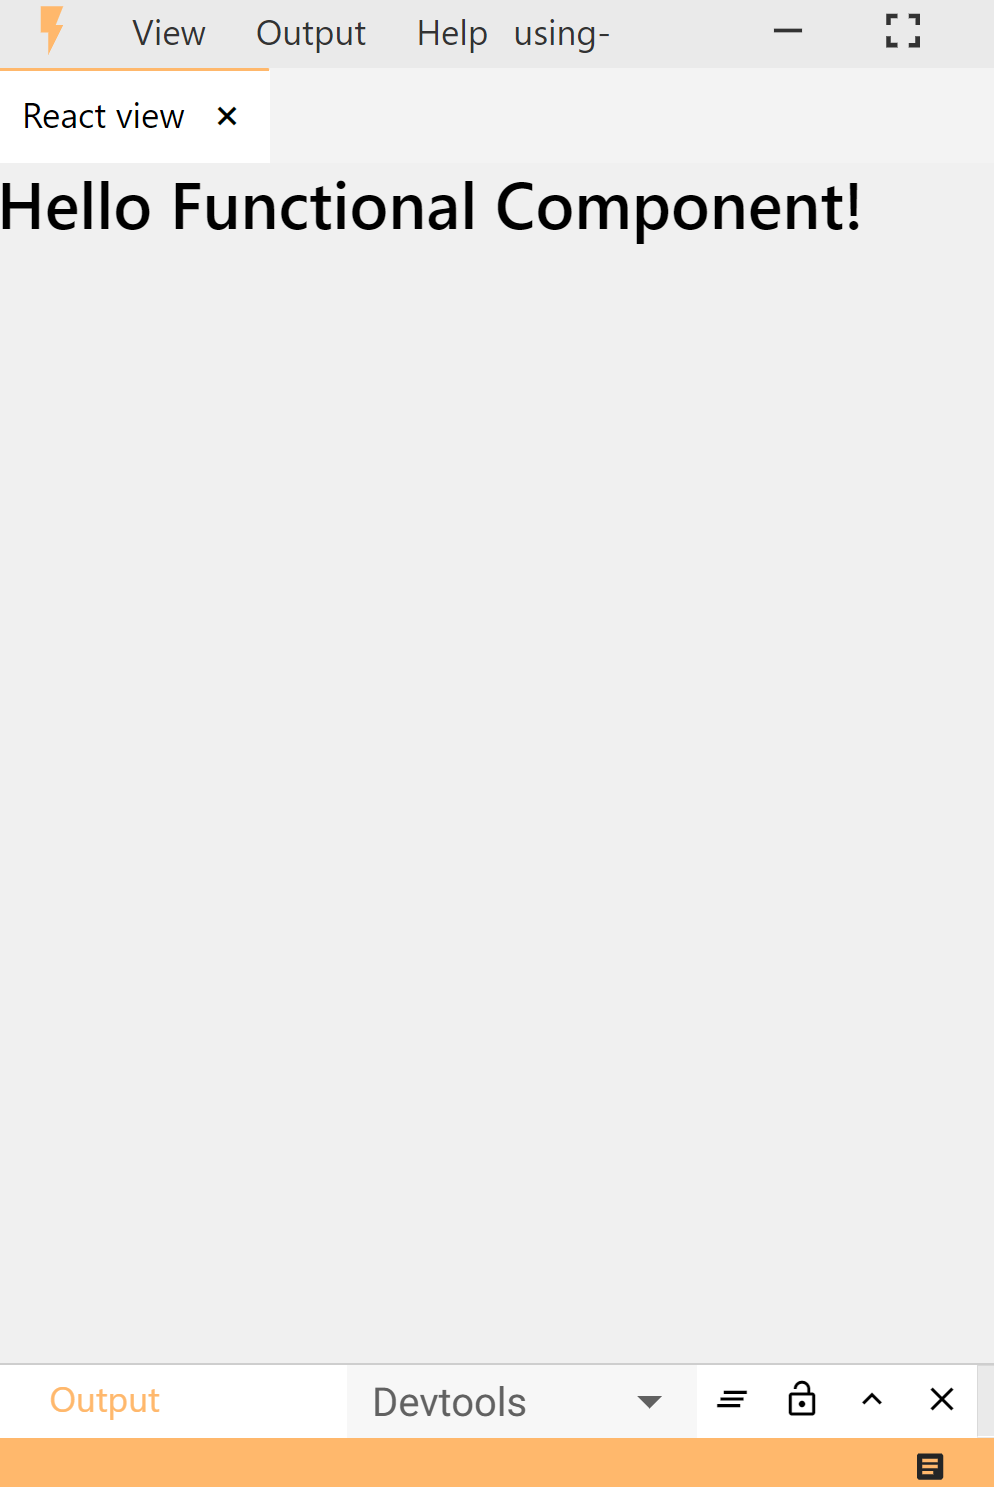
Render a react component inside another component
// setup.js
import { render } from 'react-dom';

function App() {
  return <Headline />;
}

function Headline() {
    const greeting = 'Hello Functional Component!';
    return <h1 style={{margin : '0px'}}>{greeting}</h1>;
}

const view = quark.views.createTabsView('React view');
view.onDidConnectElement = () => {
    view.element.style.backgroundColor = '#f0f0f0';##     view.element.style.height = '100%';
    render(<App />, view.element);
};

view.focus();
Using import/export statements
// headline.js
function Headline() {
    const greeting = 'Hello Functional Component!';
    return <h1 style={{ margin: '0px' }}>{greeting}</h1>;
}

export default Headline;
// setup.js
import { render } from 'react-dom';
import Headline from './headline';

function App() {
    return <Headline />;
}

const view = quark.views.createTabsView('React view');
view.onDidConnectElement = () => {
    view.element.style.backgroundColor = '#f0f0f0';##     view.element.style.height = '100%';
    render(<App />, view.element);
};

view.focus();
Creating react class components
import { render } from 'react-dom';
import Headline from './import-export/headline';
import React from 'react';

class App extends React.Component {
    render() {
        return (
            <h1 style={{ margin: '0px' }}>{this.props.greeting}</h1>
        );
    }
}

const view = quark.views.createTabsView('React view');
view.onDidConnectElement = () => {
    view.element.style.backgroundColor = '#f0f0f0';##     view.element.style.height = '100%';
    render(<App greeting = 'Hello Functional Component!' />, view.element);
};

view.focus();
Vue
All docs on one page.Using the esm build
// setup.js
import Vue from 'vue/dist/vue.esm';

const view = quark.views.createTabsView('My Vue');
view.onDidConnectElement = () => {
    const app = new Vue({
        el: view.element,
        data() {
            return {
                greetings: 'Hello Vue.js'
            }
        },
        template: `<h1>{{greetings}}</h1>`
    });
}
view.focus();
####### Result
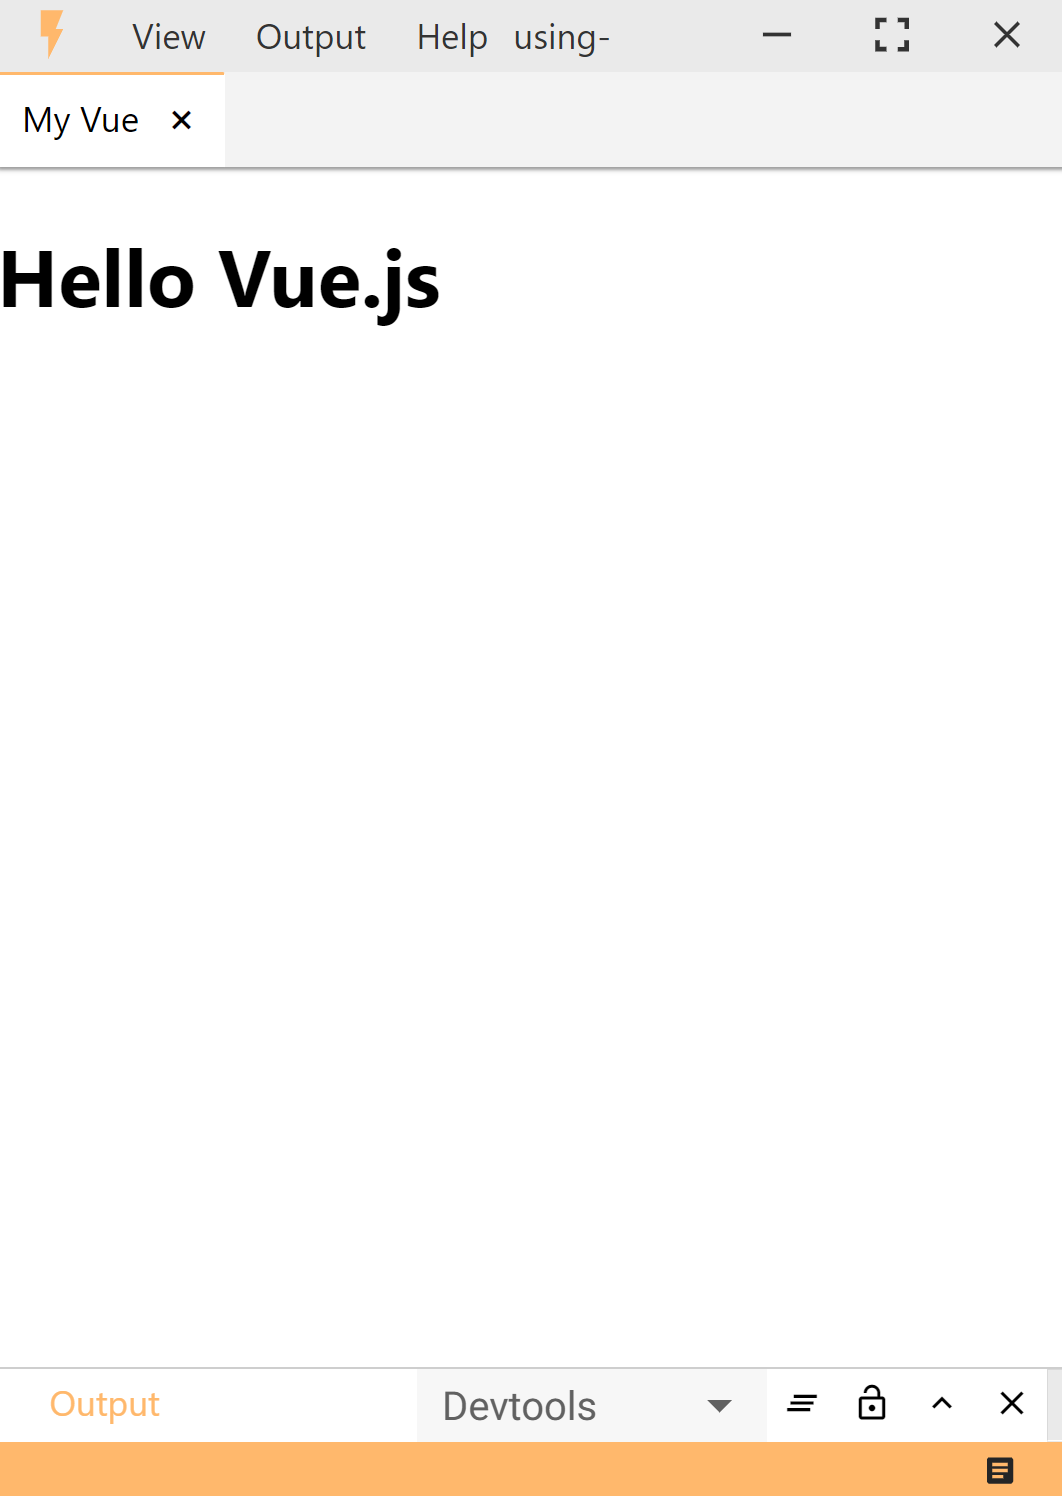
Using multiple components
// setup.js
import Vue from 'vue/dist/vue.esm';

const myComponent = Vue.component('my-component', {
    template : '<h3>Hello parent component</h3>'
});

const view = quark.views.createTabsView('My Vue');
view.onDidConnectElement = () => {
    const app = new Vue({
        el: view.element,
        components : {
            myComponent
        },
        template: `<my-component />`
    });
}
view.focus();
Importing external html template.
<!-- template.html -->
<h1>{{greetings}}</h1>
// setup.js
import Vue from 'vue/dist/vue.esm';
import htmlTemplate from './template.html';

const view = quark.views.createTabsView('My Vue');
view.onDidConnectElement = () => {
    const app = new Vue({
        el: view.element,
        data() {
            return {
                greetings: 'Hello Vue.js'
            }
        },
        template: htmlTemplate
    });
}
view.focus();
Serialport
All docs on one page.Listing all available serialports
import * as serial from 'serialport';

serial.list().then((list) => {
    list.map((port)=>{
        console.log(`COM name: ${port.comName}, Manufacturer : ${port.manufacturer}`)
    });
}).catch(console.error);
####### Result
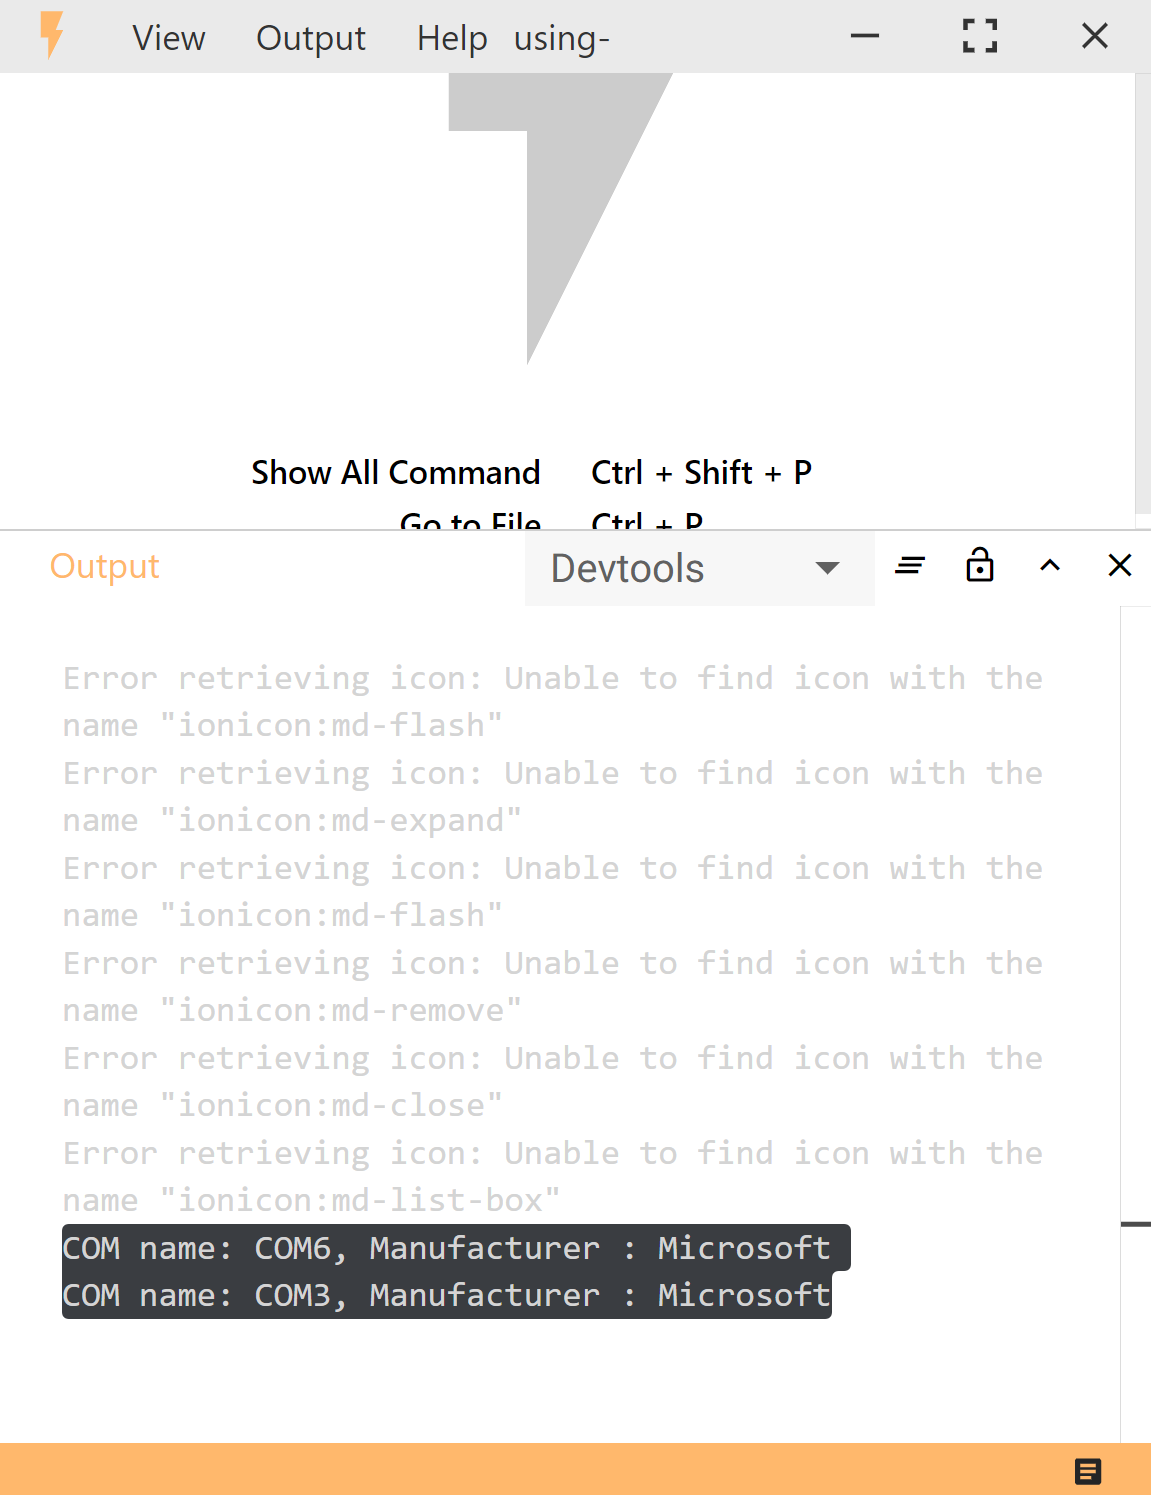
Listing all available ports in DOM
import * as serial from 'serialport';

serial.list().then((list) => {
    list.map((port) => {
        console.log(`COM name: ${port.comName}, Manufacturer : ${port.manufacturer}`)
    });
}).catch(console.error);

const view = quark.views.createTabsView('Serial ports');
view.onDidConnectElement = async () => {
    try {
        const list = await serial.list();
        let html = '<h1>Available Ports</h1>';
        list.map((port) => {
            html = html.concat(`<h3>${port.comName}</h3>`);
        });
        view.element.style.padding = '20px';
        view.element.innerHTML = html;
    } catch (err) {
        console.err(err);
    }
}
view.focus();
####### Result
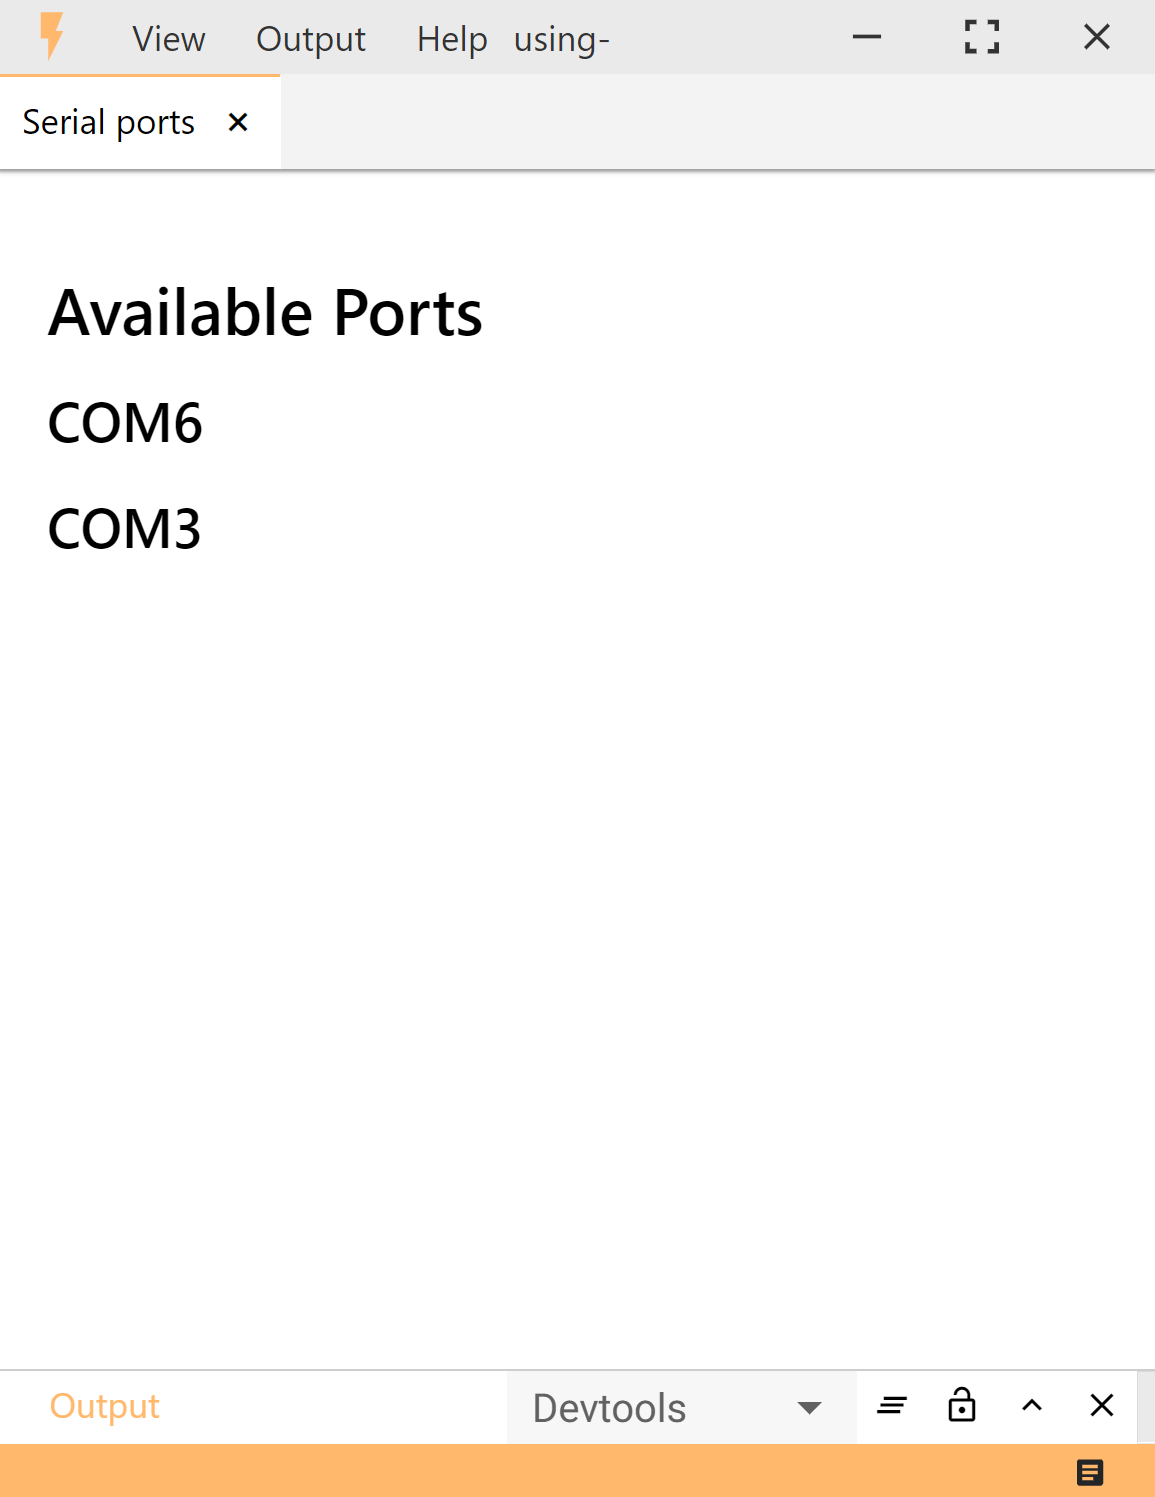
Examples
Activity Monitor
All docs on one page.####### The project that we are finally going to build, will look something like this:
Note
The complete project could be found here on the github repo.
Create a new Project
Just like we did it in the getting started guide, create a new project.
Creating the directory structure
We need only 2 files, the base setup.js file and a util.js file. Create the directory structure like so.
.
├─ setup.js
└─ util.js
Write the code
####### setup.js
// setup.js
import { drawChart } from './util';
import * as os from 'os';

// create an element for the view
const element = quark.util.createElementFromHtml(`
    <div style="width:100%;height:100%;">
        <canvas id="my-chart"></canvas>
    </div>
`);

// create a view
const view = quark.views.createTabsView('Activity Monitor', element);
view.onDidConnectElement = () => {
    const canvas = document.getElementById('my-chart');
    drawChart(canvas);
}
view.focus();

// optionally hide navbar
// quark.views.tabsviewController.hideNavbar();

// set the app theme
quark.util.setAppTheme({
    "background.dark": "#111111",##     "on.background.dark": "#ffffff",##
    "background.default": "#222222",##     "on.background.default": "#ffffff",##
    "background.light": "#3e3e3e",##     "on.background.light": "#ffffff",##
    "background.divider": "#4D4A4B",##
    "primary.default": "rgba(54, 162, 235, 1)",
    "on.primary.default": "#000000",##
    "secondary.default": "#ff7246",##     "on.secondary.default": "#000000"## });

const status = quark.util.createStatusBarItem(quark.StatusBarAlignment.Right);
status.text = `Monitoring CPUs: ${os.cpus().length}`;
status.show();
####### util.js
// util.js

import * as Chart from 'chart.js';
import * as os from 'os';

var lastMeasureTimes = [];
var chart = null;

function setLastMeasureTimes(cpus) {
    for (let i = 0; i < cpus.length; i++) {
        lastMeasureTimes[i] = getCpuTimes(cpus[i]);
    }
}

function getDatasets() {
    const datasets = [];
    const cpus = os.cpus();

    for (let i = 0; i < cpus.length; i++) {
        const cpu = cpus[i]
        const cpuData = {
            data: getCpuTimes(cpu),
            backgroundColor: [
                'rgba(255, 99, 132, 1)',
                'rgba(54, 162, 235, 1)',
                'rgba(255, 206, 86, 1)'
            ]
        }
        datasets.push(cpuData)
    }
    return datasets;
}

function updateDatasets() {
    const cpus = os.cpus()
    for (let i = 0; i < cpus.length; i++) {
        const cpu = cpus[i]
        chart.data.datasets[i].data = getCpuTimes(cpu);
        chart.data.datasets[i].data[0] -= lastMeasureTimes[i][0];
        chart.data.datasets[i].data[1] -= lastMeasureTimes[i][1];
        chart.data.datasets[i].data[2] -= lastMeasureTimes[i][2];
    }
    chart.update();
    setLastMeasureTimes(cpus);
}

function getCpuTimes(cpu) {
    return [
        cpu.times.user,
        cpu.times.sys,
        cpu.times.idle,
    ];
}

export function drawChart(element) {
    chart = new Chart(element, {
        type: 'doughnut',
        data: {
            labels: [
                'User Time (ms)',
                'System Time (ms)',
                'Idle Time (ms)'
            ],
            datasets: getDatasets()
        },
        options: {
            maintainAspectRatio: false,
            title: {
                display: true,
                text: 'CPU Activity',
                fontColor: 'rgb(250, 250, 250)',
                fontSize: 16
            },
            legend: {
                display: true,
                labels: {
                    fontColor: 'rgb(250, 250, 250)',
                    fontSize: 12
                }
            }
        }
    });
    setInterval(updateDatasets, 1000);
}

setLastMeasureTimes(os.cpus());
Build and run the sketch
- Press the
buildbutton at the bottorm right side of the status bar. (Or usectrl + shift + b). - Press the
runbutton at the bottorm right side of the status bar. (Or usectrl + r).
Arduino dashboard and data logger
All docs on one page.####### The project that we are finally going to build, will look something like this:
Note
The complete project could be found here on the github repo.
Features
Serialport selector: A graphical user interface component that allows you to select the serialport for your Arduino.

Dashboard: A dashboard that prints the real time values on the screen and also draws charts.

Datalogger: A data logger that will read data from arduino and save it on your computer in csv format.

Getting started
- Clone this repository
- cd
examples/arduino-dashboard - Upload the
arduino.inofile to the arduino. - Open project file
arduino-dashboard.qrkto edit project, or build filearduino-dashboard.build.qrkto run the project in Quark.
Running the project
- Open the build file
arduino-dashboard.build.qrkin Quark. - Press
ctrl+pand select the COM port of your arduino from the serial port selector. - To start the data logger, open the commands palette## by pressing
ctrl+shift+p, and selectDatalogger: Startcommand. You will see a notification on the bottom right of your screen if the logger was started. - To stop the data logger, open the commands palette and select command
Datalogger: Stop. This will open a save dialog where you can enter the path of the file where you want to save your data.
Prices
All docs on one page.####### The project that we are finally going to build, will look something like this:
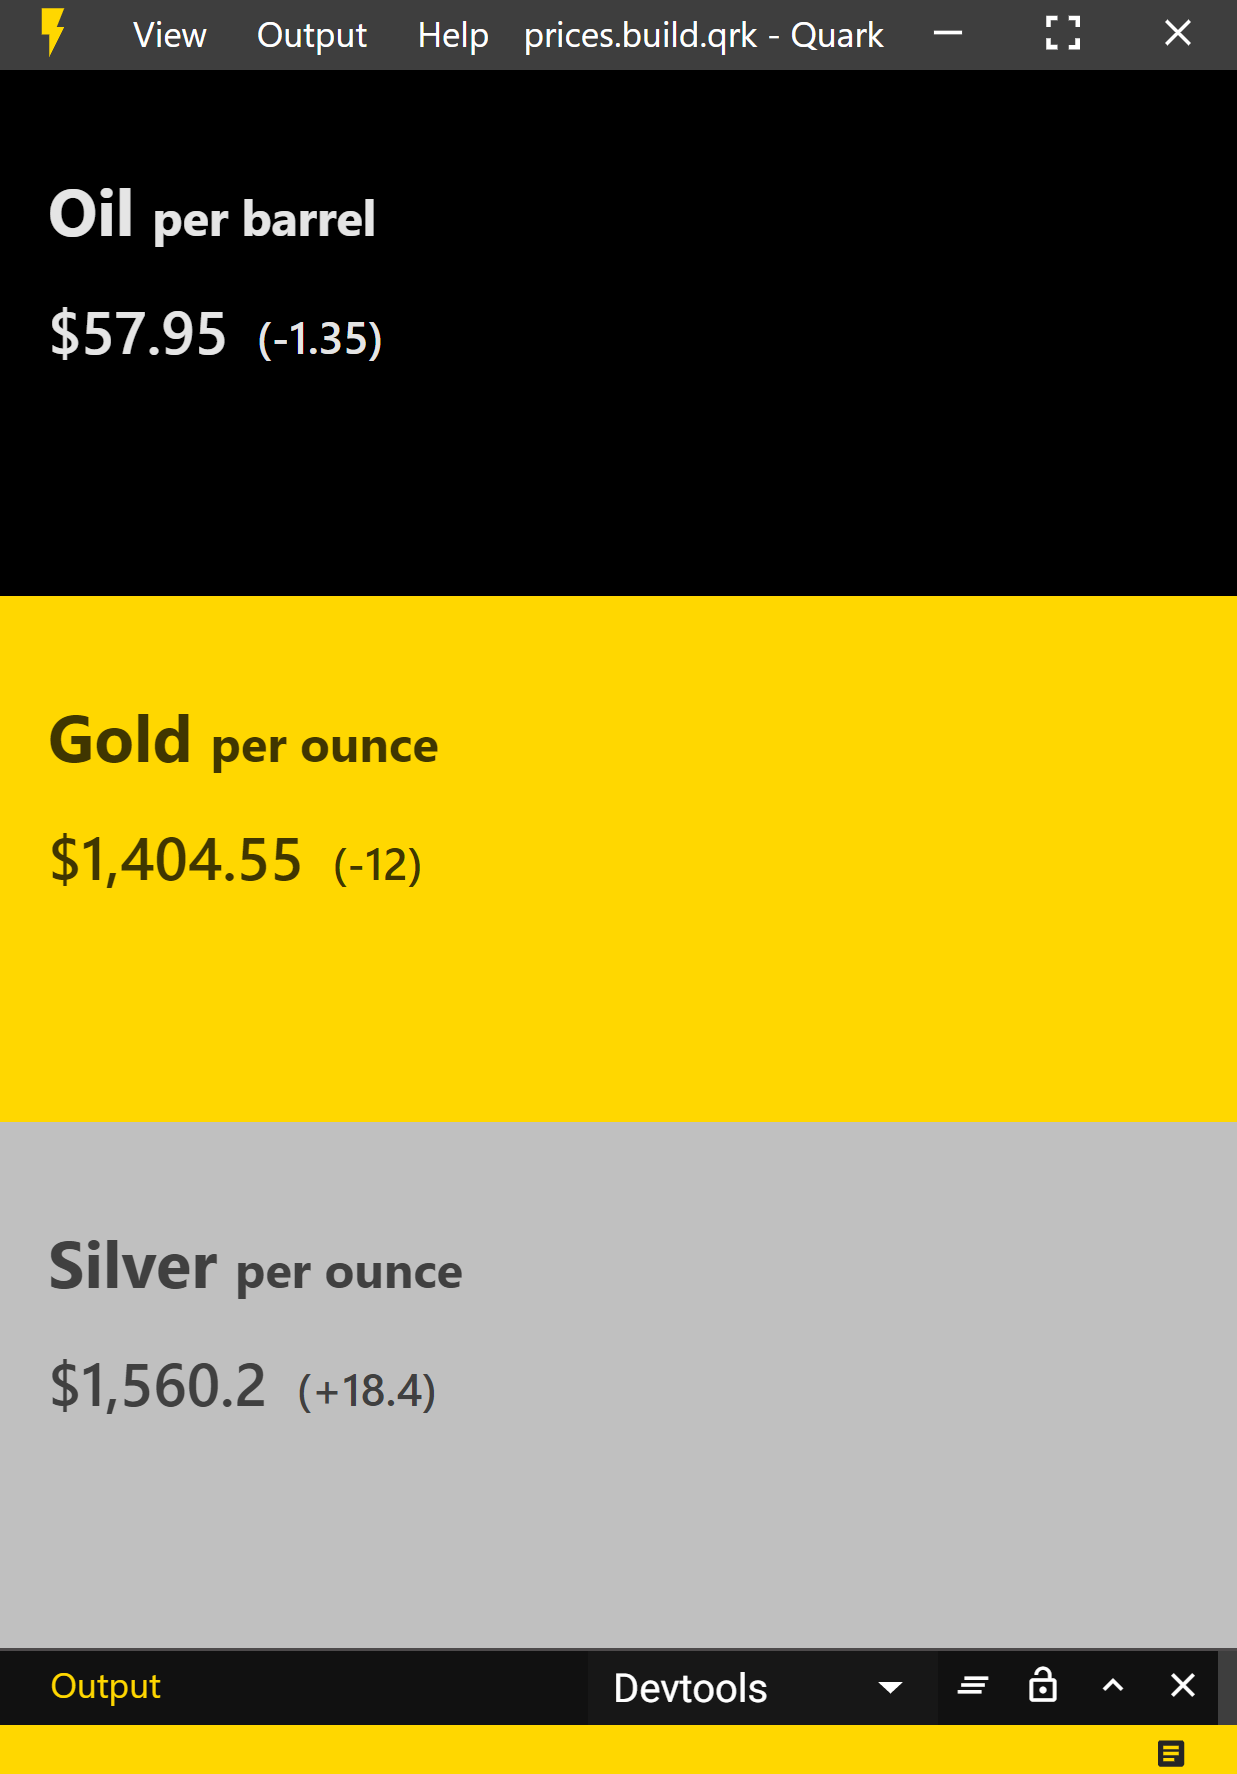
Note
The complete project could be found here on the github repo.
Create a new Project
Just like we did it in the getting started guide, create a new project.
Creating the directory structure
Create the following directory structure.
.
├─ index.html
├─ setup.js
├─ styles.css
└─ util.js
Write the code
####### index.html
<!-- index.html -->

<div class="container-fluid">

	<!-- Oil Row -->
	<div class="row oil">
		<div class="item">
			<h1>Oil <small>per barrel</small></h1>
			<h2>
				<span id="oil-price" class="price"></span>
				<small id="oil-change" class="change"></small>
			</h2>
		</div>
	</div>

	<!-- Gold Row -->
	<div class="row gold">
		<div class="item">
			<h1>Gold <small>per ounce</small></h1>
			<h2>
				<span id="gold-price" class="price"></span>
				<small id="gold-change" class="change"></small>
			</h2>
		</div>
	</div>

	<!-- Silver Row -->
	<div class="row silver">
		<div class="item">
			<h1 class="silver">Silver <small>per ounce</small></h1>
			<h2>
				<span id="silver-price" class="price"></span>
				<small id="silver-change" class="change"></small>
			</h2>
		</div>
	</div>

</div>
####### setup.js
// setup.js

import './styles.css';
import html from './index.html';
import { updatePrices } from './util';

// hide navbar
quark.views.tabsviewController.hideNavbar();

// create view
const element = quark.util.createElementFromHtml(html);
const view = quark.views.createTabsView('Prices', element);
view.onDidConnectElement = () => {
    updatePrices();

    // update every 10 seconds
    setInterval(() => {
        updatePrices();
    }, 10000);
}
view.focus();

// set app theme
quark.util.setAppTheme({
    "background.dark": "#111111",##     "on.background.dark": "#ffffff",##
    "background.default": "#222222",##     "on.background.default": "#ffffff",##
    "background.light": "#3e3e3e",##     "on.background.light": "#ffffff",##
    "background.divider": "#4D4A4B",##
    "primary.default": "gold",
});
####### styles.css
/* styles.css */

.gold,
.gold small {
    background-color: gold;
    color: #403600;## }

.silver,
.silver small {
    background-color: silver;
    color: #404040;## }

.oil,
.oil small {
    background-color: black;
    color: #E5E5E5;## }

.container-fluid {
    height: 100%;
    display: flex;
    flex-direction: column;
    user-select: text;
}

.row {
    flex-grow: 1;
    padding: 20px;
}

.price {
    padding-right: 5px;
}

/* Add a ( before the change */
.change::before {
    content: '(';
}

/* Add a ) after the change */
.change::after {
    content: ')';
}

/* Add a $ before the price */
.price::before {
    content: '$';
}

/* Hide the price and change when they are empty */
.change:empty,
.price:empty {
    display: none;
}

h1 {
    font-weight: 700;
}
####### util.js
// util.js

import * as csv from 'papaparse';

let url
const stocks = {
    'oil': 'CL.F', // Crude oil, https://stooq.com/q/?s=cl.f
    'gold': 'GC.F', // Gold, https://stooq.com/q/?s=gc.f
    'silver': 'SI.F' // Silver,https://stooq.com/q/?s=si.f
};

export function updatePrices() {
    for (let symbol in stocks) {
        url = `https://stooq.com/q/l/?s=${stocks[symbol]}&f=sd2t2ohlc&h&e=csv`

        csv.parse(url, {
            download: true,
            delimiter: ',',
            complete: (results) => {
                // price data is the second array, first is headers
                const prices = results.data[1]
                const previousPrice = parseFloat(prices[3], 10)
                const currentPrice = parseFloat(prices[6], 10)
                let change = Math.round((currentPrice - previousPrice) * 100) / 100

                if (change >= 0) {
                    change = `+${change}`
                }

                console.log(`${symbol}-price`);
                document.getElementById(`${symbol}-price`).innerText = (currentPrice.toLocaleString());
                document.getElementById(`${symbol}-change`).innerText = (change)
            }
        })
    };
}
Build and run the sketch
- Press the
buildbutton at the bottorm right side of the status bar. (Or usectrl + shift + b). - Press the
runbutton at the bottorm right side of the status bar. (Or usectrl + r).
Hash
All docs on one page.####### The project that we are finally going to build, will look something like this:
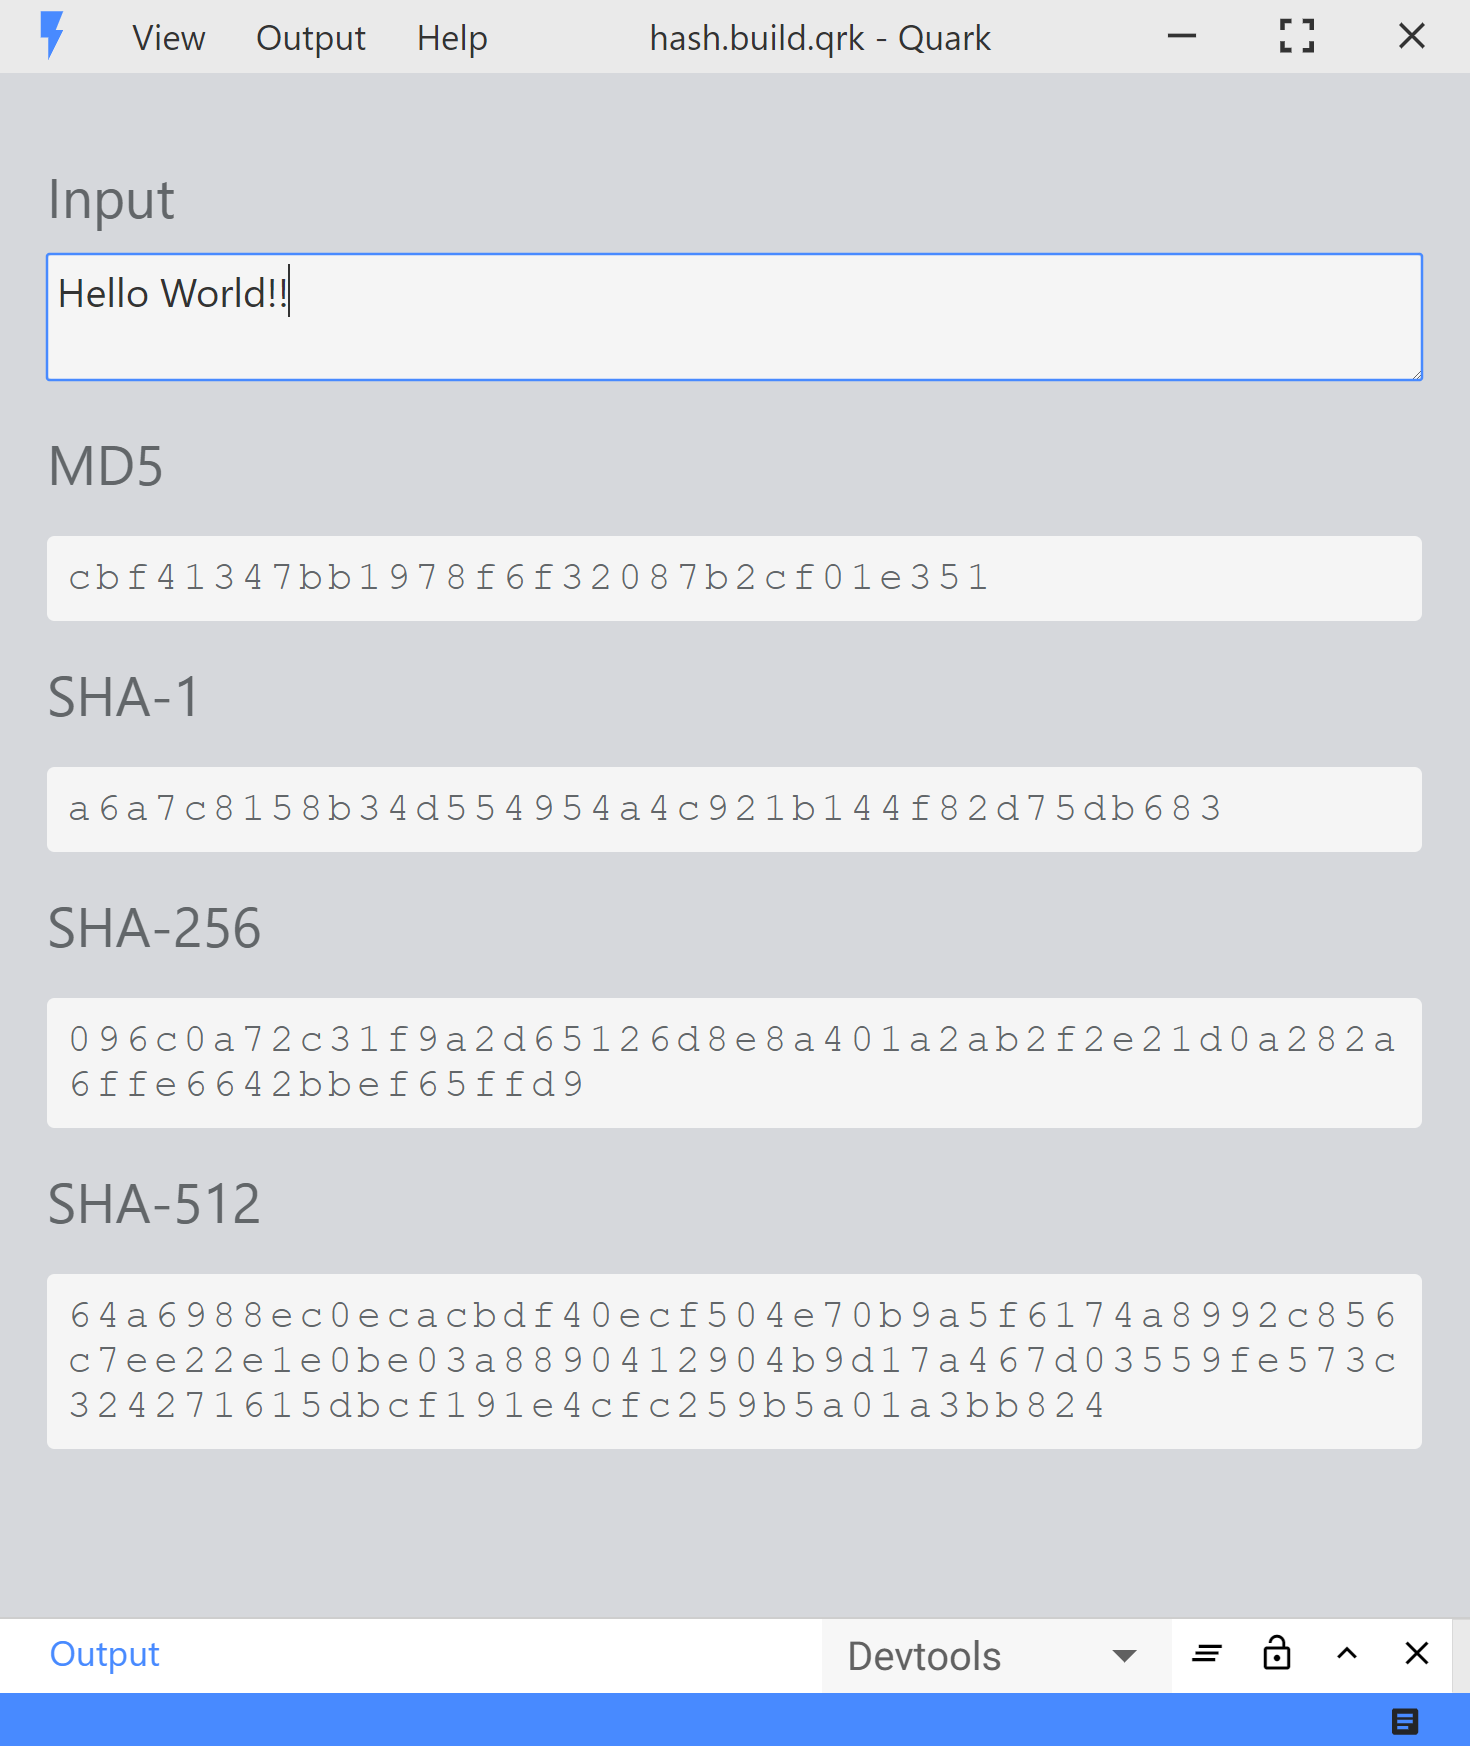
Note
The complete project could be found here on the github repo.
Create a new Project
Just like we did it in the getting started guide, create a new project.
Creating the directory structure
Create the following directory structure.
.
├─ index.html
├─ setup.js
├─ styles.css
└─ util.js
Write the code
####### index.html
<!-- index.html -->

<div class="container-fluid">

	<!-- Input row -->
	<div class="row">
		<div class="item">
			<h3 class="hash-heading">Input</h3>
			<textarea rows="2" id="text-input" class="form-control text-input" placeholder="Enter text and see it hashed..."></textarea>
		</div>
	</div>

	<!-- MD5 row -->
	<div class="row">
		<div class="item">
			<h3 class="hash-heading">MD5</h3>
			<pre id="md5-output" class="hash-output"> </pre>
		</div>
	</div>

	<!-- SHA-1 row -->
	<div class="row">
		<div class="item">
			<h3 class="hash-heading">SHA-1</h3>
			<pre id="sha1-output" class="hash-output"> </pre>
		</div>
	</div>

	<!-- SHA-256 row -->
	<div class="row">
		<div class="item">
			<h3 class="hash-heading">SHA-256</h3>
			<pre id="sha256-output" class="hash-output"> </pre>
		</div>
	</div>

	<!-- SHA-512 row -->
	<div class="row">
		<div class="item">
			<h3 class="hash-heading">SHA-512</h3>
			<pre id="sha512-output" class="hash-output"> </pre>
		</div>
	</div>

</div>
####### setup.js
// setup.js

import html from './index.html';
import { registerUpdateHandle } from './util';
import './styles.css';

// hide the navbar
quark.views.tabsviewController.hideNavbar();

// create view
const element = quark.util.createElementFromHtml(html);
const view = quark.views.createTabsView('Hash', element);
view.onDidConnectElement = () => {
    registerUpdateHandle();
};
view.focus();

// set app theme
quark.util.setAppTheme({
    "primary.default" : "#488aff"## });
####### styles.css
/* styles.css */

.container-fluid {
    padding: 20px;
    user-select: text;
    height: 100%;
    background-color: #D6D8DC;## }

pre {
    white-space: pre-wrap;
    word-break: keep-all;
    padding: 8px;
    background-color: #f5f5f5;##     border-radius: 3px;
}

.text-input {
    font-size: 16px;
    width: 100%;
    background-color: #f5f5f5;##     border-radius: 3px;
}

.hash-output {
    color: #626669;##     font-size: 16px;
    letter-spacing: 2px;
    white-space: pre-wrap;
}

.hash-heading {
    color: #626669;##     font-weight: normal;
}
####### util.js
// util.js

import * as crypto from 'crypto';

export function registerUpdateHandle() {
    document.getElementById('text-input').addEventListener('input', (ev) => {
        const text = ev.srcElement.value;

        const md5 = crypto.createHash('md5').update(text, 'utf8').digest('hex');
        document.getElementById('md5-output').innerText = md5;

        const sha1 = crypto.createHash('sha1').update(text, 'utf8').digest('hex');
        document.getElementById('sha1-output').innerText = sha1;

        const sha256 = crypto.createHash('sha256').update(text, 'utf8').digest('hex');
        document.getElementById('sha256-output').innerText = sha256;

        const sha512 = crypto.createHash('sha512').update(text, 'utf8').digest('hex');
        document.getElementById('sha512-output').innerText = sha512;
    });
}
Build and run the sketch
- Press the
buildbutton at the bottorm right side of the status bar. (Or usectrl + shift + b). - Press the
runbutton at the bottorm right side of the status bar. (Or usectrl + r).
Mirror
All docs on one page.Note
The complete project could be found here on the github repo.
Create a new Project
Just like we did it in the getting started guide, create a new project.
Creating the directory structure
Create the following directory structure.
.
├─ index.html
├─ setup.js
├─ styles.css
└─ util.js
Write the code
####### index.html
<!-- index.html -->

<div class="video-container">
	<!-- Video that displays the camera feed -->
	<video autoplay></video>

	<!-- Rainbow filter overlay -->
	<div class="rainbow-filter"></div>

	<!-- Rainbow filter checkbox -->
	<label class="filter">
		<input type="checkbox" id="rainbow-toggle"> Rainbow Filter
	</label>
</div>
####### setup.js
// setup.js

import html from './index.html';
import './styles.css';
import { startVideo } from './util';

// hide tabs navbar
quark.views.tabsviewController.hideNavbar();

// create view
const element = quark.util.createElementFromHtml(html);
const view = quark.views.createTabsView(`My View`, element);
view.onDidConnectElement = () => {
    startVideo();
}
view.focus();
####### styles.css
/* styles.css */

.video-container {
    height: 100%;
    width: 100%;
}

video {
    padding: 0;
    margin: 0;
    width: 100%;
    height: 100%;
    background-color: transparent;
    object-fit: cover;
}

.filter {
    position: absolute;
    right: 15px;
    top: 15px;
    color: white;
    background-color: var(--primary-default);
    padding: 5px 15px;
    border-radius: 3px;
}

.rainbow-filter {
    position: absolute;
    left: 0;
    right: 0;
    top: 0;
    bottom: 0;
    display: none;
    opacity: .3;
    animation: 3s linear 0s infinite alternate;
    animation-name: rainbow_background;
}

/* Animate from red to green to blue */
@keyframes rainbow_background {
    0% {
        background: #f00;##     }

    50% {
        background: #0f0;##     }

    100% {
        background: #00f;##     }
}
####### util.js
// util.js

import { screen } from 'electron';

export function startVideo() {
    const display = screen.getPrimaryDisplay() // http://electron.atom.io/docs/api/screen

    const constraints = {
        video: {
            width: {
                ideal: display.size.width // Ideal video width is size of screen
            },
            height: {
                ideal: display.size.height // Ideal video height is size of screen
            }
        }
    }

    navigator.mediaDevices.getUserMedia(constraints).then((stream) => {
        const video = document.querySelector('video')
        video.srcObject = stream  // Play stream in <video> element
    }).catch((error) => {
        console.error(error)
    });

    document.getElementById('rainbow-toggle').addEventListener('change', (ev) => {
        const checked = ev.srcElement.checked;

        if (checked) {
            document.querySelector('.rainbow-filter').style.display = 'block';
        } else {
            document.querySelector('.rainbow-filter').style.display = 'none';
        }
    });
}
Build and run the sketch
- Press the
buildbutton at the bottorm right side of the status bar. (Or usectrl + shift + b). - Press the
runbutton at the bottorm right side of the status bar. (Or usectrl + r).